Flowers
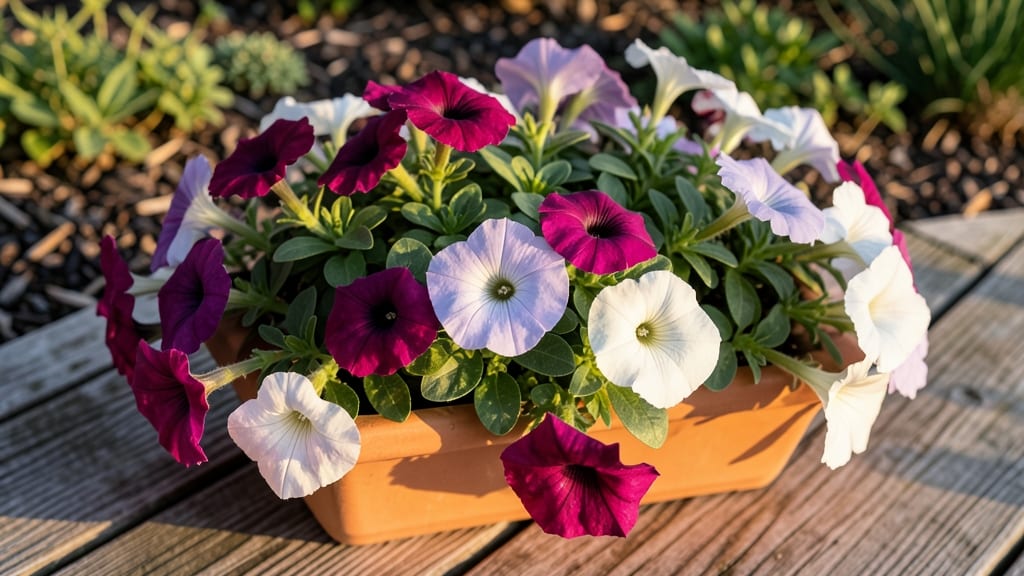
Annual flower flats are the secret weapon for instant color that transforms any space—whether it's a tiny balcony or a sprawling garden bed. 🌸 I used them last summer to turn my front walkway into a vibrant, low-maintenance showstopper with just a few hours of work.
The key is treating them like movable art: swap out faded blooms every 6-8 weeks, and your design stays fresh all season.
You don’t need fancy setups—just sturdy trays, quality potting mix, and a mix of thrillers (tall plants like snapdragons), fillers (petunias or lobelia), and spillers (trailing nasturtiums). For window boxes, space plants 3-4 inches apart; for borders, stretch them out in 12-inch intervals.
The best part? You can pair them with perennials to create year-round interest while keeping the annuals as the "wow" factor.
What you’ll end up with is a garden that pops with seasonal themes—think bright reds for summer, deep purples for fall, or cheerful yellows in spring. The colors coordinate effortlessly, and you can even mix heights for drama.
Plus, these flats are perfect for renters or small spaces since they’re lightweight and portable.
Works for everything from patio edges to large-scale borders—just adjust the spacing and plant choices. Here’s how to make them work for your space without breaking the bank or your back.
📚 In This Guide
- What you need
- Instructions
- Tips and common mistakes
- Wrapping up and next steps
What you need
- ● Annual Flower Flats: 1–3 flats (depending on space) – Choose petunias, geraniums, impatiens, or marigolds for vibrant color.
- ● Pre-planted flats (easier) or bare-root seedlings (for customization).
- ● Containers: 1–2 large, shallow planters (12–18" wide, with drainage holes).
- ● Window boxes, hanging baskets, or tiered trays for vertical appeal.
- ● Soil: 1 bag lightweight potting mix (avoid garden soil—it compacts!).
- ○ Slow-release fertilizer (optional but recommended for extra blooms).
- ● Tools: 1 hand trowel (for transplanting).
- ● 1 pruning shears (to trim dead foliage).
- ● 1 watering can with a rose nozzle (gentle watering = happy plants!).
- ○ Extras (Optional but Helpful): Mulch (to retain moisture and suppress weeds).
- ● Decorative stones or moss (for a polished look).
- ● Stakes or trellises (if growing vining plants like nasturtiums).
Step-by-Step guide to creating stunning annual flower flats
Here's how to transform limited space into a vibrant display with just a few simple techniques.
🪴 Step 1: Choose the Right Containers and Drainage
Select shallow, long containers like wooden window boxes or plastic nursery flats that are at least 6 inches deep. Drainage is critical—if your containers don’t have holes, drill ¼-inch holes in the bottom. I line mine with landscape fabric to prevent soil from washing out while still allowing water to drain freely. This keeps roots healthy and prevents soggy soil, which can rot delicate annuals.
For 4 flats, you’ll need about 1 cubic foot of lightweight potting mix per container. Fill each flat to within 1 inch of the rim to leave room for watering. Tap the sides gently to settle the soil without compacting it—you want it fluffy enough for roots to spread easily. If you’re using pre-mixed annual blends, skip fertilizing now; they’re already packed with nutrients.
🌱 Step 2: Layer Soil and Plant for Even Growth
Start by spreading a ½-inch layer of coarse sand or perlite at the bottom of each flat. This improves drainage and prevents compaction at the base where roots first grow. Next, add your potting mix in a 1-inch layer and lightly rake it smooth. This creates a stable foundation before planting.
Arrange plants in a staggered pattern, spacing them 6-12 inches apart depending on their mature size. Larger annuals like petunias or geraniums go in the back, while trailing varieties like nasturtiums or lobelia spill over the edges. Press each plant into the soil just deep enough to cover the root ball—no deeper, or they’ll struggle. Water gently after planting to settle the soil around the roots without disturbing them.
☀️ Step 3: Water and Position for Maximum Impact
Water the flats deeply but evenly until water runs out the drainage holes. The goal is moist but not soggy soil—you should see water dripping from the bottom after a few minutes. Let the flats sit for 10-15 minutes to drain completely before moving them. Overwatering at this stage can suffocate roots before they’ve had a chance to establish.
Place your flats in a location with at least 6 hours of sunlight daily. South or west-facing spots work best for most annuals, but if you’re working with shade-lovers like impatiens or begonia, a north or east exposure is perfect. Rotate the flats a quarter turn every few days so plants grow straight instead of leaning toward the light. This simple trick ensures even growth and a fuller, bushier display.
💧 Step 4: Maintain with Consistent Care
Check soil moisture daily during hot weather—annuals in shallow flats dry out fast. Water in the early morning to give roots time to absorb moisture before the heat of the day. Use a gentle spray or watering can with a fine rose to avoid disturbing the soil or dislodging plants. A mulch of ¼-inch pine bark fines on top helps retain moisture and keeps soil temperatures stable.
Fertilize every 2-3 weeks with a balanced liquid fertilizer (like 10-10-10) diluted to half strength. This keeps blooms vibrant and encourages steady growth. Deadhead spent flowers weekly to prompt more blooms—just pinch off faded blooms with your fingers or snip them with clean scissors. This habit keeps your flats looking fresh and encourages continuous flowering.
Tips & tricks for perfect annual flower flats
Transforming your space into a vibrant display doesn't have to be complicated—just a few smart tricks make all the difference.
Drainage is Everything: In Step 1, when drilling those ¼-inch holes, I recommend using a drill bit slightly larger than the holes you need—it makes the job faster and cleaner. If you're using landscape fabric, cut it to fit snugly but don't stretch it too tight, or it could restrict root growth. The key is balancing drainage with root space—think of it like creating a cozy home for your plants rather than a waterlogged swamp.
Plant Placement Strategy: For Step 2, when arranging your plants in that staggered pattern, remember the "thriller-filler-spiller" rule. Place your tallest annuals—like snapdragons or salvia—toward the back, then fill in with medium-height plants, and let your trailing varieties spill over the edges. This creates visual depth and keeps your display from looking flat. I like to sketch a quick layout on paper first to visualize how everything will look.
Watering Wisdom: In Step 3, when you're watering deeply until it drains for 10-15 minutes, check the soil moisture after that time. If the top inch still feels dry, give it another round. Shallow flats dry out fast, so don't be afraid to water more frequently than you think you should—just make sure that excess water drains completely. The goal is consistently moist soil, not soggy bottoms.
Sunlight Savvy: For Step 3's sunlight requirements, remember that "at least 6 hours" is the minimum for most annuals, but many thrive with 8-10 hours. If you're working with shade-loving varieties, monitor their progress—if they start looking leggy or pale, they might need a little more light. And that quarter turn rotation every few days? It's not just about straight growth—it also helps all sides of your plants get equal exposure to sunlight, leading to more even blooming.
Pro Tips for Annual Flower Flats
- Transforming your space into a vibrant display doesn't have to be complicated—just a few smart tricks make all the di...
- Drainage is Everything: In Step 1, when drilling those ¼-inch holes, I recommend using a drill bit slightly larger th...
- Plant Placement Strategy: For Step 2, when arranging your plants in that staggered pattern, remember the "thriller-fi...
Frequently asked questions
Got questions about annual flower flats?
You’re not alone! Whether you're a first-time gardener or a seasoned pro, these common queries can help you make the most of your seasonal blooms.
What’s the best time to plant annual flower flats?
Plant your annual flower flats after the last frost in your area—typically late spring for most U.S. regions. Check your local frost dates (around April–June for most zones) and wait until soil is warm (60°F+). For cooler climates, opt for cold-hardy varieties like pansies or violas.
How often should I water my annual flower flats?
Water deeply 2–3 times per week (or daily in extreme heat). Flats dry out faster than in-ground plants, so check soil moisture with your finger—top 1–2 inches should feel slightly damp. Mulch around the edges to retain moisture and reduce weeds. Pro tip: Water in the early morning to prevent fungal issues.
Can I reuse annual flower flats year after year?
Yes! After the season ends, clean flats with a 10% bleach solution (1 part bleach to 9 parts water) to kill pests/diseases. Scrub off old soil, let dry, and store in a dry place. Replace flats if they crack or degrade—plastic lasts longer than biodegradable options.
What are good alternatives to traditional annual flower flats?
Consider hanging baskets (for vertical spaces), window box planters (for patios), or raised beds (for larger displays). For small spaces, try succulent flats or herb gardens in shallow trays. Just ensure drainage holes are present!
Why are my annual flowers wilting or dying in the flats?
Common culprits: overwatering (root rot), underwatering (dry soil), pests (aphids, slugs), or poor drainage. Check for yellowing leaves (overwatering) or crispy edges (underwatering). Add compost or slow-release fertilizer if growth stalls. Rotate flats occasionally for even sunlight.
Wrapping up and next steps
Annual flower flats are a game-changer for adding vibrant, low-maintenance color to any space—whether it’s a balcony, patio, or windowsill! 🌸 With just a few materials and a little creativity, you can transform small areas into stunning seasonal displays.
The key is choosing the right flowers, prepping your flat thoughtfully, and keeping up with simple care.
Ready to dive in? Start by sketching your design and grabbing your supplies—then let your green thumb shine! Your future blooms will thank you. 🌿