
Propagation
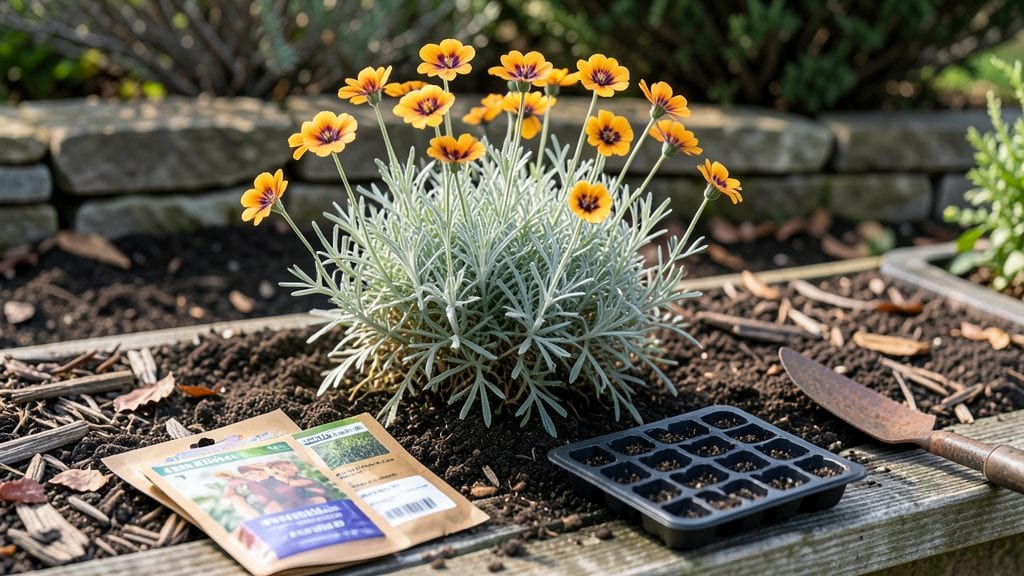
Growing wallflowers from seed delivers fast blooms—some varieties burst into color in just 7 days—and their frost-hardy nature makes them one of the easiest flowers to coax from tiny seeds. 🌱 I’ve started wallflowers in late fall for winter color and again in early spring, and both times, those delicate clusters of blooms appeared like magic when nothing else was growing.
The secret lies in their cold-required germination process, which skips the fuss of waiting for warm soil.
You’ll need just three simple supplies: a shallow tray, well-draining soil mix (sandy loam works best), and a spray bottle for gentle moisture. The soil should stay cool—50-60°F—so a north-facing windowsill or unheated garage works perfectly.
Plant seeds ¼-inch deep, barely covering them, and keep them damp but never soggy. Most gardeners overwater at this stage, which is the fastest way to invite rot before the seeds even sprout.
By day 7, you’ll see tiny green shoots pushing through the soil, and within 4-6 weeks, those shoots transform into frost-resistant stems packed with vibrant blooms.
The flowers themselves smell like honey and attract bees early in the season, making them a pollinator magnet when other plants are still dormant. Once established, they’ll keep blooming through spring and even into early summer with minimal care.
This method works for both fall and spring planting, so you can enjoy wallflowers year-round in zones 3-9. The key is patience with the germination phase—those first sprouts are worth the wait. Ready to try? Grab your seeds and let’s get growing!
📚 In This Guide
- What you need
- Instructions
- Tips and common mistakes
- Wrapping up and next steps
What you need
- ● Wallflower seeds – Choose Erysimum varieties (e.g., 'Bowles Mauve' or 'Cuprum'). Aim for 50–100 seeds for a small batch.
- ● Seed-starting mix – A sterilized, well-draining blend (e.g., 50% peat moss + 50% perlite or vermiculite). 1–2 cubic feet for a seed tray.
- ● Seed trays or small pots – 2–4 inch deep with drainage holes. 12–24 cells per tray (or 3–6 small pots for direct sowing).
- ● Clear plastic domes or plastic wrap – To create a humid microclimate for germination.
- ● Spray bottle – For gentle watering (16 oz capacity with a fine mist nozzle).
- ○ Gloves (optional) – Protects hands from soil and seeds.
- ○ Heat mat (optional but helpful) – 70–75°F range to speed up germination (especially in cool climates).
- ● Grow lights or sunny windowsill – 6–8 hours of light/day after sprouting. LED grow lights work great!
- ● Patience (but not much!) – Wallflowers germinate in 5–7 days with ideal conditions.
- ● Cooling period (for frost resistance) – After germination, expose seedlings to 40–50°F nights for 2–3 weeks to harden them.
- ● Sunny spot or grow light – Wallflowers thrive in full sun (6+ hours/day).
Step-by-step instructions for growing wallflowers from seed
Here’s how to coax those vibrant blooms from seed in record time—no waiting months for results.
🌱 Step 1: Prep Seeds for Lightning-Fast Germination
Wallflower seeds need a little nudge to break dormancy. Soak them in warm water for 12 hours before planting. This softens the tough outer shell and speeds up germination. I use a small bowl of water at 75°F—just warm enough to feel comfortable, not scalding. After soaking, drain them thoroughly and let them sit on a paper towel for 30 minutes to prevent mold.
Here’s the thing—wallflowers thrive on cold stratification, but we’re cheating the system for speed. Instead of planting in fall, we’ll simulate winter conditions briefly. Place the soaked seeds in a sealed plastic bag with a damp paper towel and refrigerate for 24 hours. This mimics natural frost exposure and tricks the seeds into thinking winter’s passed.
💧 Step 2: Plant in Light, Well-Draining Soil
Fill your seed trays with a sterile seed-starting mix—wallflowers hate soggy roots. Press the mix down lightly so it’s firm but not compacted. Plant seeds ¼ inch deep, spacing them ½ inch apart in rows. I use a toothpick to make small divots for precision—this prevents overcrowding later.
Water gently with a spray bottle until the soil looks evenly moist but not saturated. Too much water now will bury seeds deeper than intended. Cover the tray with a clear plastic dome or wrap it in plastic wrap to trap warmth and humidity. Place it in a cool, bright spot—60-65°F is ideal. Avoid direct sunlight here; seedlings need light after they sprout, not before.
☀️ Step 3: Trigger Sprouts with Controlled Conditions
Check the tray daily for moisture—mist lightly if the soil surface feels dry. Within 3-5 days, you’ll see tiny green sprouts pushing through. This is the moment that matters: remove the plastic cover immediately to prevent damping-off. Wallflowers are tough, but fungal diseases will kill them faster than you can say “spring.”
Move the tray to a south-facing windowsill or under a grow light for 12-14 hours of light daily. You’ll notice seedlings stretch toward the light—this is normal. If they grow leggy (thin stems, leaves spaced far apart), lower the light closer or rotate the tray daily so they grow evenly. Strong seedlings will have bold green leaves and compact spacing between stems.
⏰ Step 4: Harden Off for Frost-Resistant Transplants
When seedlings reach 2-3 inches tall (about 3-4 weeks after planting), it’s time to toughen them up. Start by placing them outside in a shaded, sheltered spot for 1 hour the first day. Gradually increase exposure by 1 hour daily over 7-10 days, ending with a full day in the garden. This slow acclimation prevents shock—wallflowers are frost-hardy, but sudden cold snaps will still stress them.
Transplant on a cool, overcast day to minimize transplant shock. Space seedlings 8-12 inches apart in well-draining soil. Water deeply at the base—avoid wetting leaves to prevent disease. Here’s where it gets fun: wallflowers love cool weather and will often bloom their first year if planted early. Watch for buds forming in late winter—that’s your reward for fast germination!
Tips & tricks for perfect wallflower germination
Took me a while to figure these out, so here goes—wallflowers reward patience, but they also reward the right moves. These small tweaks make all the difference between waiting months and seeing blooms in weeks.
Seed Prep Precision: That 12-hour soak at exactly 75°F isn't just arbitrary—it's the Goldilocks zone for breaking dormancy without over-softening the seed coats. I use a thermometer to confirm the water temp, especially if your tap runs hot or cold. After soaking, the 30-minute paper towel drying isn't optional: it's the difference between moldy seeds and perfect germination. Pro tip: Use a fine-mesh strainer to drain seeds after soaking—it prevents the seeds from sticking together in clumps.
Cold Stratification Shortcut: The 24-hour fridge trick works because wallflowers naturally experience winter's chill before spring growth. Don't skip this step—it mimics the frost exposure they'd get in nature. I place the sealed bag on a shelf in my fridge's crisper drawer where temps stay steady. If you forget to refrigerate, don't panic: you can still plant, but germination may take 2-3 extra days. The seeds won't be harmed, just delayed.
Light Management: Those 12-14 hours of light daily are critical for preventing leggy seedlings. I use a simple LED grow light on a timer to automate this—no need to remember to move trays. If using natural light, rotate your trays 180 degrees daily so all seedlings get even exposure. Watch for seedlings stretching toward the light: this is your cue to either lower the light closer or increase light duration slightly. The goal is compact, sturdy stems with dark green leaves.
Transplant Timing: The 3-4 week mark for hardening off isn't set in stone—judge by height, not days. Seedlings ready for transplant should be 2-3 inches tall with at least 3-4 true leaves. I test readiness by gently tugging a seedling: if it resists, it's ready. Harden off gradually over 7-10 days, but don't rush. Sudden temperature changes can shock even frost-resistant wallflowers. On cloudy days, extend outdoor time by 30 minutes to help them acclimate more quickly.
Pro Tips for Wallflowers From Seed
- Took me a while to figure these out, so here goes—wallflowers reward patience, but they also reward the right moves.
- Seed Prep Precision: That 12-hour soak at exactly 75°F isn't just arbitrary—it's the Goldilocks zone for breaking dormancy without over-softening the seed coats.
- Cold Stratification Shortcut: The 24-hour fridge trick works because wallflowers naturally experience winter's chill before spring growth.
Frequently asked questions
Got questions about growing wallflowers from seed? You’re not alone! Here are answers to the most common queries to help you succeed with these fast-growing, frost-resistant beauties.
How long does it take for wallflower seeds to germinate?
Wallflower seeds typically germinate in 7–14 days when sown in warm soil (60–70°F). For faster results, pre-soak seeds for 24 hours or use a heat mat. Keep the soil consistently moist but not soggy—patience pays off!
Can I plant wallflower seeds in cold weather?
Yes! Wallflowers are frost-resistant and can handle light frosts. Sow seeds outdoors in fall or early spring for best results. If planting in winter, use a cold frame or row cover to protect seedlings until temperatures stabilize.
What’s the best soil mix for wallflower seeds?
Use a well-draining, slightly alkaline soil mix (pH 6.5–7.5). A blend of 50% potting soil + 50% perlite or sand works well. Avoid heavy clay—wallflowers hate soggy roots! Add a dash of lime if your soil is acidic.
Why aren’t my wallflower seeds sprouting?
Common culprits: too-cold soil, dampness, or old seeds. Try these fixes:
- Move containers to a warmer spot (like a sunny windowsill).
- Ensure soil stays moist but not waterlogged.
- Test seed viability by soaking a few in water—if they sink, they’re still good!
Are there faster-growing wallflower varieties?
Yes! ‘Ruby Cluster’ and ‘Purple Emperor’ germinate quickly (5–7 days) and bloom in 8–10 weeks. For even speedier results, start seeds indoors 4–6 weeks before the last frost using a grow light.
Wrapping up and next steps
Growing wallflowers from seed is a rewarding and surprisingly fast process—especially when you know the tricks to boost germination in just 7 days! With the right soil, light, and a little patience, you’ll soon be enjoying vibrant, frost-resistant blooms that brighten up gardens, borders, and even containers. 🌱✨
Now that you’re armed with all the tips and answers, why not start a small batch today? Try sowing a few seeds in a sunny spot and watch your garden transform. Happy planting—your future wallflower patch is waiting! 🌸