Flowers
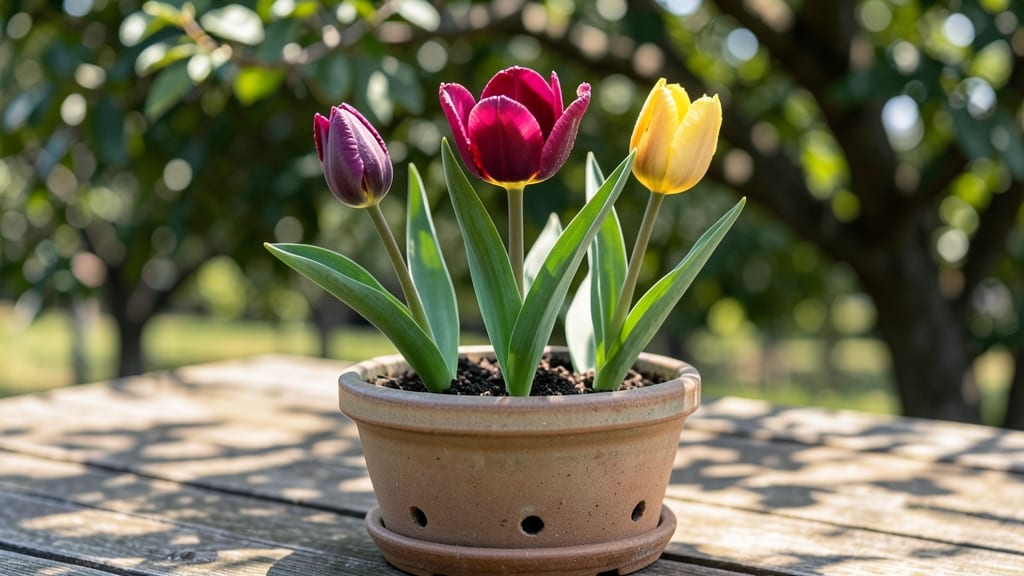
Growing tulips in flower pots turns your porch into a spring masterpiece—tulip flower pots let you showcase bold blooms without a garden. I started with a single terracotta pot last year, and now I can’t imagine spring without them.
The secret isn’t just the tulips; it’s the way pots elevate every arrangement, from classic red to unexpected variegated varieties.
You’ll need containers with drainage, a well-draining potting mix, and bulbs that fit the pot’s size. My favorite combo is a 12-inch pot with 3-5 tulip bulbs, surrounded by trailing ivy or ornamental grass for year-round texture.
The key? Plant bulbs in October or November—they’ll establish roots before winter, then burst into color by March or April, depending on your zone.
What you end up with is a showstopper that lasts longer than cut flowers. The blooms stay vibrant for 2-3 weeks, and the foliage adds architectural interest until summer. Swap out spent tulips for summer annuals like geraniums or petunias to keep the pot looking fresh all season.
Even small balconies can host a tulip display—just choose the right pot size and variety.
Here’s the best part: these pots work anywhere. Urban balconies, patio corners, or even a sunny windowsill—tulips in containers bring that unmistakable spring cheer without the commitment of a garden bed. Plus, you can move them to chase sunlight or protect them from late frosts. Let’s get those bulbs planted!
📚 In This Guide
- What you need
- Instructions
- Tips and common mistakes
- Wrapping up and next steps
What you need
- ● Tulip bulbs: 5–10 bulbs (depending on pot size; larger pots can accommodate more for a fuller look). Choose Darwin Hybrid or Parrot Tulips for bold, long-lasting blooms.
- ● Flower pot: 1 ceramic, terracotta, or fiberglass pot (12–16 inches in diameter) with drainage holes. Pro tip: 💡 Opt for a pot with a saucer to catch excess water!
- ● Potting soil: 1 bag (1–2 cubic feet) of high-quality, well-draining bulb-specific mix or a blend of peat moss, perlite, and compost (60% soil, 30% perlite, 10% compost).
- ● Drainage layer: Small gravel, perlite, or pumice (1–2 inches) to prevent root rot.
- ● Garden trowel or spoon: 1 (for planting and layering soil).
- ● Watering can or spray bottle: 1 (with a gentle spray nozzle for hydration).
- ○ Mulch (optional): 1 bag of decorative stones, bark, or moss (for a polished finish).
- ○ Fertilizer (optional): Slow-release bulb fertilizer or a balanced 10-10-10 mix (follow package instructions).
- ○ Decorative elements (optional): Paint, stencils, or ribbons to personalize your pot! ✨
Step-by-step guide to designing striking tulip flower pots
Creating showstopping tulip displays in containers is simpler than you think—just follow these key steps.
Select Containers and Drainage Solutions
Choose containers with at least 12-inch depth to accommodate tulip bulbs' long roots. I prefer terracotta pots because they wick moisture away naturally, preventing bulb rot. Ensure each container has multiple drainage holes—if not, drill them yourself. Place a 1-inch layer of gravel or broken pottery at the bottom to create an air pocket that prevents waterlogging.
Here's the thing—tulips need excellent drainage more than any other spring bulb. If water pools at the bottom, bulbs will suffocate and refuse to bloom. Test your containers by filling them with water; if they drain completely within 2-3 minutes, they're ready. If not, add more gravel or choose shallower containers.
Layer Soil and Bulbs for Maximum Impact
Fill the container one-third full with a lightweight potting mix (avoid garden soil—it compacts and suffocates roots). For 4 tulip bulbs per pot, arrange them 6-8 inches apart in a loose cluster, with the pointy ends facing up. This spacing ensures each bulb has room to develop strong roots without competing for nutrients.
Cover bulbs with 2-3 inches of soil, leaving the tips exposed. The reason we don’t bury them completely is that tulips need light exposure to trigger flowering. Once planted, gently water until the soil feels evenly moist but not soggy. Overwatering now will rot bulbs before they even sprout.
Choose Companion Plants for Year-Round Interest
Tulips bloom for just 2-3 weeks, so pair them with slow-growing perennials that thrive in containers. I recommend heuchera (coral bells) for foliage contrast or dwarf boxwood for structure. Plant companions in the outer edges of the pot, leaving the center for tulip growth. This creates a balanced, layered look that stays stunning long after the tulips fade.
Here’s where it gets fun—mix in evergreen ferns or ornamental grasses for winter texture. These plants mask the empty spots left by tulip foliage once it dies back. Just ensure companions have similar light and water needs—tulips hate soggy roots, so avoid moisture-loving plants like impatiens.
Position for Sunlight and Shelter
Tulips demand full sun (6+ hours daily) for vibrant blooms, but their leaves need partial shade after flowering to prevent scorching. Place pots in a south-facing spot where they’ll get morning sun and afternoon shade in hot climates. If your space is shadier, opt for dwarf tulip varieties like ‘Tiny Star’ or ‘Queen of Night,’ which tolerate 4-6 hours of sun.
In colder regions, move pots to a protected location (like against a north-facing wall) before the first frost. Tulip bulbs are hardy, but consistent freezing and thawing can damage them. A thick layer of mulch (2-3 inches) on top of the soil helps insulate roots through winter.
Maintain Through Seasons for Repeat Blooms
Water pots deeply once a week during dormancy (fall/winter) to keep soil lightly moist. Once shoots appear in early spring, increase watering to every 5-7 days, soaking until water runs through the drainage holes. Fertilize lightly with a balanced bulb food (10-10-10) when shoots reach 4 inches tall—this encourages strong blooms without burning foliage.
After tulips finish blooming, leave the leaves intact for 6-8 weeks—they photosynthesize energy back into the bulbs for next year. Once foliage yellows and dies back, cut it to 2 inches above the soil and reduce watering. This signals bulbs to rest while keeping the pot looking tidy. With proper care, the same bulbs will rebloom for years.
Tips & tricks for perfect tulip flower pots
These practical strategies will help you create stunning tulip displays that thrive year after year.
Drainage Test: Before planting, test your container's drainage by filling it with water. If it doesn't drain completely within 2-3 minutes, add more gravel or choose a shallower pot. I've ruined three batches of tulips by ignoring this step—waterlogged bulbs simply refuse to bloom. The key is creating that air pocket at the bottom where roots can breathe.
Bulb Orientation: Always plant tulip bulbs with their pointy ends facing upward. This might seem obvious, but I've seen gardeners plant them upside down more times than I can count. The roots will grow downward naturally, and the stem will emerge from the top. For maximum impact, arrange 4 bulbs in a loose cluster with 6-8 inches between each—this creates a full, natural look rather than a sparse arrangement.
Companion Plant Placement: When adding companion plants like heuchera or dwarf boxwood, plant them in the outer edges of your container. This leaves the center open for tulip growth and creates that beautiful layered effect. I recommend using evergreen ferns or ornamental grasses—they'll provide winter texture while masking empty spots once tulips fade. Just avoid moisture-loving plants that might compete with tulips for water.
Seasonal Transition Care: After tulips bloom, leave the foliage intact for 6-8 weeks—this is when the plant photosynthesizes energy back into the bulbs for next year's flowers. Once the leaves yellow and die back, cut them to 2 inches above the soil. This signals the bulbs to rest while keeping your pots looking tidy. I've seen gardeners cut foliage too soon and wonder why their tulips don't rebloom.
Pro Tips for Tulip Flower Pot
- These practical strategies will help you create stunning tulip displays that thrive year after year.
- Drainage Test: Before planting, test your container's drainage by filling it with water. If it doesn't drain complete...
- Bulb Orientation: Always plant tulip bulbs with their pointy ends facing upward. This might seem obvious, but I've se...
Frequently asked questions
Got questions about styling your tulip flower pots? We’ve got answers! Whether you’re a first-time gardener or a seasoned plant parent, these common queries will help you create the perfect spring display—and beyond. Dive in!
Can tulips in pots be grown year-round, or do they need winter care?
Tulips are perennial in pots only in mild climates (Zones 7-9). For colder areas, dig up bulbs after foliage yellows, store them in a cool, dry place, and replant in fall. Pro tip: Use well-draining pots and mulch lightly in winter to protect roots.
What’s the best pot size and drainage for tulip bulbs?
Opt for pots at least 6 inches deep (with drainage holes!) to accommodate bulbs and roots. A diameter of 8–12 inches works for 3–5 bulbs per pot. Troubleshooting: No drainage? Add a layer of pebbles or perlite to prevent root rot.
How often should I water tulips in pots, and what’s the ideal soil mix?
Water when the top 1–2 inches of soil feel dry (usually every 5–7 days). Use a lightweight mix of potting soil, perlite, and compost (ratio: 2:1:1). Watch out: Overwatering causes bulb rot—let pots dry slightly between waterings!
Can I mix tulips with other flowers in a pot, and which ones work best?
Pair tulips with low-maintenance companions like pansies, daffodils, or ornamental grasses. Avoid heavy feeders (e.g., petunias) that compete for nutrients. Design hack: Use contrasting colors—think purple tulips + silver foliage for drama!
Why are my tulip leaves turning yellow, and how do I fix it?
Yellow leaves often signal overwatering, nutrient deficiency, or bulb rot. Adjust care by:
- Ensuring pots have drainage holes.
- Fertilizing lightly with bulb-specific food in early spring.
- Trimming dead leaves after they’ve absorbed sunlight.
Wrapping up and next steps
Transforming your space with tulip flower pots is a simple yet stunning way to embrace spring’s charm—and yes, their beauty lasts well beyond the season! Whether you’re a gardening novice or a seasoned pro, these versatile blooms bring color, texture, and effortless elegance to any corner.
Now that you’re equipped with the right materials and answers to common questions, it’s time to let your creativity bloom.
🌱 Ready to take the next step? Start small—pick a single pot or a cluster—and let your tulips shine. Need inspiration? Browse local nurseries or online plant shops for unique varieties, or experiment with mixed containers to extend their seasonal magic.
Your garden (or balcony!) deserves this pop of joy—so go ahead and plant with confidence! 💐