Planting
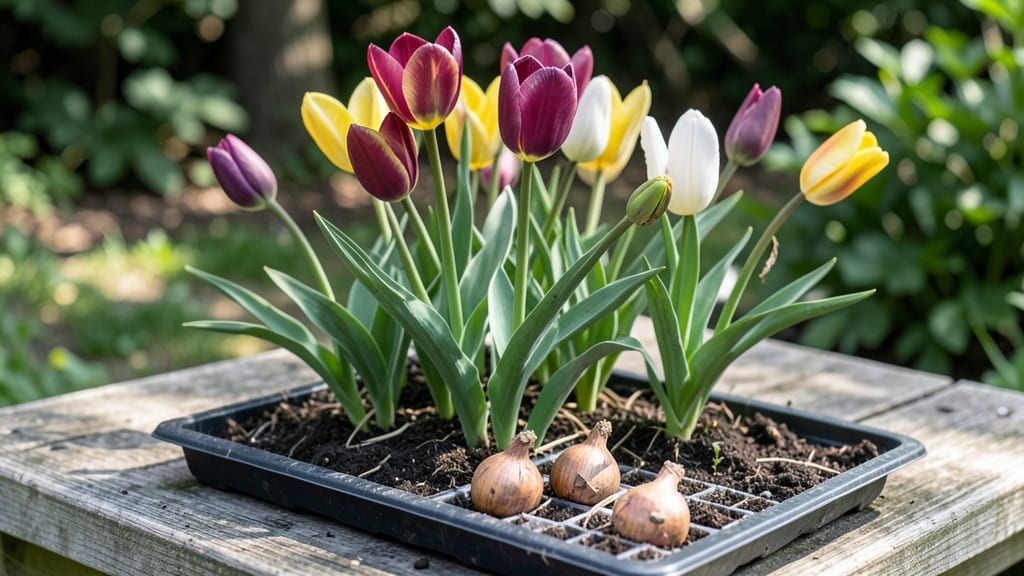
Finding inexpensive flower bulbs that deliver year-round color doesn’t require a gardening degree—just smart shopping and a little patience. 🌱 Last fall, I scored a flat of 50 tulip bulbs for $12 at a local hardware store, and this spring, my front yard became a riot of pink, purple, and yellow without breaking the bank.
The secret? Bulbs don’t need to cost $5 each to perform like $20 varieties.
Most garden centers mark up bulbs in spring, but the best deals come in late summer or early fall when stores want to clear inventory. Look for daffodils, crocuses, and alliums—these tough, cold-hardy bulbs often sell in bulk bins for under $1 each.
Even "imperfect" bulbs (smaller or odd-shaped) will bloom just as well, so don’t skip them. A 5-pound bag of mixed bulbs can fill an entire border for under $20.
What you’ll get is a garden that blooms earlier and longer than neighbors paying premium prices. Daffodils push through snow for February color, tulips peak in spring, and alliums add drama in late summer—all while suppressing weeds naturally.
The best part? You can divide and share bulbs after they bloom, turning one flat into a dozen over time.
Works for containers, borders, or even under trees where grass won’t grow. Here’s how to stretch your dollar further—without sacrificing beauty.
📚 In This Guide
- What you need
- Instructions
- Tips and common mistakes
- Wrapping up and next steps
What you need
- ● Inexpensive flower bulbs: Choose from tulips, daffodils, crocuses, or alliums (5–10 bulbs per variety). Opt for dormant bulbs (sold in fall/winter) for the best deals!
- ● Well-draining soil: Mix 1 part compost with 2 parts garden soil (or use pre-mixed potting soil for containers).
- ● Garden bed or containers: For in-ground planting: A 6-inch-deep spot with sunlight exposure (6+ hours/day for most bulbs).
- ● For containers: 10–12 inch pots with drainage holes (use 1–2 bulbs per 6-inch pot).
- ● Basic gardening tools: Trowel or bulb planter (for digging).
- ○ Garden gloves (optional but highly recommended—bulbs can be sharp!).
- ● Watering can or hose: With a gentle spray nozzle to avoid displacing bulbs.
- ○ Mulch (optional): 2–3 inches of straw or shredded leaves to protect bulbs in winter.
- ○ Fertilizer (optional): A balanced, slow-release bulb fertilizer (follow package instructions).
Step-by-step guide to planting affordable flower bulbs
Here’s how to get stunning blooms without breaking the bank—just follow these simple steps.
🌱 Step 1: Choose the Right Bulbs for Your Climate
Start by selecting bulbs that thrive in your USDA hardiness zone. I always check the packaging for zone recommendations—this ensures your bulbs survive winter and bloom reliably. Look for dormant bulbs (like tulips, daffodils, or crocuses) in late summer or fall sales, when prices drop significantly.
For year-round color, mix spring-blooming bulbs (like hyacinths) with fall-planted varieties (like alliums). Bulbs like daffodils and tulips are budget-friendly and widely available. Avoid pre-planted "bloom pots"—they’re convenient but costlier than bare bulbs.
🪴 Step 2: Prepare the Soil and Planting Site
Pick a spot with well-draining soil—bulbs rot quickly in soggy ground. Loosen the soil to 12 inches deep with a garden fork or tiller. Amend heavy clay with 2-3 inches of compost to improve drainage. A sunny location (at least 6 hours of light daily) works best for most bulbs, though some like shade-tolerant varieties (e.g., snowdrops).
If planting in containers, use a lightweight potting mix with perlite or sand. Fill the pot halfway, place the bulb pointy end up, and cover with soil. Containers let you grow bulbs in small spaces, like patios or balconies, where soil might be poor.
💧 Step 3: Plant Bulbs at the Correct Depth and Spacing
Plant bulbs twice as deep as their height—so a 2-inch bulb goes 4 inches deep. Use a bulb planter or your finger to make holes. Space bulbs 3-6 inches apart, depending on the variety (check the packet). Crowding leads to smaller blooms, but too much space wastes soil and water.
After planting, water deeply to settle the soil. Mulch with 2-3 inches of straw or shredded leaves to protect bulbs from freezing temps and retain moisture. Avoid overwatering—bulbs need dry dormancy in summer to rebloom the next year.
☀️ Step 4: Provide Care for Healthy Growth
Once shoots emerge in spring, reduce watering slightly—bulbs pull nutrients from their own storage, not the soil. Fertilize lightly with a balanced 10-10-10 formula in early spring, but skip high-nitrogen feeds, which encourage leafy growth over flowers.
Deadhead spent blooms to redirect energy into next year’s flowers. For perennials like daffodils, let foliage yellow naturally before trimming—this feeds the bulb for future blooms. If you’re growing annuals (like gladiolas), dig them up after flowering and compost the bulbs.
⏰ Step 5: Plan for Year-Round Interest
Layer bulbs in the same spot for staggered blooms. Plant early spring bloomers (like crocuses) first, then add mid-season (tulips) and late-season (alliums) varieties. This creates a continuous show from early spring to summer.
In fall, add fall-blooming bulbs (like chrysanthemum or colchicum) for late-season color. Mark planting spots with stakes or flags to avoid disturbing bulbs when digging other plants. With this approach, your garden stays vibrant without expensive replanting every year.
Tips & tricks for perfect flower bulb planting
Here's what nobody tells you about getting the most from your budget-friendly bulbs.
Bulb Selection Savings: Look for "seconds" or "imperfect" bulbs at garden centers—these often cost 30-50% less than perfect specimens but perform just as well. I've planted entire gardens using only seconds and never noticed a difference in blooms. Check for firmness and no mold; size matters more than shape for reliable flowering.
Soil Prep Shortcut: If amending heavy clay with compost feels like too much work, mix in coarse sand instead—it improves drainage just as effectively. For containers, use a 50/50 mix of potting soil and perlite to prevent soggy roots. This simple tweak saves time while preventing the #1 bulb killer: rot.
Planting Depth Hack: When in doubt about depth, remember this rule: "Pointy side up, twice as deep as wide." For example, a 2-inch bulb goes 4 inches deep. Use a ruler or even a pencil to mark your holes—it's easier than guessing and prevents over-planting, which stunts blooms.
Year-Round Planning: Create a simple chart of your planting timeline with bloom dates. I keep mine on my fridge so I don't miss fall planting windows. Mark your calendar for late September to early November—this is the sweet spot for most bulbs to establish roots before winter. The 6 hours of sunlight mentioned in Step 2 can be morning sun plus afternoon shade in hot climates.
Pro Tips for Inexpensive Flower Bulbs
- Here's what nobody tells you about getting the most from your budget-friendly bulbs.
- Bulb Selection Savings: Look for "seconds" or "imperfect" bulbs at garden centers—these often cost 30-50% less than p...
- Soil Prep Shortcut: If amending heavy clay with compost feels like too much work, mix in coarse sand instead—it impro...
Frequently asked questions
Got questions about growing inexpensive flower bulbs? You’re not alone! Here are answers to the most common queries to help you get the most out of your budget-friendly blooms.
What are the cheapest flower bulbs to plant for long-term color?
Daffodils, tulips, and crocus are top picks—they’re affordable, hardy, and often return year after year. For extra savings, opt for bulb mixes (like wildflower blends) or bulb starter packs from garden centers or online retailers. Bonus: Many bulbs (like alliums) are perennial, meaning you plant once and enjoy free blooms for seasons!
When is the best time to plant inexpensive bulbs for spring blooms?
For spring flowers, plant bulbs 6–8 weeks before the ground freezes (typically October–December in most U.S. zones). Fall planting gives roots time to establish before winter. Pro tip: Check the bulb packaging—some varieties (like hyacinths) need slightly earlier planting. Summer-blooming bulbs (e.g., dahlias) go in early spring.
Where can I buy inexpensive flower bulbs without sacrificing quality?
Start with discount garden centers, local farmers' markets, or online bulk sellers (like Bare Root Bulbs or Amazon). Tip: Buy in bulk (50+ bulbs) for the best per-unit prices. Avoid sprouted or moldy bulbs—they won’t thrive!
What do I do if my inexpensive bulbs don’t bloom the first year?
Don’t worry! Many bulbs (especially perennials) take 1–2 years to establish before blooming. Ensure they get 6+ hours of sun and well-draining soil. Troubleshooting:
- Too much shade? Move bulbs to a sunnier spot next season.
- Poor drainage? Amend soil with compost or sand.
- Pests (like squirrels)? Use chicken wire or plant bulbs deeper.
Can I grow inexpensive bulbs in containers or small spaces?
Tulips, crocus, and miniature daffodils
thrive in pots (just use well-draining soil). For small spaces, try layered planting: Combine bulbs with annuals (like pansies) for year-round color. Container tip: Plant bulbs closer together than in gardens to maximize impact. Drainage holes are a must!
Wrapping up and next steps
Transforming your garden—or even a cozy windowsill—into a vibrant, year-round display doesn’t have to break the bank! With inexpensive flower bulbs, you’ve got the perfect tool to add color, charm, and life without the hefty price tag.
Whether you’re a seasoned gardener or just starting out, these budget-friendly blooms make it easy to create beauty on a budget.
Now that you’re armed with tips and tricks, take the next step—pick your favorite bulbs, grab a trowel, and start planting! Your future garden (or indoor oasis) will thank you. 🌱✨