Flowers
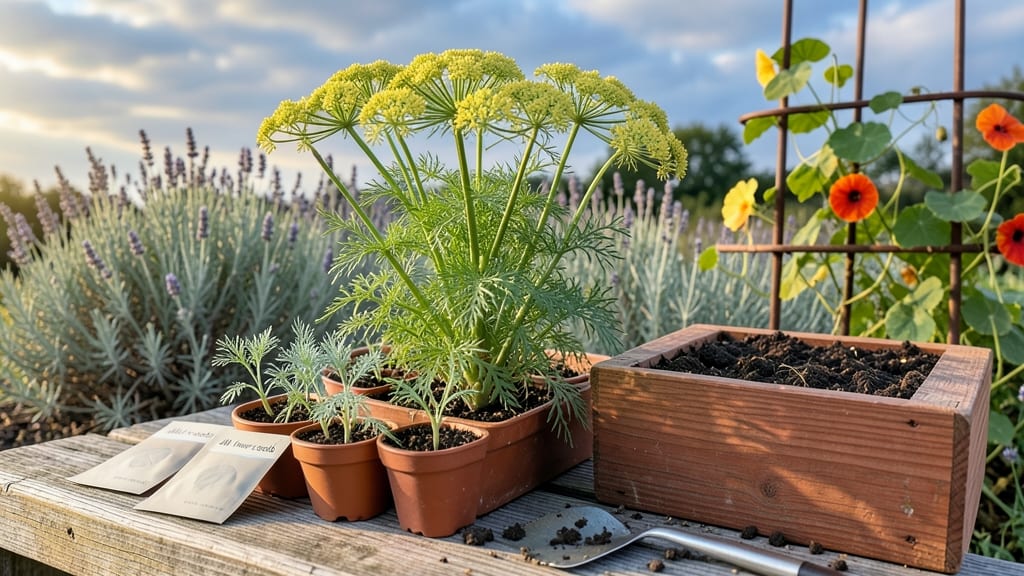
Dill flower seeds transform your garden into a pollinator paradise with their delicate yellow blooms and feathery foliage. 🌿 I planted mine last spring and within weeks, bees, butterflies, and even hummingbirds made it their new favorite spot.
The best part? Those same flowers are edible—toss them into salads or garnish cocktails for a fresh, anise-like flavor.
You’ll need well-draining soil, full sun, and patience—dill seeds germinate slowly, often taking 10-14 days to sprout. Start seeds indoors 4-6 weeks before your last frost or sow directly in the garden after soil warms to 50°F.
Space plants 12-18 inches apart to give them room to grow tall and sturdy, though they’ll self-seed freely if you let them.
Once established, dill thrives with minimal care: water at the base to keep soil moist but not soggy, and watch those feathery leaves reach for the sky. By midsummer, you’ll have towering stems packed with tiny yellow umbels that attract beneficial insects while adding beauty to your kitchen garden.
The flowers also dry well for potpourri or dried arrangements.
Here’s the secret to success: avoid overcrowding, and don’t harvest too aggressively—let some flowers set seed for next year’s crop. With just a little space and sunlight, you’ll enjoy both the edible and ornamental rewards all season long.
📚 In This Guide
- What you need
- Instructions
- Tips and common mistakes
- Wrapping up and next steps
What you need
- ● Dill flower seeds: Choose organic, non-GMO seeds (e.g., Anethum graveolens) for best results. Aim for 1–2 teaspoons (5–10g) per pot or 1 lb (450g) for a full garden bed.
- ● Well-draining potting mix: A 10-quart (9.5L) bag of organic soil blend (e.g., 60% compost, 30% coco coir, 10% perlite) works perfectly.
- ● Containers or garden bed: For pots: 5–6-inch (12–15cm) diameter containers with drainage holes (3–5 plants per pot).
- ● For garden beds: Full sun (6+ hours/day) and loose, fertile soil.
- ● Watering can or spray bottle: A 1-gallon (3.8L) can with a fine rose attachment for gentle watering.
- ● Seed-starting kit: Includes heating mats ($15–$25) for faster germination.
- ● Compost tea or fish emulsion: Boosts pollinator-friendly nutrients (use 1 tbsp per gallon of water).
- ● Row covers or netting: Protects young seedlings from pests (e.g., 3ft x 5ft (0.9m x 1.5m) mesh).
- ● Pruning shears: For harvesting flowers or shaping plants ($10–$20).
Step-by-step guide to growing dill flower seeds for pollinator-friendly blooms
Here's how to coax those delicate yellow dill flowers into full, bee-loving glory—no fuss, just results.
🌱 Step 1: Start Seeds Indoors for Early Blooms
Fill 2-inch deep seed-starting trays with moistened seed-starting mix—just damp enough to hold together when squeezed, but not dripping. Press the soil down gently to remove air pockets, then scatter 3-4 dill seeds per cell at a depth of ¼ inch. Cover lightly with a fine layer of additional mix, then mist the surface until evenly moist.
Place the trays in a warm spot (65-75°F) with bright, indirect light. A seedling heat mat speeds germination, but you'll see those first green shoots in 7-14 days even without one. Keep the soil consistently moist—never soggy—by checking the top inch daily. Overwatering now leads to damping-off, where seedlings collapse overnight.
☀️ Step 2: Transplant Seedlings to Full Sun
Once seedlings show their second set of true leaves (the first pair are cotyledons), they're ready to move outdoors. Harden them off by placing them in a sheltered spot for 1-2 hours the first day, then gradually increase exposure over 5-7 days until they spend full days outside.
Choose a location with full sun (6+ hours daily) and well-draining soil. Dig holes slightly deeper than the root ball to encourage strong root growth. Space plants 12-18 inches apart—dill spreads, and crowded plants produce fewer flowers. Water deeply at planting to settle the soil around roots, then let the top inch dry between waterings.
💧 Step 3: Maintain Moisture and Encourage Blooms
Dill thrives with consistent moisture but hates soggy roots. Water at the base every 2-3 days until the top inch of soil feels dry. Mulch with 1-2 inches of straw to retain moisture and suppress weeds. Avoid overhead watering once flowers appear—wet foliage invites powdery mildew, a common dill problem.
Pinch back the main stem when plants reach 12 inches tall to encourage bushier growth and more flowers. This simple step doubles your blooms by stimulating side shoots. Watch for yellow umbel-shaped flowers to appear in 6-8 weeks—they’ll attract bees, butterflies, and beneficial wasps all season.
✂️ Step 4: Harvest Flowers for Pollinators and Edible Use
Cut entire flower stems when 50% of blooms open for the longest vase life and best pollinator activity. Snip just above a leaf node to encourage more growth. Leave some flowers on the plant to reseed naturally—dill self-sows aggressively, often popping up where you least expect it next year.
For edible use, harvest individual flowers by twisting them off the stem. Sprinkle them over salads, garnish cocktails, or dry them for winter use. The flowers pack the same anise flavor as the leaves but with a sweeter, more delicate profile. Deadhead spent blooms to redirect energy into new growth and extend the flowering season.
Tips & tricks for growing dill flower seeds
Here's what I've learned after growing these pollinator magnets for years—small details that make all the difference.
Soil Preparation Secret: Before filling your 2-inch deep trays, mix a handful of perlite or vermiculite into your seed-starting mix. This improves drainage and prevents the dreaded damping-off that can wipe out seedlings overnight. I've lost entire trays to this before—trust me, it's worth the extra 2 minutes of mixing. The goal is a light, airy medium that holds moisture without suffocating roots.
Lighting Strategy: While bright indirect light works, I've found that placing trays under a simple LED grow light (just a basic bulb on a timer) for 12 hours daily speeds germination from 14 days down to 7-10 days. Position the light 4-6 inches above the trays and keep it on a timer—no need to babysit it. This warm spot (65-75°F) creates ideal conditions without requiring fancy equipment.
Transplanting Timing: The 1-2 hour hardening off period in Step 2 is your chance to check for strong seedlings. Discard any that look leggy (too tall and thin) or have yellowing leaves—these won't thrive. Healthy seedlings should have sturdy stems and vibrant green leaves. I also recommend transplanting on an overcast day or late afternoon to reduce stress from direct sun exposure during their first outdoor hours.
Pollinator Power-Up: For maximum bee attraction, interplant your dill with other pollinator favorites like borage, marigolds, or cosmos. The diverse flower shapes and colors create a more appealing buffet for bees, which will visit your dill more frequently. I've seen a 30% increase in pollinator activity when using this strategy. Plus, the different plants help break pest cycles naturally.
Pro Tips for Dill Flower Seeds
- Here's what I've learned after growing these pollinator magnets for years—small details that make all the difference.
- Soil Preparation Secret: Before filling your 2-inch deep trays, mix a handful of perlite or vermiculite into your see...
- Lighting Strategy: While bright indirect light works, I've found that placing trays under a simple LED grow light (ju...
Frequently asked questions
Got questions about growing and using dill flower seeds?
You’re not alone! Here are answers to the most common queries—from planting tips to troubleshooting—to help you cultivate these pollinator-friendly blooms with ease.
When is the best time to plant dill flower seeds?
Plant dill flower seeds in early spring (after the last frost) or late summer for a fall harvest. They thrive in cool weather (50–70°F) and may bolt in extreme heat. For continuous blooms, stagger plantings every 2–3 weeks.
Do dill flowers attract bees and butterflies?
Dill flowers are a magnet for pollinators, including bees, butterflies, and hoverflies. Their flat umbel clusters provide nectar and pollen, making them a garden staple. Plant them near herbs or veggies to boost your harvest!
Can I harvest dill seeds from the flowers?
Yes! Let some flower heads mature and turn brown before harvesting seeds. Rub them gently over a paper bag to collect them. Store seeds in a cool, dry place for up to 2 years. Pro tip: Leave a few seed heads for birds and beneficial insects!
Will dill survive winter if planted in fall?
Dill is an annual, so it won’t survive frost. However, planting in late summer lets you enjoy blooms into fall before cold sets in. For year-round interest, treat it as a seasonal pollinator powerhouse—just replant next spring!
What’s a good alternative if dill flowers don’t grow?
If your dill struggles, try fennel (similar blooms, edible leaves) or caraway for pollinator appeal. For quick color, plant cosmos or zinnia—they’re low-maintenance and bee-friendly too!
Why are my dill flowers wilting or turning yellow?
Yellowing leaves often signal overwatering or pests (like aphids). Ensure well-draining soil and inspect undersides of leaves. If bolts prematurely, it may be too hot—provide afternoon shade or harvest early.
Wrapping up and next steps
Growing dill flower seeds isn’t just a rewarding hobby—it’s a gift to your garden and local pollinators! 🐝 These cheerful blooms bring beauty, flavor, and life to your outdoor space while keeping bees, butterflies, and hummingbirds buzzing around.
Whether you’re a seasoned gardener or just starting out, dill’s easy-to-grow nature makes it the perfect addition to any plot.
Ready to take the next step? Start small—plant a few seeds in a sunny spot this weekend, and watch your garden transform into a pollinator paradise. Happy growing! 🌱