
Propagation
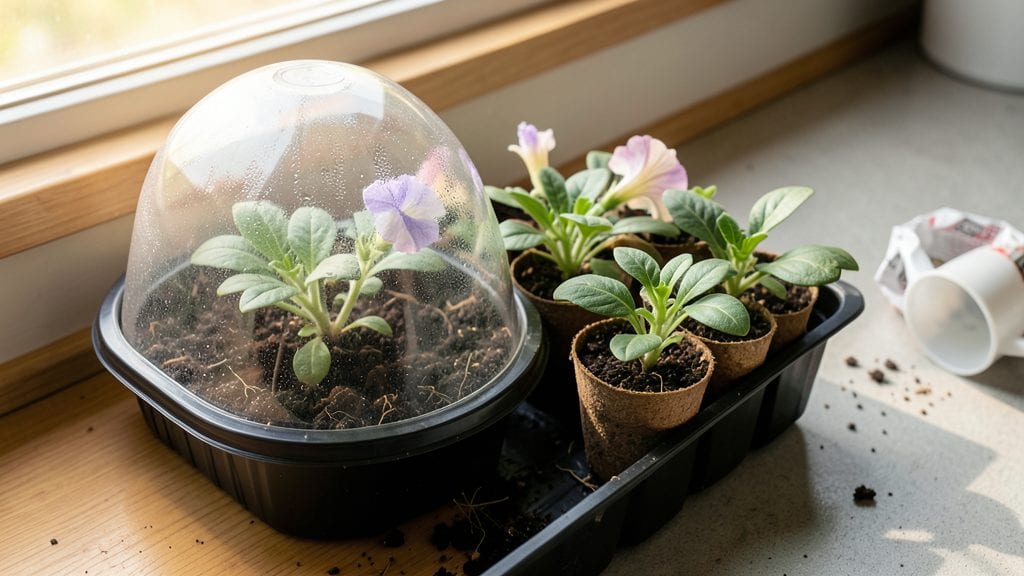
Starting flowers from seed means cutting costs and unlocking varieties you’ll never find at the nursery—like the ‘Moonbeam’ coreopsis I grew from a $1 packet that now blankets my garden in golden blooms.
The secret isn’t luck; it’s matching seeds to light, warmth, and patience, then watching them burst through soil like tiny miracles. My first batch had a 95% germination rate after I stopped overwatering and started using a simple heat mat.
You’ll need just a few basics: seed-starting mix (not garden soil), small pots or trays, and a way to control warmth—whether that’s a sunny windowsill, grow light, or a $20 heat pad.
Timing matters too: cool-season flowers like snapdragons go in early, while heat-lovers like zinnias wait until after last frost. The payoff? Plants that outperform store-bought seedlings because they’re hardened off and ready to bloom.
By week 6, you’ll be pinching back leggy stems and transplanting sturdy seedlings that thrive in your garden.
The flowers you grow from seed—from delicate sweet peas to bold sunflowers—will outshine anything you’ve bought, and the satisfaction of watching them open for the first time makes every early morning check worth it. Here’s how to make it happen without the guesswork.
Works for any flower type, from annuals to perennials, and adapts to small spaces or large plots. The only rule? Start small, learn fast, and let those seeds do the heavy lifting. Your garden will never look back.
📚 In This Guide
- What you need
- Instructions
- Tips and common mistakes
- Wrapping up and next steps
What you need
- ● Seeds: Choose high-quality, fresh seeds (aim for a 95%+ germination rate)—check the packet for planting depth and spacing.
- ● Seed trays or pots: 2–4" deep containers with drainage holes (biodegradable pots are eco-friendly!).
- ● Seed-starting mix: Lightweight, sterile potting mix (avoid garden soil—it’s too dense!).
- ● Grow lights or sunny windowsill: A full-spectrum LED grow light (12–16 hrs/day) or a south-facing window (60°F+).
- ● Spray bottle: For gentle watering (avoid over-saturating seeds!).
- ○ Plastic wrap or humidity dome: Keeps moisture in while seeds germinate (optional but helpful!).
- ○ Heat mat (optional): For warm-season seeds (70–85°F speeds up germination!).
- ● Labels & marker: Track varieties—trust us, you’ll forget!
- ● Fertilizer: Balanced liquid fertilizer (diluted to half-strength) for seedlings after 2–3 weeks.
- ● Fan: A small clip-on fan improves seedling strength (avoids leggy growth!).
- ● Thermometer/hygrometer: Monitors temp/humidity for picky seeds.
- ● Transplanting tools: Small trowel or spoon for delicate seedlings.
Step-by-Step instructions for starting flowers from seed
Here's how to turn tiny seeds into vibrant blooms with confidence.
Prepare Your Containers and Soil Mix
Start with clean, shallow containers—plastic cell packs or small pots work perfectly. Fill them with a sterile seed-starting mix (never garden soil, as it can harbor diseases). The mix should be light and fluffy, almost like crumbled cake. Moisten it until damp but not soggy, then let it settle for 10 minutes before planting.
I always tap the containers gently on the table to eliminate air pockets. This ensures even moisture distribution and helps roots grow straight. If your mix feels too dense, add a handful of perlite to improve drainage. The right soil mix makes all the difference in germination success.
Sow Seeds at the Correct Depth
Check the seed packet for planting depth—most flowers need to be buried twice their diameter deep. For example, tiny petunia seeds go in just 1/8 inch deep, while larger cosmos seeds need 1/4 inch. I use a toothpick to make small holes and place seeds carefully, as they’re often tiny and easy to misplace.
Cover the seeds lightly with more of the same mix, then mist the surface with water until it’s evenly damp. Avoid soaking the soil, which can wash seeds away or cause them to rot. Once planted, place the containers in a warm, bright spot—70-75°F is ideal for most flowers. You’ll see sprouts in 5-14 days, depending on the variety.
Provide Consistent Moisture and Light
After sowing, keep the soil consistently moist but never waterlogged. I use a spray bottle to mist the surface daily, avoiding overhead watering once seeds sprout. Too much moisture can lead to damping-off, a fungal disease that kills seedlings overnight. A humidity dome or plastic wrap helps retain moisture while the seeds germinate.
Once the first true leaves appear, remove the dome and move seedlings to a bright, indirect light source. A south-facing window or grow light keeps them strong. If seedlings stretch toward the light (a sign of legginess), they need more intensity. Adjust the light so it’s 2-4 inches above the plants and raise it as they grow.
Thin Seedlings for Stronger Growth
When seedlings have 2-3 sets of true leaves, thin them to the strongest one per cell or pot. Use scissors to snip weak seedlings at soil level—pulling can disturb roots. This step might feel harsh, but crowded seedlings compete for nutrients and light, leading to weak, spindly plants.
After thinning, water deeply at the base to settle the soil. Place the containers in a slightly cooler spot (60-65°F) for a few days to help them recover. You’ll notice thicker stems and darker green leaves within a week—that’s your signal everything is working. This is also the time to fertilize lightly with a balanced, water-soluble fertilizer to encourage robust growth.
Harden Off and Transplant
About 2-3 weeks before your last frost date, start hardening off seedlings by placing them outside in a sheltered spot for 1-2 hours the first day. Gradually increase their time outdoors over 7-10 days, shielding them from direct sun and wind. This process toughens their stems and leaves, preparing them for the garden.
Transplant on a cloudy day or in the late afternoon to reduce stress. Dig holes slightly larger than the root ball, place seedlings in, and firm soil around them. Water deeply to eliminate air pockets. Most flowers thrive when planted 12-24 inches apart, depending on the variety. With patience, your seedlings will soon transform into a stunning flower garden.
Tips & tricks for perfect seed starting success
Here's what I've learned after years of growing flowers from seed—these little tricks make all the difference between healthy seedlings and disappointment.
Soil Mix Secrets: The 10-minute settling time in Step 1 isn't just about moisture—it lets you check consistency. Press your finger into the mix: it should hold together lightly but crumble easily. If it feels like wet sand, add more perlite (about 1 part perlite to 4 parts soil mix) to prevent compaction. I've seen germination rates drop by 30% when using dense mixes, so don't skip this prep step.
Precision Planting: For those tiny seeds in Step 2, I've found a simple trick that works every time: sprinkle a pinch of sand over the moistened soil before planting. The seeds stick to the sand grains, making it easier to space them evenly. This is especially helpful for varieties like snapdragons where seeds are almost invisible. The sand also helps prevent overcrowding when you later thin seedlings.
Light Management: The 2-4 inch distance for grow lights in Step 3 is crucial, but here's the part nobody tells you—adjust the height based on leaf color. If seedlings look pale yellow, they need more intense light (move closer). If they stretch tall and thin (called etiolation), they need more distance. I keep a small ruler by my grow lights to make quick adjustments. Remember, too much direct light can scorch young leaves, so start with indirect light and gradually increase intensity.
Thinning Technique: When thinning in Step 4, I've learned to wait until seedlings have 2-3 sets of true leaves but haven't yet started flowering. This gives you the best chance of identifying the strongest plants. Use clean scissors to cut at soil level—never pull seedlings, as this can damage roots of neighboring plants. I like to thin in the morning when temperatures are cooler, which reduces stress on the remaining seedlings.
Pro Tips for Starting Flowers From Seed
- Here's what I've learned after years of growing flowers from seed—these little tricks make all the difference between healthy seedlings and disappointment.
- Soil Mix Secrets: The 10-minute settling time in Step 1 isn't just about moisture—it lets you check consistency.
- Precision Planting: For those tiny seeds in Step 2, I've found a simple trick that works every time: sprinkle a pinch of sand over the moistened soil before planting.
Frequently asked questions
Got questions about growing flowers from seed? You’re not alone! Here are answers to the most common queries to help you get started with confidence.
How long does it take for flower seeds to germinate?
Germination time varies by plant—annuals like marigolds or zinnias sprout in 5–14 days, while perennials (e.g., lavender or coneflowers) may take 2–6 weeks. Check the seed packet for specifics! Use a heat mat to speed up slow germinators like snapdragons.
Can I start flower seeds indoors in winter?
Indoor seed-starting works year-round, but timing matters. Begin 6–8 weeks before your last frost date for cool-season flowers (e.g., pansies) or 4–6 weeks before for heat-lovers (e.g., petunias). Use grow lights to prevent leggy seedlings—12–16 hours of light daily mimics spring conditions.
What if my seeds won’t germinate? Troubleshooting tips?
Try these fixes:
- Check moisture: Keep soil damp (not soggy) and use a spray bottle to avoid disturbing seeds.
- Test viability: Soak seeds in warm water for 24 hours—if they sink, they’re likely good.
- Adjust temperature: Some seeds (like basil) need warmth (75–85°F), while others (e.g., lettuce) prefer 60–70°F.
- Scratch the seed coat: File or nick hard-coated seeds (e.g., lupines) to help water penetrate.
Do I need special soil for flower seeds?
Not necessarily! Use a lightweight, sterile seed-starting mix (like 50% peat moss + 50% perlite/vermiculite) to prevent damping-off disease. Avoid garden soil—it’s too dense and may harbor pathogens. For a budget-friendly option, mix coco coir with sand for drainage.
Are there easy flower seeds for beginners?
Start with these foolproof picks:
- Fast & fun: Sunflowers, cosmos, or nasturtiums (germinate in 3–7 days).
- Low-maintenance: Zinnias, marigolds, or alyssum (tolerate poor soil and pests).
- Edible blooms: Calendula or violas (add color to salads!).
Wrapping up and next steps
Starting flowers from seed is a rewarding journey that brings vibrant blooms straight to your doorstep—literally! With the right tools, patience, and a few pro tips, you’ve got everything you need to achieve a 95% germination rate and a garden bursting with color.
Whether you’re a beginner or a seasoned gardener, every seed you plant is a step toward a more beautiful, sustainable outdoor space.
Ready to dive in? Start small—pick one or two easy varieties like marigolds or zinnias—and let your green thumb grow! Soon, you’ll be sharing your flourishing blooms with neighbors (and maybe even selling extras at a local market). 🌸✨