Flowers
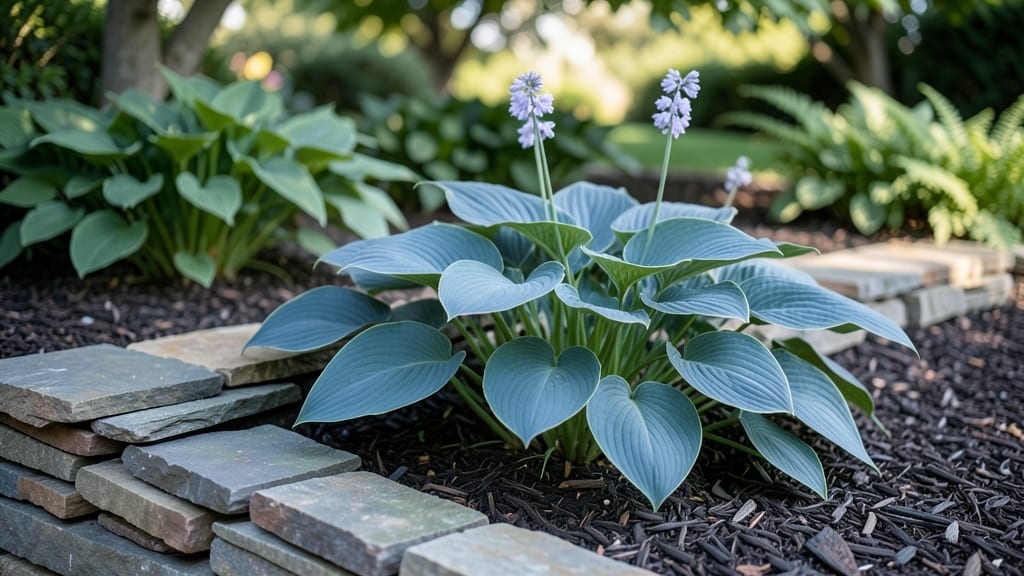
Creating a stacked stone flower bed turns flat garden space into dramatic, layered beauty that thrives year-round. I built mine last spring after struggling with erosion in my sloped yard—now it’s the centerpiece of my garden, holding plants that would’ve washed away in heavy rains.
The stones don’t just look stunning; they create microclimates where delicate perennials and tough ground covers all find their perfect spot.
You’ll need flat stones (6–12 inches wide) for stability, smaller stones for drainage layers, and landscape fabric to keep weeds at bay. A 3-foot-wide bed works well for most gardens, with heights ranging from 12 to 24 inches—just ensure each layer is compacted before adding the next.
The key is angled stones at the base to prevent soil from slipping out, while the top layer can be flat or slightly tiered for planting.
Pair your stones with drought-tolerant perennials like lavender or sedum on the upper tiers, where soil dries faster, and moisture-loving plants like hostas or ferns at the base. The result?
A garden that stays lush through summer droughts, pops with color in spring, and even holds winter interest with evergreens or ornamental grasses. Plus, the stones warm up faster in spring, giving early bloomers like crocuses a head start.
This design works for slopes, flat spaces, or even as a border along a driveway. The only real mistake is rushing—take time to stack stones securely, or you’ll spend more time fixing shifts than enjoying your garden.
Start small if you’re new, and soon you’ll be designing entire landscapes with these versatile, low-maintenance layers.
📚 In This Guide
- What you need
- Instructions
- Tips and common mistakes
- Wrapping up and next steps
What you need
- ● Flat and irregular stones: 40–60 pieces (mix of sizes: 12"–24" for base layers, 6"–12" for mid-height, and 4"–8" for top accents). Use sedimentary, granite, or fieldstone for natural texture.
- ● Landscape fabric: 1 roll (3'–4' wide, heavy-duty) to block weeds.
- ● Gravel or crushed stone: 2–3 bags (50 lbs each) for drainage and base layer.
- ● Soil: 1–2 cubic yards of well-draining garden soil or a mix of topsoil and compost (60/40 ratio).
- ● Perennials or seasonal flowers: 12–20 plants (choose drought-tolerant varieties like lavender, sedum, or coneflowers for low maintenance).
- ● Shovel and garden trowel for digging and planting.
- ● Wheelbarrow or bucket for hauling soil and stones.
- ● Rubber mallet to gently tap stones into place.
- ● Level or string line to ensure even layers.
- ● Measuring tape for precise spacing.
- ● Work gloves and knee pads for comfort and protection.
- ● Edging material: Flexible metal or plastic edging to define the bed’s shape.
- ● Moss or ground cover: For a lush, green base between stones (e.g., creeping thyme).
- ● Solar-powered landscape lights: To highlight your bed at night.
- ● Mulch: 2–3 bags of pine bark or shredded bark to retain moisture.
- ● Decorative rocks or pebbles: For a polished, finished look.
How to build a stacked stone flower bed for year-round beauty
Here's the straightforward approach I use to create sturdy, attractive stone layers that keep plants thriving in every season.
Plan Your Design and Gather Materials
Start by sketching a simple layout on paper. I like to keep mine about 2-3 feet wide and 3-4 feet long for easy maintenance. Choose stones that are roughly 12-18 inches tall for the base layer, with progressively smaller stones for each tier above. You'll need about 4-6 large stones for the foundation and 10-15 smaller stones for the upper layers.
Select stones with flat, stable surfaces—avoid anything too rounded or uneven. The key is creating a sturdy base that won't shift over time. I always place my design where it gets at least 4-6 hours of sunlight daily, since most flowering plants need that much light to thrive. Measure the area carefully before digging.
Dig and Prepare the Base
Dig a trench about 6-8 inches deep along your planned outline. The depth should accommodate the largest stones you're using. I like to slope the sides slightly outward to help with drainage—this prevents water from pooling underneath when it rains. Line the trench with landscape fabric to keep weeds from growing up through the stone layers later.
Fill the trench with a 2-inch layer of gravel for drainage. Then add 4-6 inches of high-quality garden soil mixed with compost (about 1 part compost to 3 parts soil). This gives your plants a nutrient-rich foundation right from the start. Press the soil down lightly so it's firm but not compacted—you want roots to be able to push through easily.
Build the Stone Layers
Begin with the largest stones at the bottom, placing them edge-to-edge to create a solid foundation. Leave about 1-2 inches of space between stones for soil and plant roots to grow into these gaps later. Use a rubber mallet to tap stones gently into place if needed—this helps them settle without cracking.
For each subsequent layer, use progressively smaller stones. I like to create 3 distinct tiers, with each level about 6-8 inches deep. Space the stones so they're slightly staggered, which makes the structure more stable. As you build, check that each stone sits level—use a level tool to adjust if needed. The top layer should be about 12-18 inches above the original ground level.
Add Soil and Plant Your Selections
Fill the gaps between stones with mixed soil and compost, pressing lightly as you go. For the top layer, use a blend of potting soil and compost (about 2 parts soil to 1 part compost) to give plants a nutrient boost. Leave about 1-2 inches of space at the very top for mulch later.
Choose plants that thrive in layered environments. I recommend perennials like lavender, sedum, or ornamental grasses for the top tier, mid-height shrubs like dwarf boxwood or heuchera for the middle, and ground covers like creeping thyme or ajuga for the lower levels. Space them according to their mature size—usually 12-18 inches apart for most plants. Water thoroughly after planting to help roots settle in.
Tips & tricks for perfect stacked stone flower beds
Creating a stable, beautiful stone flower bed requires a few key strategies that make all the difference. Here's what I've learned from years of building these elevated gardens that last.
Stone Selection Matters: In Step 1, when choosing your stones, prioritize ones with flat bottoms and slightly textured surfaces. The 12-18 inch height recommendation is perfect because it creates enough depth for roots while maintaining stability. I've found that flat stones with natural indentations actually help anchor neighboring stones better, preventing that frustrating shifting over time. For the upper tiers, look for stones with slightly uneven edges—they interlock more naturally when staggered.
Drainage is Non-Negotiable: The 6-8 inch deep trench and 2-inch gravel layer in Step 2 aren't just suggestions—they're essential for preventing waterlogged soil. I've seen too many beautiful beds fail because water pooled underneath. After adding your gravel layer, I recommend creating a slight crown in the soil (higher in the center) to further encourage runoff. This subtle slope helps direct water away from the base, especially after heavy rains.
Leveling Creates Stability: When building your 3-tier structure in Step 3, don't skip the level checks between each stone placement. I've learned this the hard way—uneven stones create pressure points that can cause the entire structure to tilt over time. For the top layer, aim to have each stone sit at least 12-18 inches above ground level, but don't sacrifice stability for height. The staggered arrangement mentioned in the instructions is particularly important here—it distributes weight more evenly than a straight line of stones.
Plant Placement Strategy: In Step 4, when selecting plants, consider their mature size and growth habits. The recommended spacing of 12-18 inches works well for most perennials, but I've found that creeping ground covers like thyme actually benefit from being planted slightly closer together (about 9-12 inches apart) in the lower tiers. This creates that lush, cascading effect you see in professional designs. For the top tier, choose plants that can handle more exposure to wind and sun, since they'll be the most visible—and vulnerable—to elements.
Pro Tips for Stacked Stone Flower Bed
- Creating a stable, beautiful stone flower bed requires a few key strategies that make all the difference.
- Stone Selection Matters: In Step 1, when choosing your stones, prioritize ones with flat bottoms and slightly textured surfaces.
- Drainage is Non-Negotiable: The 6-8 inch deep trench and 2-inch gravel layer in Step 2 aren't just suggestions—they're essential for preventing waterlogged soil.
Frequently asked questions
What’s the best time of year to build a stacked stone flower bed?
The ideal time is early spring or fall—when temperatures are mild, and the ground is workable. Avoid extreme heat (which can dry out soil) or freezing conditions (which make digging difficult). If you’re in a warm climate, late winter works too!
Can I use just any rocks for my stacked stone flower bed?
Not all rocks are created equal! Choose flat, stable stones (like flagstone, slate, or river rocks) that won’t crumble or shift over time. Avoid sharp-edged or porous rocks (like limestone), as they can damage plants or retain too much moisture. Local landscaping suppliers often sell pre-cut stones for this purpose.
How do I keep weeds from growing between the stones?
Weed suppression is easy with a few tricks:
- Landscape fabric under the stones blocks weeds while allowing water drainage.
- Use mulch (wood chips or gravel) in the planting pockets to smother weeds.
- Plant ground covers like creeping thyme or sedum between stones for natural weed control.
Do stacked stone flower beds need special drainage?
Yes! Poor drainage can lead to root rot or eroded soil. Ensure your bed has a slight slope (1-2%) away from nearby structures. If your yard is flat, dig a gravel base (2-3 inches) beneath the stones to promote water flow. For heavy clay soil, consider adding perforated drainage pipes.
What are some low-maintenance plants that thrive in stacked stone beds?
Opt for drought-tolerant, slow-growing plants that love well-draining soil:
- Perennials: Lavender, sedum, or Russian sage (hardy and fragrant).
- Grasses: Ornamental grasses (like fountain grass) add texture with minimal care.
- Succulents: Sempervivum (hens and chicks) or echeveria for a modern look.
My stones are shifting—how do I stabilize them?
Shifting stones can happen if the base isn’t level or if soil erodes over time. Reinforce stability by:
- Adding a layer of landscape fabric under the stones to prevent soil from seeping up.
- Using mortar or construction adhesive (sparingly) on the bottom layer for extra hold.
- Backfilling with gravel or coarse sand between stones to improve weight distribution.
Wrapping up and next steps
A stacked stone flower bed isn’t just a trend—it’s a timeless way to elevate your garden with low-maintenance beauty and year-round charm. Whether you’re drawn to the rustic elegance of dry-stacked stones or the structured appeal of mortared layers, this design blends functionality with curb appeal effortlessly.
With the right materials and a little creativity, you can transform even a small space into a stunning, functional oasis.
Ready to get started? Sketch your design, gather your supplies, and begin layering! Your garden’s next masterpiece is just a few stones away. 🌿✨