
Planting
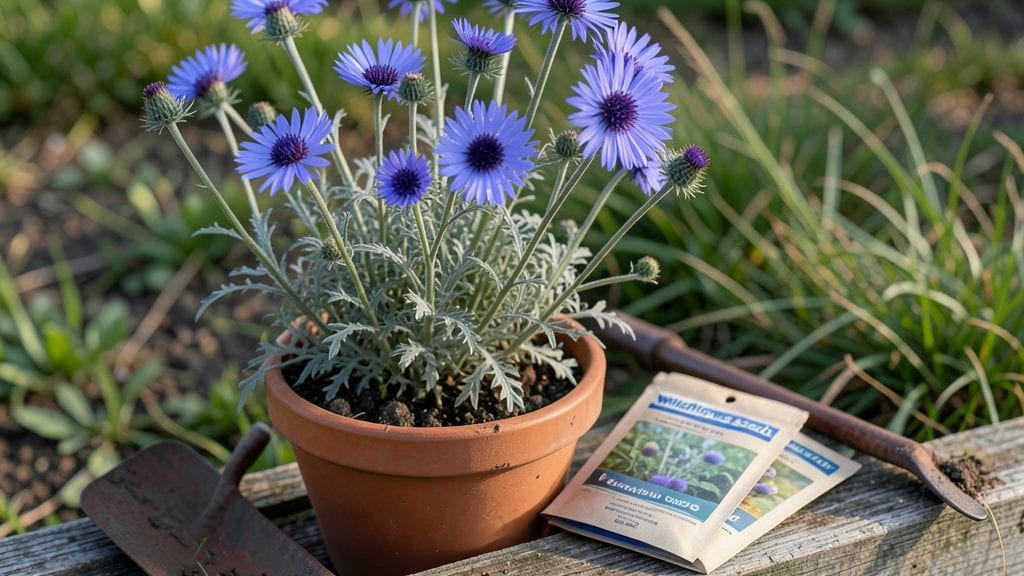
Sowing a wildflower garden transforms bare ground into a buzzing, blooming paradise in just three months—and the best part?
You don’t need a green thumb to make it happen. 🌸 I’ve watched my own patch go from empty soil to a humming, fluttering ecosystem where bees outnumber weeds, and butterflies pause mid-flight just to sip from the blossoms.
The secret lies in native seeds and a little patience—no fancy tools or perfect soil required. Start with a sunny spot (at least 6 hours of light daily), scratch the surface to break up compaction, and scatter seeds lightly.
Most wildflower mixes bloom in waves, giving you color from spring through fall without constant replanting. Even a 10x10-foot patch makes a difference for pollinators struggling to find food.
By summer, you’ll have a garden that feels alive in ways a manicured lawn never could—vibrant purple coneflowers, golden black-eyed Susans, and delicate lavender blooming in every direction. The air hums with wings, and your neighbors will ask how you did it. (Spoiler: It’s easier than you think.)
Works in urban backyards, rural fields, or even container gardens—just adjust seed quantities and watering. Let’s get those seeds in the ground and turn your corner of the world into a wildlife haven.
📚 In This Guide
- What you need
- Instructions
- Tips and common mistakes
- Wrapping up and next steps
What you need
- ● Wildflower seeds: Choose native species (e.g., Echinacea, Rudbeckia, or Lupinus). Aim for 1–2 lbs per 100 sq ft for a dense meadow.
- ● Soil: Well-draining, loamy topsoil (or existing soil amended with 2–3 inches of compost if heavy clay is present).
- ● Rake: A garden rake with ½–¾-inch tines to loosen soil and create furrows.
- ○ Hoe or cultivator: For breaking up compacted soil (optional but helpful for large areas).
- ● Water source: Hose with a gentle spray nozzle or a watering can (avoid high-pressure jets).
- ○ Mulch (optional but recommended): Straw or shredded leaves (¼–½ inch thick) to retain moisture and suppress weeds.
- ● Seed tape or pelleted seeds: Pre-spaced seeds for easier planting (great for beginners!).
- ● Soil test kit: To check pH (aim for 6.0–7.0; adjust with lime or sulfur if needed).
- ● Bird netting: Temporary protection from hungry birds or squirrels during germination.
- ● Wildflower seed mix: Pre-mixed blends (e.g., "pollinator-friendly" or "low-water" varieties) for convenience.
- ● Drip irrigation system: For automated watering (ideal for dry climates).
Step-by-Step guide to establishing a thriving wildflower meadow
Here's how to create a low-maintenance pollinator haven that blooms year after year.
🌱 Step 1: Prepare the Site for Maximum Blooms
Clear the area of weeds and debris, then loosen the top 6 inches of soil with a broadfork or tiller. Wildflowers thrive in well-drained soil, so avoid compacted or waterlogged spots. If your soil is heavy clay, mix in 2-3 inches of compost to improve drainage and fertility.
Here's the thing—wildflowers don't need rich soil, but they do need good contact with the ground. Rake the surface smooth but not perfectly flat; slight undulations help water spread evenly. Mark your planting area with stakes if you're working in a large space, as wildflowers spread over time and you'll want to avoid disturbing them later.
🌿 Step 2: Choose and Scatter Seeds for Season-Long Color
Select a wildflower mix that includes native species for your region—these will attract the most pollinators. Sprinkle seeds evenly across the prepared area, using about ½ pound per 100 square feet. Walk in a grid pattern to ensure even distribution; you'll see bare spots if you're not careful.
Lightly rake the seeds into the soil just enough to cover them—no deeper than ¼ inch. This ensures they make contact with the earth but don't get buried too deeply. Water gently with a sprinkler to settle the seeds without washing them away. I like to water in the late afternoon so the soil stays moist overnight, which helps germination.
☀️ Step 3: Maintain Moisture Without Overwatering
Keep the soil consistently moist for the first 4-6 weeks after sowing, which is when most wildflower seeds germinate. Water deeply 2-3 times per week, aiming for ½ inch of water per session. You'll know you're doing it right when the top 1-2 inches of soil stay damp but not soggy.
Once seedlings appear, reduce watering to once a week unless you're experiencing extreme heat or drought. Wildflowers are tough once established, but young plants need steady moisture to develop strong roots. Avoid walking on the area—those delicate seedlings break easily underfoot.
✂️ Step 4: Encourage Natural Growth and Pollinator Visits
Let the wildflowers grow tall—3-4 feet is ideal for most species. Cut back spent blooms in late fall or early winter to prevent self-seeding where you don't want it, but leave some seed heads for birds and late-season pollinators. I always leave at least 20% of the plants to go to seed each year to maintain the meadow's diversity.
Mow only when absolutely necessary, and never cut more than one-third of the plant height at a time. This keeps the meadow looking neat while preserving the habitat. After the first year, your wildflower garden will start to self-sustain, requiring minimal intervention beyond occasional watering during dry spells.
Tips & tricks for perfect wildflower meadow establishment
Creating a thriving wildflower meadow takes patience and a few key insights—here's what I've learned from years of trial and error that'll make all the difference in your first season.
Soil Preparation Secret: In Step 1, when loosening that top 6 inches of soil, focus on breaking up compaction rather than turning the soil completely. Wildflowers prefer a loose, almost crumbly texture that mimics their natural habitat. If your soil feels dense after working it, sprinkle a thin layer of compost over the area and lightly scratch it in—this improves drainage without smothering the seeds later. The goal is to create a surface where water can penetrate easily but seeds won't get buried too deeply.
Seed Distribution Technique: For Step 2, here's what nobody tells you—use a simple DIY seed spreader made from a cardboard box with small holes cut in the bottom. This ensures even distribution without the bare spots you'll inevitably see when hand-sowing. Walk in a crisscross pattern rather than just one direction, and overlap your passes by about 12 inches to guarantee complete coverage. The ½ pound per 100 square feet is your baseline, but adjust slightly if your seeds are particularly fine or coarse.
Germination Timing: During the critical 4-6 week moisture phase in Step 3, I've found that morning watering actually works better than afternoon for most climates. Watering in the early morning gives seeds time to absorb moisture before the heat of the day evaporates it. Use a rain gauge or tuna can to measure your ½ inch per session—this ensures consistency. And here's the thing about those delicate seedlings: they'll emerge at different times, so don't be surprised if you see the first sprouts after 3 weeks and others appearing 2 weeks later.
Long-Term Maintenance Strategy: When you reach Step 4 and those plants hit their 3-4 foot height, resist the urge to cut everything back uniformly. Leave some taller plants standing through winter—they provide shelter for overwintering pollinators. The 20% seed head rule is your insurance policy for maintaining diversity year after year. I mark my meadow with colored flags in late fall to identify which sections I'll cut back completely versus which I'll leave for pollinators, and it's made all the difference in my garden's biodiversity.
Pro Tips for Sowing A Wildflower Garden
- Creating a thriving wildflower meadow takes patience and a few key insights—here's what I've learned from years of trial and error that'll make all the difference in your first season.
- Soil Preparation Secret: In Step 1, when loosening that top 6 inches of soil, focus on breaking up compaction rather than turning the soil completely.
- Seed Distribution Technique: For Step 2, here's what nobody tells you—use a simple DIY seed spreader made from a cardboard box with small holes cut in the bottom.
Frequently asked questions
Got questions about sowing a wildflower garden? You’re not alone—here are some of the most common ones to help you get started with confidence!
When is the best time to plant wildflower seeds?
The ideal time depends on your climate, but early spring (March–April) or late summer (August–September) are the sweet spots. Spring planting gives flowers a head start, while fall sowing lets seeds establish roots before winter. In warm climates, you can even plant in winter—just avoid extreme heat or frost!
Do wildflowers need constant watering?
Not at all! Once established (after 2–3 weeks), wildflowers are drought-tolerant and thrive with minimal water. Water lightly every 2–3 days for the first few weeks to help seeds germinate, then let nature take over. Overwatering can even harm them—think of them as low-maintenance superstars!
Will wildflowers attract pests like mosquitoes?
Actually, the opposite! Wildflowers support pollinators (bees, butterflies, hummingbirds) and deter pests like mosquitoes by promoting biodiversity. Avoid stagnant water sources (like old tires) near your garden—those are mosquito magnets. A thriving wildflower meadow is a pollinator paradise, not a pest paradise!
Can I sow wildflowers in a small space, like a balcony or container?
Many wildflower mixes (like cosmos, zinnias, or bachelor’s buttons) grow beautifully in containers, window boxes, or even hanging baskets. Choose compact varieties and ensure good drainage. Just 1–2 square feet can make a difference for local pollinators—every little bit helps!
What if my wildflowers don’t grow?
Don’t worry—it’s often a matter of patience, soil prep, or timing. Check your seed packet for depth/light needs, ensure the soil isn’t compacted, and consider scarifying (lightly scratching) the soil to help seeds make contact. If you’re in a dry area, a thin layer of mulch can retain moisture. Most wildflowers are resilient—give them a season or two!
Are there wildflower alternatives for shady areas?
Yes! While many wildflowers love sun, shade-tolerant options include foxglove, bleeding heart, astilbe, or Virginia bluebells. These thrive in partial shade (2–6 hours of sunlight) and still attract pollinators. Just avoid heavy, wet soil—opt for well-draining, organic-rich soil instead.
Wrapping up and next steps
Sowing a wildflower garden is a rewarding way to support pollinators while adding beauty to your space—and you’ve got this! 🌸 With the right seeds, soil prep, and a little patience, you’ll soon enjoy a vibrant, buzzing paradise in just three months.
Start small if needed, but every wildflower makes a difference for bees, butterflies, and birds.
Ready to take the next step? Grab your seeds, mark your calendar, and begin planting! Whether you’re a seasoned gardener or a curious beginner, your wildflower garden will thrive with care—and soon, you’ll be the proud host of a pollinator party.