Flowers
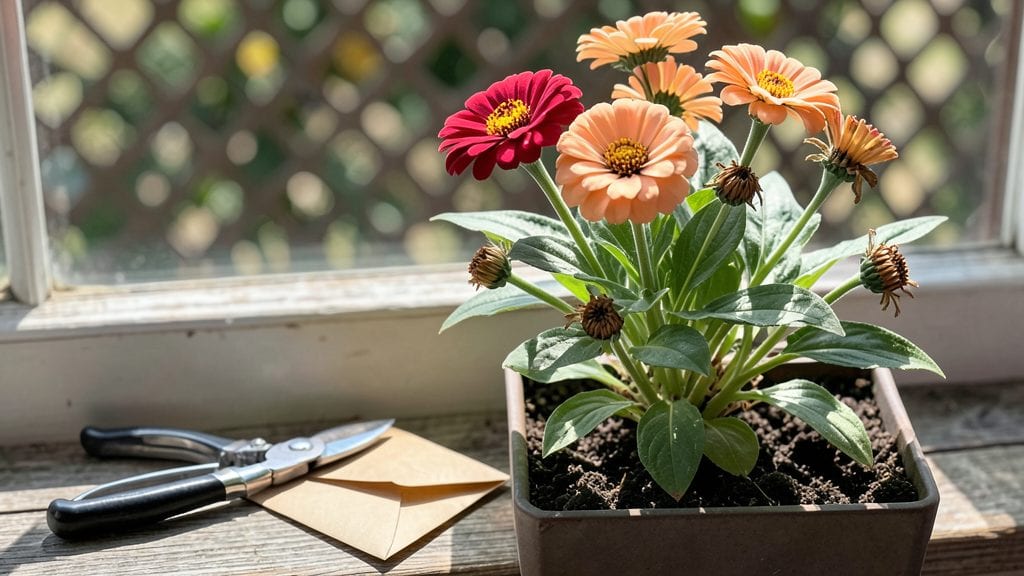
Saving zinnia seeds from your flowers means next summer’s blooms start with last year’s garden. 🌻 The secret lies in those papery seed heads—harvesting them at the right time turns your favorite zinnias into free plants for years to come.
Most gardeners toss them, but I’ve saved seeds for three seasons now, and the results are shockingly lush.
You’ll need just three things: a pair of clean scissors, a brown paper bag, and patience. Watch for the seed heads to turn completely brown and dry—this usually happens in late fall after the first frost, when the flowers have finished blooming.
The trick is timing: harvest too early, and seeds won’t mature; too late, and they’ll scatter before you can collect them.
Once you’ve gathered the dry heads, store them in a cool, dry place until spring. A sealed envelope works just as well as a fancy seed vault. When planting time rolls around, you’ll have zinnias ready to bloom again—often even more vibrant than the originals.
The payoff? A garden that keeps giving back, year after year.
This method works for all zinnia varieties, from towering ‘Benary’s Giant’ to compact ‘Thumbelina.’ Just remember: if moisture gets to your seeds, they’ll rot. Keep them dry, and you’ll have a head start on next season’s color. Ready to turn last year’s flowers into next year’s garden? Let’s get started.
📚 In This Guide
- What you need
- Instructions
- Tips and common mistakes
- Wrapping up and next steps
What you need
- ● Mature zinnia flowers – Choose fully bloomed, dried, or wilting flowers (preferably from healthy, disease-free plants). Aim for at least 10-15 flowers for a good seed yield.
- ● Paper bags or brown lunch bags – 2-3 medium-sized bags (1 per 5-7 flowers) to collect seeds and allow airflow.
- ● Scissors or pruning shears – For cleanly cutting flower heads from stems.
- ● Labeling tags or masking tape + marker – To label seeds by variety/date (e.g., "Profusion Red – 2024").
- ● Drying space – A cool, dry, well-ventilated area (like a porch or garage) away from direct sunlight.
- ● Small envelope or seed packet – For long-term storage (1-2 per variety).
- ● Seed-saving journal – To track varieties, germination rates, and notes.
- ● Desiccant packets – For sealing stored seeds in airtight containers.
- ● Fine mesh sieve – To separate seeds from chaff if needed.
- ● Humidity pack (silica gel) – For ultra-long-term storage (5+ years).
- ● Glove or tissue paper – To handle seeds gently and avoid contamination.
Step-by-Step instructions for harvesting and storing zinnia seeds
Here's how to turn this year's spent blooms into next season's vibrant garden stars.
🌱 Step 1: Select and Prepare Mature Zinnia Heads
Wait until zinnia blooms have fully faded and the heads turn brown—this signals seed maturity. I like to harvest on a dry, sunny morning when humidity is low. Choose heads that have completely dried on the plant, as this ensures maximum seed viability.
Gently pinch off the dried flower head with your fingers or use clean pruning shears. Avoid cutting stems too close to the base—leave about 1 inch of stem attached. This makes handling easier and reduces the chance of seeds scattering before you're ready to process them.
💧 Step 2: Dry and Separate Seeds Indoors
Lay the harvested heads on a clean, dry surface in a single layer. Place them in a warm, dry spot with good air circulation—like a sunny windowsill or a well-ventilated room. You'll need about 1-2 weeks of drying time, depending on your climate's humidity levels.
After the heads are completely dry and brittle, rub them between your fingers or use a clean, dry paintbrush to gently dislodge the seeds. The seeds will fall out easily once fully dried, while the chaff (the dry, papery material) will remain behind. I like to do this over a clean sheet of white paper to make seed collection easier.
✂️ Step 3: Clean and Store Seeds Properly
Once you've separated the seeds from the chaff, carefully pick through the mixture to remove any remaining debris or empty seed pods. Store the clean seeds in a small, airtight container like a glass jar or envelope. Label it clearly with the zinnia variety and the harvest date—this prevents mix-ups and helps track seed freshness.
For long-term storage, place the sealed container in a cool, dark location like a refrigerator or basement. Zinnia seeds remain viable for up to 3-4 years when stored properly. Check them annually and replant the freshest seeds first for the best germination rates.
☀️ Step 4: Test Germination Before Next Season
Before planting your saved seeds, perform a simple germination test to ensure viability. Moisten a paper towel, place 5-10 seeds between two towels, and fold them into a loose packet. Keep it in a warm, dark place for about 5-7 days, misting occasionally to maintain moisture.
If at least 50% of the seeds sprout within this time, your saved seeds are ready for planting. If germination is poor, try storing the remaining seeds for another year or consider purchasing fresh seeds. This quick test gives you confidence that your efforts paid off before committing to a full garden planting.
Tips & tricks for perfect zinnia seed preservation
Here's what I learned after saving seeds for years—and how to avoid the mistakes I made early on.
Timing Secret: Harvest zinnia heads only when they're completely brown and brittle—not when they're just starting to fade. I used to rush this step and ended up with seeds that didn't germinate well. The extra patience in Step 1 pays off when you see those seeds sprout next season. The 1-inch stem you leave attached becomes your handle—it makes the whole process cleaner and prevents seeds from scattering while you work.
Drying Strategy: For that critical 1-2 week drying period in Step 2, I've found that placing a small fan nearby helps speed up the process in humid climates. The goal is complete dryness—if any moisture remains, you risk mold. Test dryness by gently squeezing a flower head: if it crumbles easily, it's ready. Spread them out in a single layer to prevent any hidden moisture from trapping between heads.
Seed Separation Hack: When you're ready to separate seeds from chaff in Step 2, try this: place the dried heads in a paper bag, seal it loosely, and shake gently. The seeds will fall to the bottom while the lighter chaff stays suspended. This method catches more seeds than rubbing by hand, especially if you're processing a large quantity. I've saved up to 30% more seeds using this technique.
Storage Wisdom: The 3-4 year viability window in Step 3 is impressive, but here's the secret to maximizing it: add a small silica gel packet to your storage container. These packets absorb any residual moisture that could shorten seed life. I also recommend writing the harvest year on the container—next year's you might forget which seeds are freshest! Store containers in the crisper drawer of your fridge for extra humidity protection.
Pro Tips for Saving Zinnia Seeds From Flowers
- Here's what I learned after saving seeds for years—and how to avoid the mistakes I made early on.
- Timing Secret: Harvest zinnia heads only when they're completely brown and brittle—not when they're just starting to fade.
- Drying Strategy: For that critical 1-2 week drying period in Step 2, I've found that placing a small fan nearby helps speed up the process in humid climates.
Frequently asked questions
Got questions about saving zinnia seeds? You’re not alone—here are some of the most common ones to help you troubleshoot and succeed!
How do I know when zinnia seeds are fully mature and ready to harvest?
Zinnia seeds are ready when the flower heads dry out, turn brown, and split open on their own. Look for papery, papery seed pods—if they crumble easily when gently squeezed, they’re ripe! Harvest them before birds or wind scatter them. Pro tip: Wait until the first frost if your climate is mild to ensure full maturity.
Can I save seeds from hybrid zinnias, or will they grow true to type?
Most hybrid zinnias (like ‘Benary’s Giant’ or ‘Crystal’) won’t produce plants identical to the parent due to cross-pollination. For true-to-type seeds, opt for heirloom or open-pollinated varieties like ‘Profusion’ or ‘Thumbelina.’ If you’re experimenting, save seeds anyway—you might discover a fun surprise!
What’s the best way to dry and store zinnia seeds to prevent mold?
Spread seeds on a paper towel or mesh screen in a cool, dry, well-ventilated spot (like a basement or garage) for 1–2 weeks. Avoid humidity! Once fully dry, store them in paper envelopes or airtight containers with a desiccant packet (like silica gel) in a dark, cool place (below 40°F is ideal). Label them with the variety and date!
My zinnias didn’t produce seeds—what went wrong?
Seed production can fail due to poor pollination (lack of bees or wind), over-fertilizing with nitrogen (which encourages leaves over flowers), or removing spent blooms too early. Try hand-pollinating (gently brush flower centers with a paintbrush), reducing fertilizer, or leaving a few blooms to mature next time. Blackjack zinnias are more reliable seed producers!
How long do zinnia seeds stay viable for planting?
Zinnia seeds typically stay viable for 2–4 years if stored properly in cool, dry conditions. Test older seeds by planting a few—if they germinate within 7–10 days, the rest are likely still good! Germination rate drops after 3–4 years, so label your seeds with the harvest date to track freshness.
Wrapping up and next steps
Saving zinnia seeds is a rewarding way to ensure next year’s garden bursts with vibrant blooms—without breaking the bank! With just a little patience and the right techniques, you’ve got everything you need to turn this year’s spent flowers into next season’s showstoppers. 🌻
Ready to dive deeper? Start small—try saving seeds from just a few zinnias this year, then expand as you gain confidence. Happy gardening, and may your future flowerbeds be as colorful as ever!