
Flowers
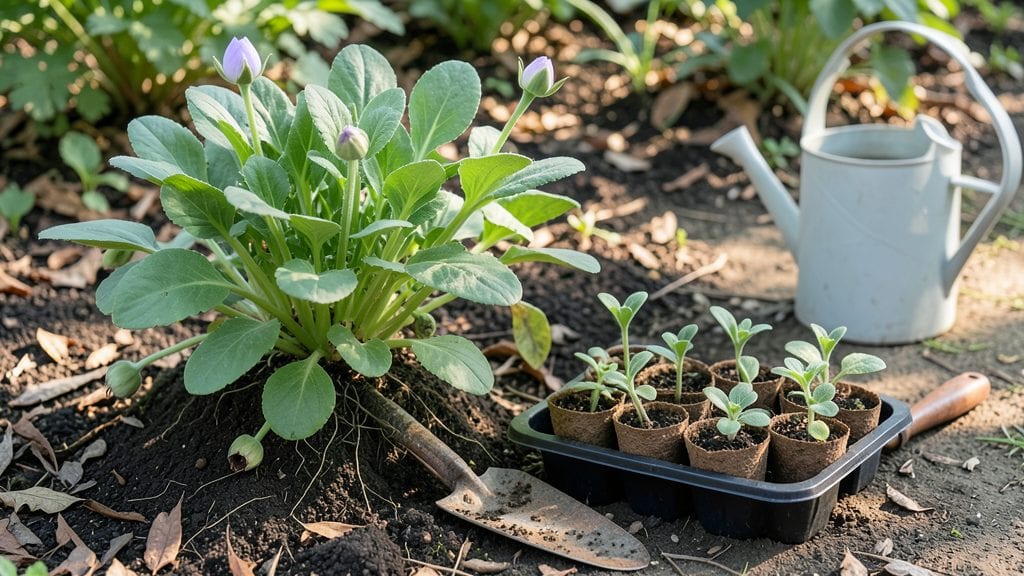
Planting balloon flower seeds unlocks a garden that blooms when most others fade—those unique, popcorn-like buds that burst into starry blue or purple blooms even after light frosts. 🌿 I’ve grown them in my Zone 5 garden for years, and they’ve never failed to deliver, whether planted in spring or fall.
The secret lies in their love of cool weather and well-drained soil, which means you can tuck them into spots where other perennials struggle.
You’ll need a sunny spot with at least 6 hours of light daily, loose soil amended with compost, and a little patience—balloon flowers take 2-3 years to reach their full, showy potential.
The seeds are tiny, so mix them with sand before scattering them ¼ inch deep and 12 inches apart to give roots room to establish. Water gently after planting to avoid disturbing them, and keep the soil consistently moist (but not soggy) until germination, which can take 2-4 weeks.
Once established, these hardy perennials reward you with drought tolerance and edible buds that taste like mild artichokes—though most gardeners grow them for their striking blooms.
The flowers attract pollinators and add height (18–24 inches tall) to borders, while their frost resistance means they often bloom into late fall. Just avoid overcrowding, which can lead to floppy stems or fungal issues.
If you’re planting in fall, do it 6-8 weeks before your first frost—the seeds need cold stratification to germinate well. For spring planting, wait until the soil warms to 50°F.
Either way, these plants thrive with minimal fuss, making them perfect for beginner gardeners or busy pollinator-friendly yards. Ready to add some cool-season drama to your garden?
📚 In This Guide
- What you need
- Instructions
- Tips and common mistakes
- Wrapping up and next steps
What you need
- ● Balloon flower seeds – Choose Platycodon grandiflorus seeds (available in seed packets or bulk). Aim for 5–10 seeds per plant or 100+ seeds for a full border.
- ● Well-draining potting mix – A blend of 50% peat moss, 30% perlite, and 20% compost works best for seedlings.
- ● Seed-starting trays or small pots – 2–3 inch diameter containers with drainage holes (or a seedling flat with individual cells).
- ● Grow lights or sunny windowsill – A south-facing window or LED grow lights (12–16 hrs/day) for seedlings.
- ● Watering can with a fine rose nozzle – Keeps soil moist without disturbing seeds.
- ○ Fertilizer (optional but helpful) – A balanced 10-10-10 or fish emulsion for young plants (dilute to half-strength).
- ● Gloves – Protects hands from soil and sharp seedling trays.
- ● Small hand trowel – For transplanting seedlings later.
- ○ Misting bottle – Keeps humidity high for germination (optional but recommended).
- ● Hardening-off tray (or shade cloth) – Helps acclimate seedlings to outdoor conditions before planting.
- ● Frost-resistant garden spot – USDA Zones 3–8 (balloon flowers love cool climates!). Choose a location with full sun to partial shade.
- ● Mulch (straw or shredded leaves) – 1–2 inches to retain moisture and protect roots in winter.
How to grow balloon flowers from seed in cool climates
These hardy annuals love cool weather and reward patience with striking, globe-shaped blooms. Here's how to get them started right.
🌱 Step 1: Time Your Planting for Cool Weather
Balloon flowers thrive when temperatures stay between 50-75°F—perfect for spring or fall planting. In cold regions, sow seeds 4-6 weeks before your last frost date for early blooms. If you're in a mild climate, you can even direct-sow in early spring or late summer for fall color.
I always check my frost dates first—planting too early means seeds may rot in cold, wet soil. Wait until the soil feels cool to the touch (around 50°F) and has started to thaw. A simple soil thermometer helps here; if it's consistently above 50°F, it's time to plant.
☀️ Step 2: Prepare the Soil for Best Germination
Balloon flowers prefer well-draining soil with a slightly acidic to neutral pH (6.0-7.0). Before planting, loosen the top 6 inches of soil with a garden fork to improve aeration. Mix in 1-2 inches of compost to provide nutrients without overwhelming the seeds.
Here's the thing—balloon flower seeds are tiny, so avoid heavy garden soil. If your native soil is dense, blend it with 20% perlite or coarse sand to prevent waterlogging. The goal is a loose, crumbly texture that lets roots spread easily. Rake the surface smooth after amending—you want a fine, even bed for planting.
💧 Step 3: Sow Seeds at the Right Depth and Spacing
Scatter seeds thinly over the prepared bed, pressing them just ¼ inch deep into the soil. These seeds need light to germinate, so don't bury them too deeply. I use a small piece of cardboard to mark the planting area—this prevents accidentally walking on the seeds and disturbing them.
Space seeds 12-18 inches apart for full-sized plants. If you're sowing in rows, keep them 18-24 inches apart to allow airflow and prevent fungal issues. Water gently with a fine mist or soaker hose until the soil is evenly moist but not soggy. Overwatering now can wash seeds away or cause them to rot.
⏰ Step 4: Provide Consistent Moisture Until Germination
Keep the soil consistently moist (but not waterlogged) until seeds germinate, which typically takes 10-21 days depending on temperature. A clear plastic dome or row cover helps retain moisture and warmth, speeding up germination. Remove it once seedlings appear to prevent damping-off disease.
Watch for the first true leaves—these look like small, rounded leaves (not the initial seed leaves). Once they appear, thin seedlings to 12 inches apart if they're crowded. I use small scissors to snip unwanted seedlings at soil level, leaving the strongest ones. This prevents transplant shock later.
🌿 Step 5: Fertilize and Maintain for Long-Lasting Blooms
After thinning, apply a balanced, slow-release fertilizer (like 10-10-10) at half-strength to encourage strong root growth. Balloon flowers are lightweight feeders, so too much fertilizer can lead to lush foliage but fewer blooms. I fertilize again 6-8 weeks after planting and once more mid-season.
Deadhead spent blooms regularly to encourage continuous flowering. These plants are drought-tolerant once established, but they'll reward you with more blooms if you water 1 inch per week during dry spells. Mulch with 1-2 inches of organic mulch to retain moisture and suppress weeds—just keep it 2 inches away from stems to prevent rot.
Tips & tricks for planting balloon flowers
Took me a while to figure these out, so here goes—these tricks will help you avoid the common pitfalls that turn promising starts into disappointing results.
Temperature Matters: The 50-75°F range isn't just a suggestion—it's critical for germination. I've seen seeds fail when planted too early in cold soil, even when frost dates were checked. Use a soil thermometer to verify temperatures before planting. If your spring is unpredictable, consider starting seeds indoors in a sunny window 2-3 weeks before your target outdoor planting date, then transplant when soil warms to 50°F. This gives you a head start on the season.
Soil Preparation Secret: Balloon flower seeds are so tiny that even a slight layer of compacted soil can prevent germination. After loosening the top 6 inches, I like to sprinkle a thin layer of vermiculite over the planting area—it helps retain moisture while keeping seeds just barely covered. This is especially helpful in windy conditions where seeds might otherwise blow away during watering. The goal is a texture so light that seeds can push through easily when they sprout.
Germination Timing: Those 10-21 days can feel like an eternity, but there's a trick to speed things up. Once you've planted, create a mini greenhouse effect by placing a clear plastic dome or row cover over the area. This traps warmth and humidity, often bringing germination down to the lower end of that range. Just remember to remove it as soon as you see the first sprouts—too much moisture afterward can cause damping-off disease. I check daily after day 7 if I'm eager!
Pro Tips for Planting Balloon Flowers
- Took me a while to figure these out, so here goes—these tricks will help you avoid the common pitfalls that turn promising starts into disappointing results.
- Temperature Matters: The 50-75°F range isn't just a suggestion—it's critical for germination.
- Soil Preparation Secret: Balloon flower seeds are so tiny that even a slight layer of compacted soil can prevent germination.
Frequently asked questions
Got questions about growing these charming, frost-resistant blooms? Here are some of the most common concerns—and their easy answers!
When is the best time to plant balloon flower seeds?
Balloon flowers (Platycodon grandiflorus) thrive in cool weather, so plant seeds indoors 8–10 weeks before your last frost (early spring) or directly outdoors in fall—they’ll self-sow happily! If your climate is mild, you can even sow seeds in early spring. Just keep soil temps below 70°F (21°C) for best germination.
Can balloon flowers survive frost or winter?
These hardy perennials are USDA zones 3–8 tolerant and often re-bloom after frost. In colder regions, mulch around the base in late fall to protect roots. Young seedlings may need winter protection (like row covers), but mature plants are tough as nails—even rebounding after light freezes!
Why aren’t my balloon flower seeds germinating?
Try these fixes if seeds aren’t sprouting:
- Light exposure: Keep seeds on the soil surface—they need sunlight to germinate (unlike many flowers).
- Moisture: Use a spray bottle to keep soil damp, not soggy. A humidity dome helps!
- Patience: Germination can take 2–4 weeks (or longer in cold soil).
- Temperature: Ideal range is 60–70°F (15–21°C). If too hot, move to a cooler spot.
If all else fails, try stratifying seeds (chill in the fridge for 4–6 weeks) to mimic winter conditions.
Are there any alternatives to planting seeds?
Yes! If seeds feel tricky, consider:
- Transplants: Buy young plants from nurseries in early spring or fall for instant blooms.
- Division: Split mature clumps in early spring or fall—each section will root easily.
- Cutting propagation: Root stem cuttings in water or soil (though this is less common for balloon flowers).
Pro tip: Deadhead spent blooms to encourage more flowers—and save seeds from your own plants for next year!
What pests or diseases should I watch for?
Balloon flowers are generally low-maintenance, but keep an eye out for:
- Slugs/snails: These love young seedlings. Use beer traps or diatomaceous earth.
- Powdery mildew: If leaves look dusty, improve airflow and avoid overhead watering.
- Aphids: Spray with soapy water if you spot sticky residue on buds.
Most issues are preventable with well-draining soil and moderate watering (let soil dry slightly between waterings).
Wrapping up and next steps
Planting balloon flower seeds is a rewarding way to add vibrant, frost-resistant blooms to your garden—even in cooler climates! 🌸 With the right soil, sunlight, and patience, these hardy plants will flourish with minimal fuss.
Whether you’re a beginner or a seasoned gardener, their resilience and striking colors make them a must-try.
Ready to dive in? Start by gathering your supplies, following the steps above, and watch your garden transform! Happy planting—your future blooms will thank you! 🌱