Flowers
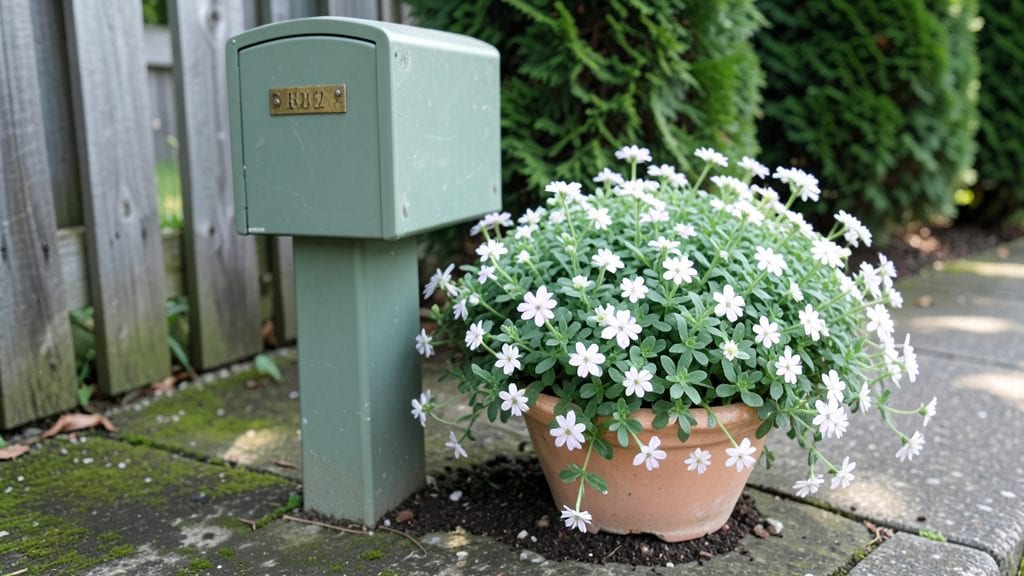
Transforming your mailbox area into a vertical garden with flower pots is one of the easiest ways to add charm without taking up extra space. 🌸 I used to think mailbox decorating was just about flags and numbers, but a few well-placed pots with the right plants can turn that spot into your front yard’s star feature.
The best part? You don’t need a green thumb—just a few low-maintenance plants and a little creativity.
Start with weather-resistant pots in sizes that fit your mailbox post (6- to 12-inch diameters work perfectly). Succulents like sedum or echeveria thrive in these conditions, while trailing plants like sweet potato vine or lobelia add movement and color.
For a pop of seasonal interest, swap out pots every few months—spring for tulips, summer for petunias, and fall for ornamental kale.
You’ll end up with a year-round display that’s both functional and eye-catching. The right plants will handle heat, rain, and occasional neglect, while the elevated pots keep them safe from pets and curious critters.
Plus, the vertical arrangement makes maintenance a breeze—no bending, no weeding, just a quick spritz with water when needed.
Works for any mailbox style, from rustic metal to sleek modern. The key is balancing plant heights and colors so the display feels intentional, not cluttered. Once you see how quickly neighbors start asking for tips, you’ll wonder why you didn’t try this sooner!
📚 In This Guide
- What you need
- Instructions
- Tips and common mistakes
- Wrapping up and next steps
What you need
- ● Flower pot or planter: A sturdy, weather-resistant container (e.g., ceramic, plastic, or metal) with a minimum depth of 6–8 inches and drainage holes (or drill your own!). Size: 12–18 inches wide to fit near your mailbox.
- ● Potting soil: 1–2 gallons of high-quality, well-draining potting mix (avoid garden soil—it compacts too much!). Look for blends labeled for containers or flowers.
- ● Drainage layer: 1–2 inches of gravel, perlite, or small pebbles to prevent root rot.
- ● Plants: Choose compact, mailbox-friendly flowers like: Succulents (e.g., Sedum or Echeveria)
- ● Petunias or geraniums (for vibrant color)
- ● Creeping thyme or moss (for a lush, green look)
- ● Miniature roses or lavender (for fragrance)
- ● Watering can or spray bottle: A small handheld watering can (8–16 oz) or a spray bottle for gentle hydration.
- ○ Optional supports: 1–2 small stakes or plant ties if using taller flowers (e.g., geraniums).
- ● Gloves: A pair of gardening gloves to protect your hands from soil and thorns.
- ● Trowel or small shovel: For easy soil handling and planting.
- ● Measuring cup or ruler: To ensure proper soil depth and drainage layer thickness.
- ● Fertilizer: Slow-release granules or liquid fertilizer (follow package instructions).
- ○ Decorative touches (optional): Paint or chalk to personalize your pot
- ● Solar-powered lights for evening ambiance
- ● Small figurines or pebbles for a whimsical look
- ● 🌡️ Check your climate: If you’re in a hot, dry area, opt for drought-tolerant plants like succulents or lavender.
- ● ✨ Double-check drainage: No holes? Poke a few with a drill or hammer to keep roots happy.
- ● 🎯 Plant in layers: Place taller flowers in the back and shorter ones in the front for a balanced look.
Step-by-Step guide to creating stunning mailbox flower pots
Transform your mailbox into a vertical garden that steals the show with these simple steps.
🪴 Step 1: Choose and Prepare Your Mailbox Planter
Start with a sturdy mailbox planter that has drainage holes—this prevents root rot and keeps your flowers healthy. If your mailbox doesn’t have them, drill ¼-inch holes in the bottom using a power drill. Line the inside with landscape fabric to hold soil while allowing excess water to escape. This fabric acts like a barrier, keeping soil in place while letting water drain freely.
Here's the thing—if your mailbox planter is shallow, you’ll want to use lightweight potting mix. Fill it ¾ full with the mix, leaving room for plants and a little extra soil for settling. Press down gently to remove air pockets, but don’t compact it too tightly. You want roots to grow easily, not struggle through dense soil.
🌱 Step 2: Select and Plant Your Flowers
Pick compact, drought-tolerant flowers that thrive in containers, like petunias, geraniums, or trailing lobelia. These varieties handle small spaces and don’t need constant watering. Remove each plant from its nursery pot and gently loosen the roots if they’re circling—this encourages them to spread outward in their new home. Place 3-4 plants in the planter, spacing them 3-4 inches apart for even growth.
Dig small holes in the soil, just deep enough to cover the roots but not bury the stems. The top of the root ball should sit ½ inch below the rim of the planter. Press the soil around the roots lightly to secure them, then water deeply until it drains from the bottom holes. This ensures the roots make contact with moisture right away, helping them establish quickly.
☀️ Step 3: Position and Maintain Your Mailbox Garden
Place your mailbox planter in a spot that gets at least 6 hours of sunlight daily. Most flowers need this much light to bloom properly, and a south- or west-facing location works best. If your mailbox is in a shady spot, opt for shade-tolerant plants like impatiens or ferns instead. You’ll notice a difference in growth within a week—plants in full sun will perk up and start blooming faster.
Water your mailbox garden every 2-3 days, checking the soil first. Stick your finger 1 inch deep—if it feels dry, it’s time to water. Avoid overhead watering, which can wash soil out of the planter or encourage fungal diseases. Instead, water at the base until you see moisture trickle from the drainage holes. This keeps roots hydrated without disturbing the plants.
✂️ Step 4: Prune and Refresh for Long-Lasting Beauty
Deadhead spent blooms regularly to encourage more flowers and keep your mailbox looking fresh. Pinch off faded flowers with your fingers or use clean pruning shears. This simple step tricks the plant into focusing energy on producing new blooms instead of seeding. You’ll see a surge in new flowers within 10-14 days of consistent deadheading.
Every 4-6 weeks, add a slow-release fertilizer to the soil to feed your plants. Mix 1 tablespoon of granular fertilizer into the top 1 inch of soil, then water it in. This gives your flowers a steady supply of nutrients without overloading them. If you notice leaves turning yellow or growth slowing, it’s a sign your plants need more food—just repeat the process.
Tips & tricks for perfect mailbox flower pots
These small but mighty details make all the difference in keeping your vertical garden thriving for months.
Drainage is Non-Negotiable: In Step 1, if your mailbox planter lacks drainage holes, don't skip this step—root rot will ruin your flowers faster than you can say "wilted petunias." Use a power drill to create those ¼-inch holes precisely. I've seen too many mailbox gardens fail because people skipped this, thinking "it'll be fine." Trust me, it won't be. The landscape fabric creates that perfect barrier that keeps soil in while letting excess water escape—don't substitute with regular fabric or paper towels.
Soil Science Matters: When filling your planter ¾ full with potting mix in Step 1, choose a blend specifically formulated for containers. Regular garden soil compacts too much and drains poorly. Pro tip: Add a handful of perlite or vermiculite to improve aeration—this helps roots breathe, especially in shallow planters. Press down gently but firmly to eliminate air pockets without compacting the soil too tightly.
Sunlight Strategy: The 6 hours of sunlight mentioned in Step 3 is non-negotiable for most flowering plants. If your mailbox gets less, choose shade-tolerant varieties like impatiens or ferns. I've noticed that even partial shade can cause leggy growth and fewer blooms. For maximum impact, position your planter where it gets morning sun and afternoon shade—this prevents wilting during hot afternoons while still providing enough light for vibrant flowers.
Watering Wisdom: That 1-inch deep soil check in Step 3 is your best friend. I've learned the hard way that overhead watering can wash away precious soil and disturb delicate roots. Use a watering can with a narrow spout to direct water right at the base. For extra insurance against fungal diseases, water in the early morning so any moisture on leaves can evaporate during the day.
Pro Tips for Mailbox Flower Pot
- These small but mighty details make all the difference in keeping your vertical garden thriving for months.
- Drainage is Non-Negotiable: In Step 1, if your mailbox planter lacks drainage holes, don't skip this step—root rot will ruin your flowers faster than you can say "wilted petunias."
- Soil Science Matters: When filling your planter ¾ full with potting mix in Step 1, choose a blend specifically formulated for containers.
Frequently asked questions
Got questions about transforming your mailbox into a blooming vertical garden?
Here are answers to the most common ones—so you can dive in with confidence!
What’s the best type of mailbox flower pot for beginners?
Start with lightweight, pre-drilled mailbox planters made from durable materials like fiberglass or lightweight plastic. Avoid heavy ceramic—it can damage mailbox hardware. Look for ones with drainage holes and secure mounting brackets for stability.
When is the ideal time to plant mailbox flower pots?
Plant in early spring (after the last frost) or late summer for a fall display. Succulents and drought-tolerant plants thrive in summer heat, while annuals like petunias or pansies love cooler spring/fall temps. Check your USDA zone for local timing!
How often should I water mailbox flower pots?
Water daily in hot weather (especially in full sun) and every 2–3 days in cooler conditions. Pots dry out faster than ground soil—check moisture by sticking your finger 1 inch deep. Pro tip: Use self-watering pots or a drip irrigation kit to keep plants happy without overwatering.
What if my mailbox pot falls off or looks unbalanced?
Ensure your pot has secure mounting brackets and is screwed directly into the mailbox post (not just the box itself). For extra stability, add a weighted base or use a mailbox planter with a built-in hanger. Avoid overloading with heavy soil—opt for lightweight potting mix.
Can I use mailbox pots for herbs or vegetables instead of flowers?
Compact herbs like basil, thyme, or chives thrive in mailbox pots, as do shallow-rooted veggies like lettuce or radishes. Just ensure the pot has enough depth (at least 6–8 inches) and use a high-quality potting soil. Avoid heavy producers like tomatoes—they’ll outgrow the space!
Wrapping up and next steps
Transforming your mailbox area into a vibrant vertical garden is a creative and rewarding way to maximize small spaces! With the right mailbox flower pots, you can add beauty, functionality, and even a touch of whimsy to your home’s curb appeal.
Whether you’re a seasoned gardener or just starting out, this project is perfect for bringing nature closer while keeping maintenance simple.
Ready to get growing? Start by gathering your supplies, following the steps with confidence, and let your green thumb shine! Which flowers or herbs will you plant first? 🌿✨