Flowers
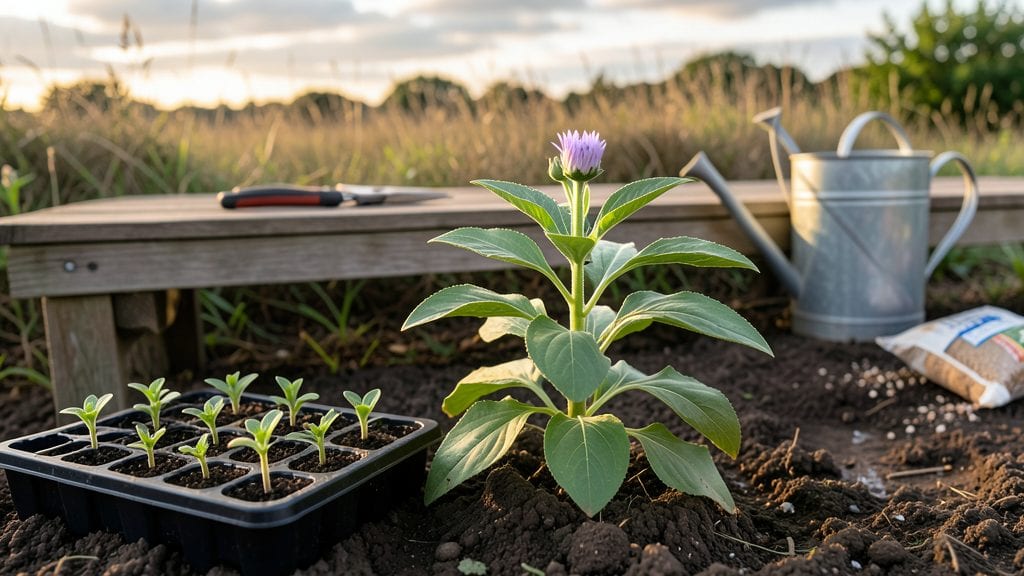
Starting a flower bed for beginners isn’t as intimidating as it seems—especially when you break it down into six simple stages that actually work. I’ve turned more than a few scraggly patches into vibrant displays by following this exact process, and the best part?
You don’t need a green thumb or fancy tools to pull it off. The secret lies in smart site selection, prepping the soil right, and choosing plants that forgive mistakes (because let’s be honest, we all make them at first).
Here’s the thing—most beginners overthink the soil, but the real game-changer is sunlight. Pick a spot that gets at least 6 hours of sun daily, and your flowers will thrive without extra fuss.
Once you’ve marked your space, clear weeds, loosen the soil with a shovel or tiller, and mix in a 3-inch layer of compost—this feeds your plants for months. I’ve seen firsthand how this small step cuts down on watering and keeps blooms coming all season.
By the time you’re done, you’ll have a low-maintenance bed bursting with color that needs just 15 minutes of care a week. Imagine stepping outside to cut fresh-cut flowers for your table or watching bees buzz happily among your plants—it’s easier than you think.
The key is starting small, picking hardy annuals like marigolds or zinnias, and letting nature do the rest.
This method works for any yard size, from tiny urban patches to full backyard plots. Whether you’re fixing up a tired lawn corner or creating a brand-new garden space, these steps keep things simple and stress-free. Let’s get those shovels in the ground!
📚 In This Guide
- What you need
- Instructions
- Tips and common mistakes
- Wrapping up and next steps
What you need
- ● Garden soil or topsoil: 2–3 cubic yards (depending on bed size) – opt for well-draining, nutrient-rich soil or mix in compost.
- ● Mulch: 2–3 bags (straw, shredded bark, or pine needles) – helps retain moisture and suppress weeds.
- ● Organic fertilizer: 1–2 bags (slow-release or granular) – boosts plant health without harsh chemicals.
- ● Plants: 6–12 young perennials, annuals, or bulbs (choose based on your climate and sunlight).
- ● Garden gloves: 1 pair – protects your hands from thorns and soil.
- ● Watering can or hose: 1 – for consistent hydration.
- ● Garden trowel: 1 – for digging small holes.
- ● Garden fork or spade: 1 – for turning soil and removing weeds.
- ● Wheelbarrow: 1 – for hauling soil, mulch, or tools.
- ● Measuring tape: 1 – to mark bed dimensions accurately.
- ● String and stakes: 1 set – for outlining your design.
- ● Pruners: 1 pair – for trimming plants as needed.
- ● Sunlight assessment: Note how much sun your bed gets (full sun, partial shade, or full shade).
- ● Water source proximity: Ensure easy access to water your new plants.
- ● Weed removal: Clear existing grass, weeds, or debris from the area.
- ● Location planning: Choose a spot that’s visible but not overly trafficked.
Step-by-Step instructions for creating a beginner-friendly flower bed
Here's how to transform a blank space into a thriving flower bed without the guesswork.
Choose and Prepare the Perfect Location
Pick a spot that gets at least 6 hours of sunlight daily—most flowering plants need full sun to bloom their best. Avoid low-lying areas where water pools after rain, as soggy soil invites root rot. I like to sketch the space on paper first, marking sun exposure patterns throughout the day.
Clear the area of grass, weeds, or debris using a shovel or garden fork. Dig down about 6-8 inches to loosen the soil and improve drainage. If your soil feels compacted or clay-heavy, mix in 2-3 inches of compost to lighten it. You'll know you've done enough when the soil crumbles easily between your fingers.
Define the Flower Bed Shape and Edges
Use a garden hose or spray paint to outline your design—rectangular beds are easiest for beginners, but curved edges add visual interest. Keep the width no more than 4 feet so you can reach the center without stepping on the bed. I often use landscape fabric along the edges to suppress weeds while allowing water to penetrate.
For a clean finish, install edging materials like bricks, stones, or metal strips. Press them 1-2 inches into the ground at a slight angle (tilted outward) to prevent soil from spilling over. This also makes future weeding much easier. Leave the center area clear for planting.
Test and Amend the Soil
Grab a handful of your soil and squeeze it—if it forms a tight ball that doesn't crumble, it's too clay-heavy. For better drainage, work in 2-3 inches of coarse sand or perlite per square foot. If the soil feels gritty like beach sand, it's too sandy and needs 2-3 inches of peat moss or compost to retain moisture.
Spread a 1-inch layer of balanced 10-10-10 fertilizer over the entire bed and gently mix it into the top 4-6 inches of soil. Water the area thoroughly to help the amendments settle. You'll see improved soil structure within a few weeks—plants will grow more vigorously and require less frequent watering.
Plan Your Plant Layout for Long-Term Success
Group plants by their sunlight and water needs to simplify maintenance. Place taller flowers like delphiniums or snapdragons at the back, medium-height varieties like salvia in the middle, and low-growing plants like alyssum or creeping thyme at the front. This creates a natural tiered effect that looks fuller immediately.
Space plants according to their mature size—check the back of seed packets or plant tags for guidelines. For example, marigolds need 12-18 inches between plants, while petunias can handle 6-10 inches. Dig holes just deep enough to accommodate the root ball, then water each hole before planting to help roots settle in.
Plant with Care and Mulch for Protection
Gently remove plants from their containers and loosen any circling roots with your fingers. Place each plant in its hole so the top of the root ball sits even with the surrounding soil—burying stems too deep can cause rot. Press soil firmly around the base to eliminate air pockets, then water deeply to help roots establish contact with the soil.
Spread 2-3 inches of organic mulch (like shredded bark or straw) over the entire bed, keeping it 2 inches away from plant stems to prevent moisture buildup against the bark. Mulch conserves water, suppresses weeds, and regulates soil temperature. You'll notice fewer weeds popping up and less frequent watering needs after applying mulch.
Water and Maintain for Continuous Blooms
Water the bed 1-2 inches per week, either through rainfall or supplemental watering. Use a soaker hose or drip irrigation to deliver water slowly at the base of plants—this prevents fungal diseases that spread from wet foliage. Water in the early morning so leaves dry quickly, reducing the risk of mildew.
Fertilize every 4-6 weeks during the growing season with a balanced liquid fertilizer (like 20-20-20). Deadhead spent blooms regularly by pinching off faded flowers with your fingers or clean pruners—this encourages more flowers and keeps the bed looking neat. Within 6-8 weeks, you'll see a lush, colorful display that keeps improving all season.
Tips & tricks for perfect beginner flower beds
Between us, these small details make the difference between a struggling flower bed and one that thrives from day one. Here's what nobody tells you about creating a foolproof design.
Sunlight Secret: That "6 hours of sunlight" guideline is non-negotiable for most flowering plants, but here's the thing: morning sun (east-facing beds) is gentler than afternoon sun (west-facing). If your location gets intense afternoon heat, consider adding shade-loving annuals like impatiens or begonias at the front. You'll notice they handle the heat better while still getting enough light to bloom.
Soil Test Trick: When you're testing your soil in Step 3, don't just squeeze it—add a drop of water. If it beads up instead of soaking in, you definitely need that 2-3 inches of compost. For clay-heavy soil, I've found mixing in a handful of perlite per square foot works wonders for drainage without changing the texture too drastically. The goal is soil that crumbles like cake crumbs, not bricks.
Plant Spacing Hack: The spacing guidelines in Step 4 are minimum distances, but here's my game-changer: arrange plants in a staggered pattern rather than straight rows. This creates a denser look immediately and reduces gaps where weeds can take over. For example, place marigolds in a diamond pattern rather than straight lines—they'll fill in faster and look more natural.
Mulch Strategy: That 2-3 inches of mulch in Step 5 isn't just decoration—it's your secret weapon. Apply it right after planting while the soil is still moist, then water again to settle it. I've seen beds with mulch stay weed-free for months, while unmulched beds need weekly weeding. Just remember to pull mulch back 2 inches from stems to prevent rot, and replace it every spring to maintain effectiveness.
Pro Tips for Start A Flower Bed For Beginners
- Between us, these small details make the difference between a struggling flower bed and one that thrives from day one.
- Sunlight Secret: That "6 hours of sunlight" guideline is non-negotiable for most flowering plants, but here's the thing: morning sun (east-facing beds) is gentler than afternoon sun (west-facing).
- Soil Test Trick: When you're testing your soil in Step 3, don't just squeeze it—add a drop of water.
Frequently asked questions
Got questions? You’re not alone! Starting a flower bed can feel overwhelming at first, but these answers will help you feel confident and ready to dig in.
What’s the best time of year to start a flower bed?
The ideal time depends on your climate, but spring or early fall are the gold standards. Soil is workable, weeds are less aggressive, and plants have time to establish roots before extreme heat or cold. In warmer zones, winter planting can work too—just avoid frost-prone periods!
Do I need to remove all the grass before planting?
Not necessarily! For small beds, smothering grass with cardboard or landscape fabric (covered with mulch) can kill it over time. For larger areas, consider sod-cutting or herbicide (follow label instructions carefully). If you’re patient, you can also dig out grass in sections—just wear gloves and take breaks!
Can I start a flower bed on a budget?
Skip expensive soil mixes by using compost, leaves, or grass clippings for mulch. Buy seeds instead of seedlings (they’re cheaper and offer more variety), and raid local green waste programs for free mulch or wood chips. Even repurposed containers (like old buckets) can hold small flower pots!
How do I keep pests and weeds out of my new flower bed?
Prevention is key! Mulch heavily (2–3 inches) to block weeds, and choose native plants (they’re pest-resistant). For stubborn weeds, pull them by hand when soil is moist. Introduce beneficial insects like ladybugs or use organic sprays like neem oil if pests appear. A little vigilance goes a long way!
What if my soil is rocky or poor-quality?
No worries—you can still make it work! Amend the soil with compost or aged manure to improve texture and nutrients. For rocky areas, plant shallow-rooted flowers (like pansies or ajuga) or create raised beds with a mix of topsoil and compost. If drainage is poor, add sand or perlite to loosen the soil.
How long until I see flowers?
Patience pays off! Annuals (like marigolds or zinnias) may bloom in 6–8 weeks, while perennials (like coneflowers) could take a season or two to establish and flower. Focus on healthy foliage first—lush leaves mean happy blooms later!
Wrapping up and next steps
Starting your first flower bed is a rewarding journey that brings beauty, joy, and a deeper connection to nature.
You’ve got this! 🌸 By choosing the right location, preparing the soil, selecting the perfect plants, and maintaining your garden with care, you’re well on your way to creating a stunning outdoor space.
Now that you’re armed with these 6 simple steps, the next logical move? Plant that first seed or bulb—today! Watch your garden grow, and don’t forget to celebrate every little bloom along the way. Happy gardening! 🌱