Container Gardens
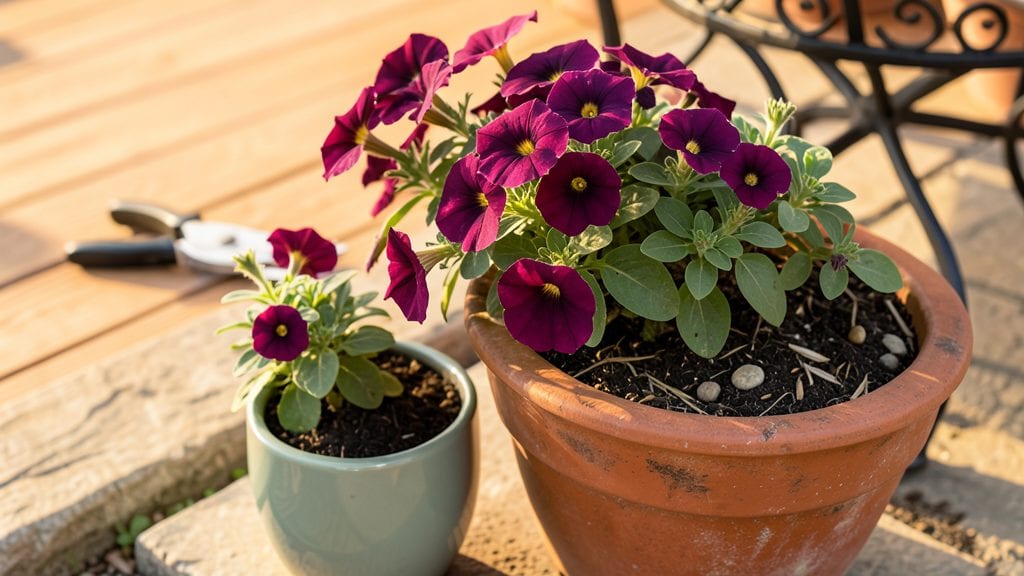
Finding cheap big flower pots that don’t break the bank but still make a statement? I’ve scoured thrift stores, hardware aisles, and online deals to find the best budget-friendly options that hold tall blooms without draining your wallet.
These containers transform small spaces into dramatic garden displays—think sunflowers towering over your patio or hydrangeas spilling over a balcony railing.
The secret isn’t sacrificing quality for price—it’s knowing what to look for. Plastic pots (like those sturdy 5-gallon buckets) are lightweight and affordable, while fiberglass or resin options mimic expensive ceramics without the cost.
Terracotta, the classic choice, stays budget-friendly if you hunt for oversized ones at garden sales. Just watch for cracks—those can mean hidden expenses later.
What you’ll love most? How these big pots solve two problems at once: they give tall plants the support they need while keeping your garden tidy. A single 12-inch-wide pot can hold a sunflower, ornamental grass, or even a small tomato plant—no more flopping stems or crowded beds.
And with the right drainage holes (or a DIY fix), you avoid soggy roots and wilting blooms.
Here’s the twist: these pots aren’t just for flowers. Use them to elevate herbs, grow dwarf fruit trees, or even create a vertical garden with stacked containers. The key is matching the pot size to your plant’s ambition—so let’s find the perfect fit for your space and budget.
📚 In This Guide
- What you need
- Instructions
- Tips and common mistakes
- Wrapping up and next steps
What you need
- ● Large containers: 2-4 big flower pots (or large plastic bins, buckets, or even old bathtubs—aim for at least 12-18 inches in diameter and 12+ inches deep). Pro tip: 💡 Check dollar stores or thrift shops for cheap finds!
- ● Drill or screwdriver: For creating drainage holes (if your pots don’t already have them).
- ● Potting soil: 1-2 bags of high-quality, well-draining potting mix (avoid garden soil—it compacts too much!).
- ○ Drainage material: 1-2 inches of small pebbles, gravel, or broken pottery pieces (optional but highly recommended to prevent root rot).
- ● Tall plants: Choose fast-growing, deep-rooted varieties like sunflowers, cannas, or tall grasses (check local nurseries for budget-friendly starter plants).
- ○ Decorative elements (optional but fun!): Paint or chalk (for customizing pots)
- ● Twine, lace, or fabric scraps (for a rustic or boho look)
- ● Small mirrors, beads, or mosaic tiles (for a creative touch)
- ● Sunlight check: Ensure your chosen spot gets at least 6 hours of sunlight daily (most tall blooms love full sun!).
- ● Weather prep: If using outdoor pots, pick lightweight materials (like plastic) for easy moving during rain or wind. ✨
- ● Budget hack: Split the cost by swapping pots with neighbors or friends—double the display, zero extra spending! 💸
How to create a space-saving garden display with affordable large pots
Here's how to transform big, budget-friendly pots into a stunning vertical garden showstopper.
Choose Your Containers and Base Materials
Start by selecting 4 large, lightweight pots (at least 12-16 inches in diameter) that fit your space and budget. Plastic or fiberglass options are affordable and durable, while terracotta adds rustic charm but requires more frequent watering. Look for pots with drainage holes—if they don’t have them, drill your own to prevent root rot.
For the base display, you’ll need a stable, flat platform—like a wooden pallet, large tray, or even a repurposed shelf. Ensure it’s level and can support the weight of pots filled with soil and plants. I like to use a 2x4-inch wooden frame for extra stability, especially if stacking pots vertically.
Prepare the Pots for Planting
Fill each pot with high-quality potting mix (avoid garden soil—it compacts and drains poorly). Leave 1-2 inches of space at the top to prevent spills when watering. For tall blooms like sunflowers or delphiniums, mix in a slow-release fertilizer to give roots a nutrient boost right away.
Here’s the trick: layer the soil differently in each pot. For the tallest plants, mound soil higher at the center to create a natural support for stems. For shorter flowers, keep the soil level. This prevents leggy growth and keeps plants upright as they mature.
Arrange Pots for Maximum Impact
Place the tallest pots at the back or center of your display, with shorter pots in front or to the sides. This creates a staircase effect that draws the eye upward. If using a vertical setup, secure pots to the frame with landscape fabric or bungee cords to prevent tipping in windy conditions.
Group pots by color or bloom time for a cohesive look. For example, pair early-blooming snapdragons with late-summer cosmos. This ensures your display stays vibrant from spring through fall. Space pots 6-12 inches apart to allow airflow and easy maintenance.
Plant and Water for Long-Lasting Blooms
Dig a hole in each pot twice as wide as the plant’s root ball but no deeper. Gently remove the plant from its nursery pot, loosen the roots, and place it in the hole. Fill the gap with soil and press lightly to eliminate air pockets. Water immediately to help roots settle.
Water deeply every 2-3 days until the top 1-2 inches of soil feel dry. Tall plants like hollyhocks or foxgloves need more frequent watering—check soil moisture daily in hot weather. Mulch the surface with 1 inch of organic mulch to retain moisture and suppress weeds.
Maintain and Enjoy Your Vertical Garden
Fertilize every 4-6 weeks with a balanced liquid fertilizer to keep blooms abundant. Deadhead spent flowers regularly to encourage new growth. If pots start to lean, stake taller plants with bamboo stakes or spiral ties for support.
Rotate pots every few weeks so all sides get even sunlight. This prevents plants from growing lopsided. With this setup, your space-saving display will thrive for years—without breaking the bank!
Tips & tricks for perfect space-saving garden displays
Transforming big pots into a stunning vertical garden doesn't have to be complicated—just a few simple tricks make all the difference. Here's what I've learned from years of experimenting with these displays.
Container Stability: When stacking pots vertically, use a 2x4-inch wooden frame as your base—it's stronger than you'd think. For extra security, add landscape fabric strips wrapped around the pots and tied to the frame. This prevents wobbling in windy conditions and gives you peace of mind, especially with taller plants like sunflowers.
Soil Layering Technique: The trick in Step 2 about layering soil differently isn't just about looks—it's about plant health. For your tallest blooms, create a slight mound in the center of the pot. This naturally supports stems and prevents them from flopping over as they grow. For shorter plants, keep the soil level, but create a slight depression around the base to catch water and prevent runoff.
Watering Strategy: The instructions mention watering every 2-3 days, but here's the secret: water in the morning. This gives plants plenty of time to absorb moisture before evening heat evaporates it. For your tallest pots, water at the base rather than overhead—this prevents water from running down the stems and causing rot. A simple watering can with a narrow spout works perfectly for this.
Seasonal Plant Rotation: To keep your display vibrant all season, plan ahead for plant rotation. In early spring, use cool-season plants like pansies or violas. As temperatures rise, swap them for heat-loving flowers like zinnias or marigolds. This ensures continuous color without needing to replant. I keep a small notebook to track which plants thrive in which seasons—it's become my go-to reference.
Pro Tips for Cheap Big Flower Pots
- Transforming big pots into a stunning vertical garden doesn't have to be complicated—just a few simple tricks make all the difference.
- Container Stability: When stacking pots vertically, use a 2x4-inch wooden frame as your base—it's stronger than you'd think.
- Soil Layering Technique: The trick in Step 2 about layering soil differently isn't just about looks—it's about plant health.
Frequently asked questions
Where can I find cheap big flower pots without sacrificing quality?
Hit up thrift stores, dollar stores, or discount garden centers for sturdy options. Check online marketplaces like Facebook Marketplace or Craigslist for free or low-cost pots. Pro tip: Look for ceramic, plastic, or fiberglass—just ensure they have drainage holes (or drill them yourself!).
How do I know if a big pot is the right size for my plants?
Rule of thumb: Choose a pot at least 12 inches deep for tall blooms (like sunflowers or hollyhocks) and 2-3 inches wider than the plant’s root ball. Overpotting can lead to soggy soil, while undersized pots stunt growth. Pro tip: Group small pots together for a fuller look if one giant pot isn’t practical!
Can I reuse non-plant containers (like buckets or troughs) as big flower pots?
Clean buckets, bathtubs, or even wooden troughs work—just add drainage (poke holes or place pots inside with gravel). Line them with plastic if needed. Caution: Avoid treated wood or metal that could leach chemicals. Paint or decorate for a polished look!
What’s the best way to stabilize a cheap pot that wobbles or tips over?
Add weight! Fill the bottom 20% with rocks, broken pottery, or sand before adding soil. For outdoor pots, place them on a non-slip mat or nestle them into a larger decorative tray. Bonus: Group pots together for wind resistance—think of them as a garden team!
How do I keep big pots from cracking in freezing weather?
Move pots to a sheltered spot (like a garage or porch) before temps drop below freezing. If that’s not possible, wrap them in bubble wrap or frost cloth and empty them after the first frost. Warning: Never leave pots filled with water—they’ll crack like ice cubes!
What’s the easiest way to clean and reuse big pots year after year?
Soak pots in a 10% vinegar solution to kill algae/mold, then scrub with a brush. For stubborn grime, use a bleach-water mix (1:9 ratio) and rinse well. Store empty pots upside down to prevent pests and extend their life.
Wrapping up and next steps
Transforming your space with cheap big flower pots is easier—and more rewarding—than you think! 🌸 Whether you’re maximizing small balconies, brightening up patios, or adding vertical charm, these budget-friendly containers let your tall blooms shine without breaking the bank.
The key? Start small, customize creatively, and let your plants do the talking.
Ready to dive in? Grab a pot, pick your plants, and get growing! 🌱 Check out our plant care guides next to keep your garden thriving all season long.