Propagation
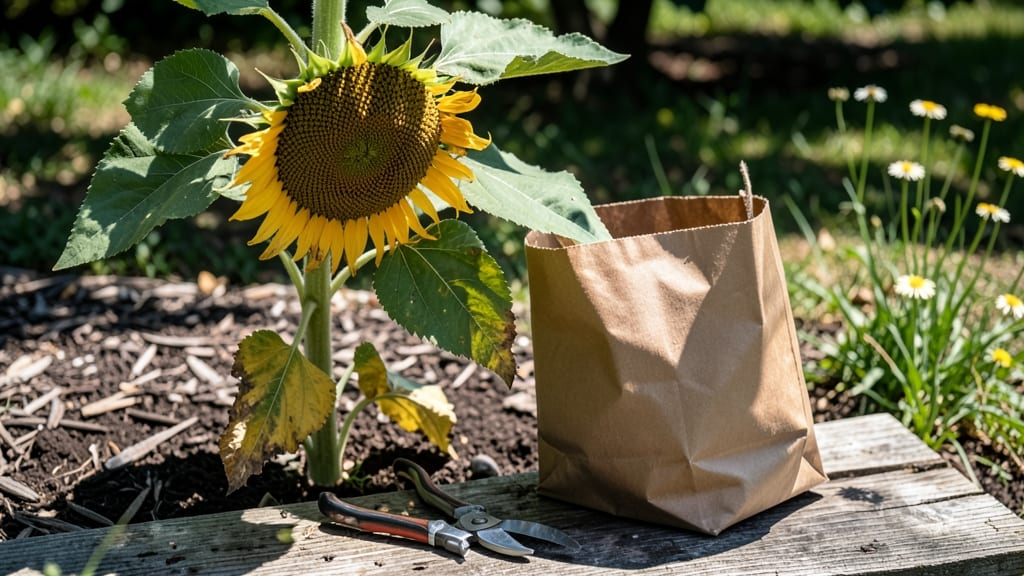
Removing seeds from sunflowers doesn't have to be a messy, time-consuming chore—it’s a quick process that yields high-quality seeds for next year’s garden. 🌻 I’ve perfected a method that takes less than 15 minutes per head, leaving you with clean, dry seeds ready for storage or replanting.
The key is timing: wait until the sunflower heads turn completely brown and the back of the seed pod feels papery to the touch. You’ll need just a few simple tools—a pair of gloves, a bowl or bucket, and a dry, sunny spot for drying.
This approach works for both single-stem varieties and towering giants, making it versatile for any garden.
Once you’ve extracted the seeds, you’ll have a stash of disease-free, viable seeds that store well for up to five years. The process is so straightforward that even first-timers can master it—no special skills required. Plus, you’ll have extra seeds to share or leave for wildlife if you prefer.
Whether you’re saving seeds for heirloom varieties or just want to avoid buying new ones, this method delivers fast, reliable results. Let’s walk through the exact steps to make it effortless.
📚 In This Guide
- What you need
- Instructions
- Tips and common mistakes
- Wrapping up and next steps
What you need
- ● Mature sunflowers – Choose fully bloomed, dried heads (brown and papery). Quantity: 1 or more, depending on your project.
- ● Sharp scissors or pruning shears – For cleanly cutting the flower head from the stem. Specs: Small, handheld, and easy to grip.
- ● Paper bag or breathable container – To collect seeds and prevent them from scattering. Size: Large enough to hold the flower head comfortably.
- ● Flat surface or tray – For laying out the flower head to work on. Tip: A baking sheet or cardboard works great!
- ○ Gloves (optional but recommended) – Protects hands from prickly stems and potential allergens.
- ● Rubbing alcohol (70% or higher) – For sterilizing tools if you’re reusing them for propagation.
- ● Fine-tooth comb or seed wrench – Makes removing stubborn seeds easier, especially for thick heads.
- ● Labeling tags or markers – If saving seeds for future planting, label them with the variety and date.
- ● Drying rack or mesh screen – For air-drying seeds before storage (if not planting immediately).
Step-by-Step instructions for harvesting sunflower seeds
Here's how to turn those towering blooms into next year's garden treasures—no mess, no fuss.
🌿 Step 1: Wait for Full Maturity
Harvest when the sunflower heads turn completely brown and the back of the bloom looks dry and papery. You'll notice the petals have all fallen off naturally, leaving just the seed head. If you harvest too early, seeds won't be fully developed and won't store well.
Gently twist the entire head off the stem with your hands—no tools needed. The head should separate cleanly if it's ready. If it resists, wait another 2-3 days for full maturity. Place the heads in a warm, dry spot indoors to finish drying completely.
✂️ Step 2: Remove Seeds from the Head
Once fully dry, place the sunflower head on a clean sheet of newspaper or a large paper bag. Hold the head firmly over the paper and rub the back of the head with your hands. Seeds will rain down like confetti—this is the fun part! You'll see them start to spill out after just a few rubs.
For stubborn seeds, use a fork or your fingers to gently pry them loose from the center. Don't worry about a few stragglers—they'll come out when you store the seeds. Collect all seeds in one spot to avoid losing any to drafts or pets.
💧 Step 3: Clean and Dry the Seeds
Spread the collected seeds on a baking sheet lined with a paper towel. Let them dry for 1-2 days in a warm, dry place with good airflow. This final drying step prevents mold during storage. You'll know they're ready when they're completely dry and hard to the touch.
Sift through the seeds to remove any debris, chaff, or small pieces of flower head. Store only the plump, full seeds in an airtight container in a cool, dark place. Properly dried seeds will last 2-3 years for planting.
🪴 Step 4: Store for Next Season (Optional)
Label your container with the sunflower variety and the year. Place it in a sealed jar or bag in your refrigerator or a dark pantry. The cool, dry environment slows seed aging. You'll want to plant these within 2-3 years for best germination rates.
If you're not saving seeds for planting, roast them in the oven at 325°F for 10-15 minutes for a tasty snack. Just watch them closely—they burn fast! This is the perfect way to enjoy your harvest while you wait for next year's sunflowers.
Tips & tricks for perfect sunflower seed extraction
Here's what I've learned after harvesting sunflowers for years—these little tricks make all the difference between a frustrating mess and a satisfying, seed-filled success.
Maturity Check: The back of the sunflower head should look completely dry and papery—almost like it's ready to crumble. If you see any green lingering, wait another day. I've learned the hard way that harvesting too early means seeds won't store properly and won't germinate well next season. The petals falling off is your best visual cue.
The Rubbing Technique: When you're rubbing the back of the head in Step 2, use a circular motion starting from the outer edges and working your way toward the center. This helps loosen seeds systematically rather than just shaking them out randomly. For really stubborn heads, try using a fork to gently pry at the center—it works like a natural seed extractor!
Drying Strategy: After collecting seeds, spread them on a baking sheet in a single layer. Place the sheet on a towel to absorb any excess moisture that might cause mold. I like to prop the baking sheet on a rack in my kitchen so air can circulate freely on all sides. The 1-2 day drying time is critical—don't rush it, even if you're eager to plant!
Storage Wisdom: For long-term seed storage, consider adding a small packet of silica gel to your container. This helps absorb any remaining moisture that could cause the seeds to sprout prematurely. I've found that storing seeds in the refrigerator extends their viability beyond the 2-3 year mark—some of my seeds have lasted 4 years with perfect germination.
Pro Tips for Remove Seeds From Sunflowers
- Here's what I've learned after harvesting sunflowers for years—these little tricks make all the difference between a frustrating mess and a satisfying, seed-filled success.
- Maturity Check: The back of the sunflower head should look completely dry and papery—almost like it's ready to crumble.
- The Rubbing Technique: When you're rubbing the back of the head in Step 2, use a circular motion starting from the outer edges and working your way toward the center.
Frequently asked questions
Got questions about removing sunflower seeds? You’re not alone! Here are some of the most common queries—and their simple solutions—to make the process even smoother.
How do I know when sunflower seeds are ready to harvest?
Sunflower seeds are ready when the back of the seed head turns yellow or brown, and the petals droop or fall off. If you tap the head and seeds rattle inside, they’re perfectly ripe! Harvest on a dry day for the easiest removal.
Can I remove seeds from sunflowers that are still on the plant?
Yes, but timing matters! Wait until the seed head is fully mature (yellow/brown) but before birds or squirrels get to them. If the head is still green, the seeds won’t be fully developed. Pro tip: Use a pair of pruning shears to snip the stem cleanly.
What’s the best way to remove seeds if the head is too tough to break open?
If the seed head is stubborn, try these tricks:
- Bake it: Place the whole head in a 200°F (93°C) oven for 10–15 minutes to soften the casing.
- Freeze it: Pop the head in the freezer for a few hours to make it easier to crack.
- Use a hammer: Gently tap the back of the head on a hard surface (like a cutting board) to loosen seeds.
Can I save sunflower seeds for planting next year?
Clean, dry seeds stored in a cool, dark place (like a sealed jar) can last 1–2 years. Just remove any cracked or shriveled seeds before storing—only the plump, firm ones will sprout well.
Why are my sunflower seeds moldy or smelly after removal?
Mold or odors usually mean the seeds were harvested too late or stored in damp conditions. Always dry seeds thoroughly (3–5 days in a warm, dry spot) before storing. If mold appears, discard the seeds—they’re unsafe for eating or planting.
Wrapping up and next steps
Removing seeds from sunflowers doesn’t have to be a messy chore—with the right tools and a little patience, you’ll have clean seeds in no time!
Whether you’re saving them for planting or crafting, this simple method ensures efficiency and minimal waste. Now that you’re equipped with the know-how, why not share your newfound skills? Try growing your own sunflower seeds or gifting them to fellow gardening enthusiasts. Happy harvesting! 🌻✨