
Flowers
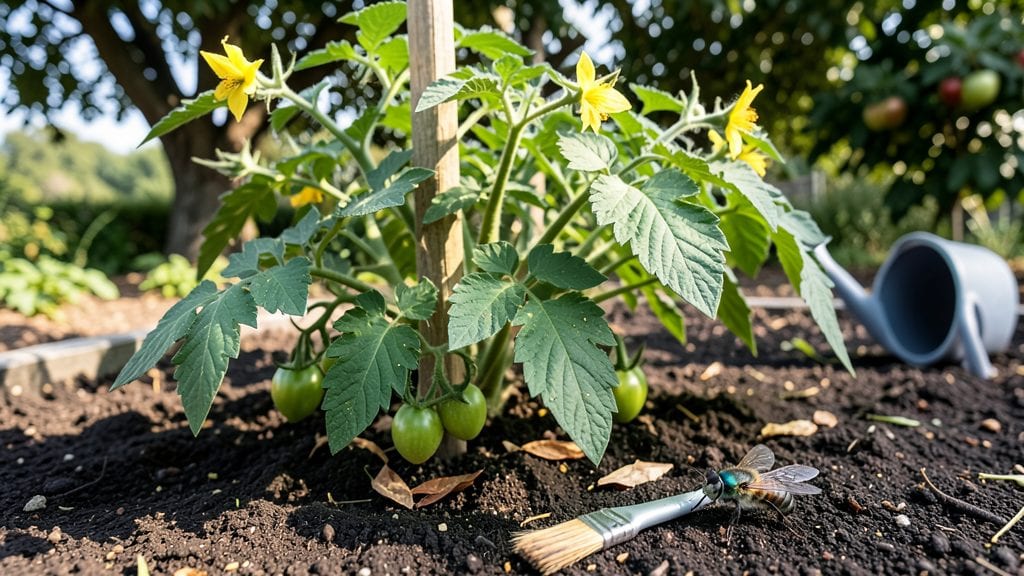
Pollinating tomato flowers by hand guarantees fruit set when bees and wind fail. 🌱 I learned this trick after watching my cherry tomatoes drop blossoms instead of swelling into fruit—turns out, even outdoor plants need a little help sometimes.
The method is simpler than it sounds: just a gentle touch at the right time transforms those yellow flowers into heavy, red harvests.
You only need two things: patience and a soft paintbrush or cotton swab. On warm, dry mornings, I tap my plants' stems lightly to release pollen or brush it from one flower to another.
This mimics how bees carry pollen naturally, but with 100% reliability. The key is timing—wait until flowers open fully, then work quickly before humidity closes them for the day.
What you’ll get is a vine packed with fruit, not just a few stragglers. Those tiny blossoms turn into plump, flavorful tomatoes that ripen evenly, and you’ll avoid the heartbreak of blossom end rot from poor fruit set.
Even indoor growers can use this trick with a small fan or paintbrush for consistent results.
Works for every tomato variety—from cherry to beefsteak—and adapts to greenhouses, balconies, or backyard cages. Once you try it, you’ll wonder how you ever grew without it. Let’s get those flowers pollinated!
📚 In This Guide
- What you need
- Instructions
- Tips and common mistakes
- Wrapping up and next steps
What you need
- ● Tomato plants – Healthy, flowering plants (indeterminate or determinate varieties work best).
- ● Soft-bristle paintbrush – A small, clean makeup or artist’s brush (½ to 1 inch wide).
- ● Q-tips or cotton swabs – 2-3 per plant (sterilized with rubbing alcohol if reusing).
- ○ Small handheld fan – Optional but helpful for mimicking wind pollination.
- ● Rubbing alcohol (70% isopropyl) – For sterilizing tools between plants (small bottle, 4 oz).
- ● Water spray bottle – To lightly mist flowers if they’re dry (8 oz or larger).
- ○ Gloves (optional) – Nitrile or cotton gloves to keep hands clean and protect from sap.
- ● Notebook & pen – To track pollination dates and progress (small pocket-sized notebook works).
- ● Pollination spray – Commercial products like Biobest Polli-Gel (follow label instructions).
- ● Magnifying glass – Helps spot tiny anthers and stigma (3x-5x magnification).
- ● Timer or phone alarm – To remind you to pollinate every 2-3 days during peak bloom.
- ● Pollen collection kit – For saving and transferring pollen between plants (DIY with fine mesh screens).
Step-by-step instructions for hand-pollinating tomato flowers
Here's how I ensure every tomato flower gets the attention it needs for fruit set.
🌿 Step 1: Identify Ready-to-Pollinate Flowers
Tomato flowers need to be fully open with a slightly swollen ovary at the base—this is your signal they're ready. I look for flowers that have unfurled completely but haven't started wilting yet. These blooms typically appear in the morning, so check your plants between 8-10 AM when humidity is lower and flowers are most receptive.
Gently examine each flower cluster—sometimes only 1-2 flowers per stem will be ready while others remain closed. I use a small magnifying glass (optional) to spot the tiny pollen sacs at the flower's center. These must be mature and yellowish, not green or white. If you see bees already working the flowers, they're doing your job—but hand-pollination gives you control in bad weather or when pollinators are scarce.
🌱 Step 2: Collect and Transfer Pollen
Use a clean, dry cotton swab or small paintbrush from your supplies. I prefer cotton swabs because they're gentle on delicate stamens. Gently brush the swab against the center of 3-5 open flowers to collect pollen. You'll see a fine yellow dust clinging to the swab—this is what fertilizes the ovary. Real talk: don't overdo it—too much pollen can clump and reduce effectiveness.
Move to the next flower and gently insert the pollen-covered swab into its center. Rotate the swab slightly to ensure pollen reaches all parts of the stigma. I make a quick mental note of which flowers I've already pollinated to avoid double-dipping. This step works best when the flowers are dry—if morning dew is present, wait until it evaporates or use a slightly damp (not wet) swab to pick up pollen without smearing it.
☀️ Step 3: Maintain Ideal Conditions for Fruit Set
After pollination, keep flowers in 70-85°F temperatures for the next 24-48 hours—this is when fertilization occurs. I've found that placing a small fan on low setting near the plants helps circulate air without disturbing flowers. Poor air movement can cause flowers to drop before they set fruit, especially on hot afternoons.
Watch for the ovary to swell slightly within 3-5 days—this is your confirmation that pollination worked. The flower will start wilting and turn brown as it redirects energy to the developing fruit. If you notice flowers dropping without swelling, either pollination failed or conditions weren't ideal. I keep a small notebook nearby to track which flowers I pollinated and when, so I can troubleshoot if needed.
⏰ Step 4: Repeat Daily Until Fruit Forms
Tomatoes produce flowers continuously throughout the season, so this becomes a daily habit. I set a reminder on my phone for 8 AM and 4 PM—morning for fresh flowers and afternoon for any that opened during the day. Consistent pollination prevents the "blossom end rot" that occurs when too many flowers set fruit at once and compete for calcium.
Here's the thing—you don't need to pollinate every single flower. Focus on the healthiest ones with the most potential. I prioritize flowers on the main stem first, then move to side shoots. Once you see pea-sized fruits forming, you can reduce frequency to every other day unless you notice new flowers opening rapidly. The goal is balance: enough fruit to harvest but not so many that the plant gets overwhelmed.
Tips & tricks for perfect tomato flower pollination
Common pitfalls—and how to sidestep every one when hand-pollinating tomato flowers.
Timing Secret: The 8-10 AM window is critical because morning flowers are freshest and most receptive. I've found that flowers opening later in the day often drop before setting fruit, no matter how carefully you pollinate them. If you miss morning, check again around 4 PM for any newly opened blooms—this is when I do my second daily pollination pass. The key is catching flowers within 2 hours of opening when the stigma is most sticky and ready to receive pollen.
Tool Technique: Cotton swabs work better than paintbrushes because they're less likely to damage delicate stamens. Here's what I learned the hard way: don't reuse the same swab for multiple flowers without reloading pollen. After 3-4 flowers, the pollen gets depleted, and you're just spreading old pollen that won't fertilize. Keep a fresh swab ready or reload by brushing against another flower's center. I keep a small jar of swabs in my gardening toolkit for quick access during my morning rounds.
Environmental Factors: Those 70-85°F temperatures aren't just recommendations—they're crucial for successful fertilization. If your greenhouse or garden gets hotter than 85°F, move plants to partial shade for 24-48 hours after pollination. I've seen flowers drop within hours when temperatures spike above 90°F. Also, avoid pollinating when rain is forecast within 24 hours—excess moisture can wash away pollen before fertilization occurs. A small battery-operated fan on low setting near plants helps maintain airflow without disturbing flowers.
Visual Confirmation: The 3-5 day wait to see ovary swelling is your best indicator of success. If you notice the ovary starting to swell but then stops, it might need another pollination attempt. I keep a small notebook where I mark each pollinated flower with the date and observe daily. Flowers that don't set fruit often have either immature pollen or insufficient pollen transfer. For stubborn flowers, I'll do a second pollination 24 hours later—sometimes it takes two tries to get that ovary growing!
Pro Tips for Pollinate Tomato Flowers
- Common pitfalls—and how to sidestep every one when hand-pollinating tomato flowers.
- Timing Secret: The 8-10 AM window is critical because morning flowers are freshest and most receptive.
- Tool Technique: Cotton swabs work better than paintbrushes because they're less likely to damage delicate stamens.
Frequently asked questions
Got questions about pollinating tomato flowers? You’re not alone! Here are some common concerns—and straightforward answers—to help you grow plump, juicy tomatoes like a pro.
Why aren’t my tomato flowers turning into fruit?
If your flowers drop off or fail to set fruit, it could be due to lack of pollination, extreme heat (above 90°F), or poor nutrition. Hand-pollinate on sunny days, ensure consistent watering, and add a balanced fertilizer to boost fruit development. Pro tip: If flowers fall off, it’s often a sign of stress—check for pests or overwatering!
When’s the best time of day to pollinate tomato flowers?
Mornings (between 8 AM and 10 AM) are ideal because humidity is lower, and flowers are fully open. Avoid midday heat, which can cause flowers to wilt or drop. If you miss morning, late afternoon (after 4 PM) works too—just avoid damp evenings to prevent fungal issues. Bonus: Pollinate every 2–3 days for continuous fruit production.
Do I need bees if I hand-pollinate?
Nope! Hand-pollination is a great alternative, especially in areas with low bee activity or urban gardens. However, bees still help with other plants, so consider planting bee-friendly flowers nearby (like marigolds or basil) to support local pollinators. Win-win: You get tomatoes, and bees get snacks!
What if my tomato plants keep producing flowers but no fruit?
This could mean stress from overcrowding, nutrient deficiency, or hormonal imbalances. Prune excess foliage for better airflow, add phosphorus-rich fertilizer (like bone meal), and ensure consistent watering. If the issue persists, try shaking plants gently to encourage natural pollination—or use a small brush for hand-pollination. Troubleshoot: Check for blossom-end rot (calcium deficiency) too!
Can I pollinate tomatoes in extreme heat or rain?
Extreme heat (above 90°F) can cause flowers to abort, while heavy rain may wash away pollen. On hot days, provide shade cloth and pollinate early. After rain, wait until flowers dry completely before hand-pollinating. Hot tip: Mulch plants to retain moisture and reduce stress during heatwaves.
Wrapping up and next steps
Pollinating tomato flowers may seem like a small task, but it’s the secret weapon behind those juicy, plump tomatoes you dream of! 🍅 With just a little patience and the right technique—whether by hand, with tools, or by inviting nature’s helpers—you’ll be well on your way to a bountiful harvest.
Start small, keep experimenting, and soon you’ll be the proud gardener of tomatoes so delicious they’ll have your neighbors asking for tips!
Ready to take the next step? Try pollinating a few flowers today and watch your tomato plants thrive! For even more gardening magic, explore our guide on growing heirloom tomatoes or dive into common tomato pests and how to beat them.