Container Gardens
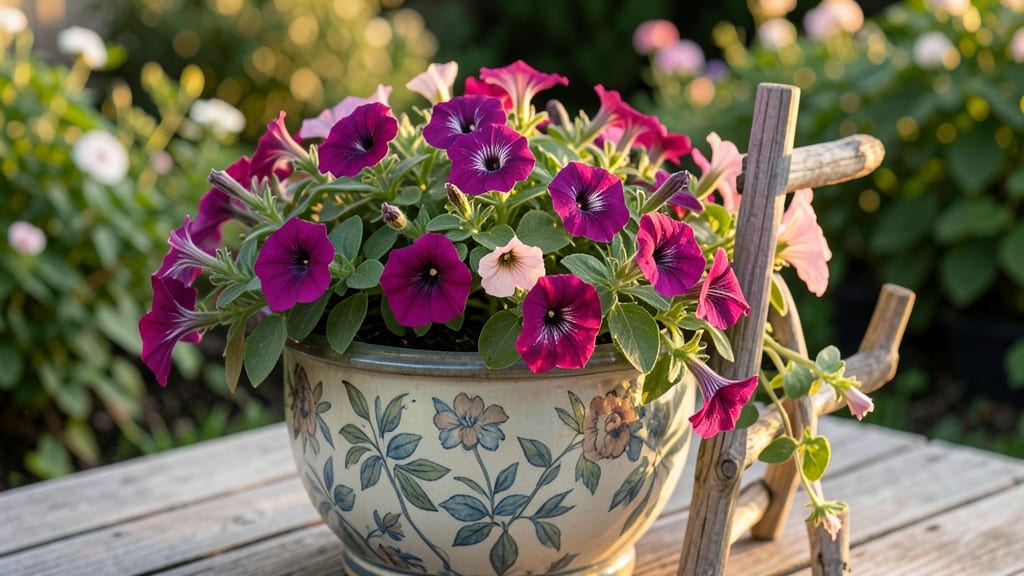
A large flower pot can turn a tiny balcony into a lush vertical garden that steals the show. 🌿 I used one last summer to grow a thriving tomato plant and trailing petunias—neighbors kept stopping to ask what I was doing.
The right size transforms containers from afterthoughts to statement pieces, whether you're growing veggies, flowers, or both.
Size matters more than you think. A 15-20 gallon pot works for tomatoes, while smaller 5-10 gallon containers suit herbs and flowers. Terracotta breathes but dries fast, plastic holds moisture longer, and fiberglass blends durability with style.
Drainage holes are non-negotiable—no one wants soggy roots ruining their design. Think of your pot as a tiny ecosystem with room for roots to stretch and grow.
You’ll end up with a self-sufficient vertical garden that thrives even in cramped spaces. Picture cascading ferns, bold succulents, or a mini citrus tree—all within arm’s reach. The key is balancing plant types (top-heavy vs. trailing) and checking soil moisture weekly.
With the right pot and combo, your small space becomes a green oasis that turns heads.
Works for balconies, patios, or even sunny windowsills. The same principles apply whether you're growing edibles or flowers—just adjust the pot size to the plant’s needs. Let’s make that small space unforgettable with a container that commands attention.
📚 In This Guide
- What you need
- Instructions
- Tips and common mistakes
- Wrapping up and next steps
What you need
- ● Large flower pot or container: Minimum 12–18 inches in diameter (or taller for vertical designs). Material: Terracotta, ceramic, fiberglass, or weather-resistant plastic (terracotta breathes best but dries faster). Drainage holes: Mandatory (or add your own with a drill if repurposing a non-drainage container).
- ● Potting soil: High-quality well-draining mix (e.g., 60% potting soil + 40% perlite/pumice or coconut coir). Quantity: 2–3 cubic feet (depends on pot size).
- ● Drainage layer: Small gravel, pebbles, or broken pottery shards (1–2 inches deep).
- ● Plants: Choose 3–5 varieties for texture/color contrast (e.g., ferns, succulents, or trailing plants like string of pearls). Size: Small to medium (avoid overcrowding; plan for mature growth!).
- ● Required: Garden trowel or small shovel.
- ● Watering can or hose with a gentle spray nozzle.
- ● Gloves (to protect your hands from soil and thorns).
- ○ Optional (but helpful!): Slow-release fertilizer (for nutrient boost).
- ● Mulch (to retain moisture and suppress weeds).
- ● Decorative elements (e.g., moss, pebbles, or painted accents for flair).
- ● Support structures (e.g., trellises for climbing plants).
- ● 🌡️ Climate check: If your space gets hot sun, opt for drought-tolerant plants (e.g., sedum or lavender).
- ● ✨ Weight warning: Large pots can be heavy when full—place them on stable surfaces or use wheels for mobility.
- ● 🎯 Drainage hack: Line the bottom with landscape fabric to prevent soil from clogging drainage holes.
How to style a large flower pot for maximum vertical impact
Turn any oversized container into a lush, eye-catching vertical garden that transforms small spaces.
🪴 Step 1: Select the Right Large Pot and Drainage System
Choose a pot with 12+ inches in diameter and at least 18 inches deep—this gives roots room to establish while creating dramatic height. I prefer glazed ceramic or fiberglass for durability, but ensure it has multiple drainage holes at the base. If your pot lacks drainage, drill 3-4 holes using a masonry bit and seal edges with silicone to prevent soil leakage.
Here's the thing—large pots dry out unevenly. To combat this, I add a 2-inch layer of expanded clay pebbles or coarse gravel at the bottom. This creates an air gap that prevents root rot while allowing excess water to escape. Tap the pot gently after adding pebbles to settle them evenly—uneven layers can cause drainage issues later.
🌱 Step 2: Layer Soil and Choose Complementary Plants
Fill the pot with 3 gallons of high-quality potting mix, pressing down lightly to eliminate air pockets but avoiding compaction. For vertical impact, I divide the pot into three sections: bottom (deep-rooted plants), middle (medium-height foliage), and top (trailing or cascading varieties). This creates natural tiers that draw the eye upward.
Select plants with varying textures and growth habits—think thrillers (dramatic height), fillers (mid-level structure), and spillers (trailing edges). For example, pair a 6-inch tall snake plant at the base with 12-inch ferns in the middle, and let 18-inch-long string of pearls cascade over the sides. This combination ensures visual interest at every level.
☀️ Step 3: Position for Optimal Light and Maintenance
Place your large pot where it receives 4-6 hours of direct sunlight daily, though many tropical varieties thrive with bright, indirect light. South-facing patios or east-facing balconies work best. If indoors, position near a south-facing window—north-facing light will stunt growth in most flowering plants.
Water deeply once a week (or when the top 2 inches of soil feel dry), but check the weight of the pot first. A fully saturated pot feels heavy; if it's lightweight, it's time to water. Avoid overhead watering—it can dislodge soil and encourage fungal growth. Instead, water at the base until it drains freely from the holes.
✂️ Step 4: Prune and Refresh for Long-Term Drama
Every 4-6 weeks, trim back leggy stems and spent blooms to encourage bushier growth. For trailing plants like pothos or string of pearls, gently weave new growth into the pot's edges to maintain a full, cascading look. I also rotate the pot quarter-turn weekly so all sides receive even light—this prevents plants from leaning toward the sun.
Real talk: Large pots need seasonal refreshes. In late winter, remove 2-3 inches of old soil from the top and replace it with fresh potting mix. This replenishes nutrients and prevents soil-borne diseases. If your pot looks tired by midsummer, consider a 50% soil replacement—it’s a small effort for a big visual boost.
Tips & tricks for stunning vertical flower pots
Creating a bold vertical statement with large flower pots takes thoughtful planning—and these pro tips will help you avoid common pitfalls while maximizing impact.
Drainage Layer Precision: The 2-inch layer of expanded clay pebbles in Step 1 isn't just about drainage—it's about creating that critical air gap. I've learned the hard way that uneven layers can cause water to pool, leading to root rot. Use a level to ensure your pebbles are perfectly horizontal before adding soil. For extra insurance, add a layer of landscape fabric over the pebbles to prevent soil from washing down into the drainage layer. This simple step keeps your vertical garden healthy for seasons to come.
Soil Layering Technique: When dividing your pot into three sections as described in Step 2, use a small hand trowel to create gentle ridges between each level. This visual separation enhances the tiered effect while preventing soil from mixing between plant groups. For the top layer where trailing plants will cascade, add a 1-inch layer of orchid bark mix—it's lighter than regular potting soil and helps prevent compaction that could weigh down delicate stems.
Light Positioning Strategy: The 4-6 hours of direct sunlight mentioned in Step 3 is ideal, but here's what nobody tells you: morning sun (east-facing) is gentler than afternoon sun (west-facing), which can scorch leaves. If you're working with heat-sensitive plants like ferns, position them on the north side of the pot where they'll receive filtered light. For sun-lovers like succulents, place them on the south or west sides. This strategic placement prevents leaf burn while maximizing vertical impact.
Seasonal Refresh Hack: That 50% soil replacement mentioned for midsummer isn't just about nutrients—it's about aeration. When you remove the top 2-3 inches of old soil, use a garden fork to gently loosen the remaining soil before adding fresh mix. This creates channels for better water penetration and root growth. I also add a handful of worm castings to the fresh soil—it's a natural fertilizer that improves soil structure and helps plants recover from heat stress.
Pro Tips for Flower Pot Large
- Creating a bold vertical statement with large flower pots takes thoughtful planning—and these pro tips will help you avoid common pitfalls while maximizing impact.
- Drainage Layer Precision: The 2-inch layer of expanded clay pebbles in Step 1 isn't just about drainage—it's about creating that critical air gap.
- Soil Layering Technique: When dividing your pot into three sections as described in Step 2, use a small hand trowel to create gentle ridges between each level.
Frequently asked questions
Got questions about making a bold statement with a large flower pot in small spaces? You’re not alone! Here are answers to the most common queries to help you garden with confidence.
What’s the best size for a large flower pot in a small space?
Aim for 12–18 inches in diameter and 10–14 inches deep to balance aesthetics and practicality. Smaller pots (8–10") work for herbs or succulents, while larger ones (20"+) need sturdy stands or wall mounts to avoid overwhelming tight areas. Pro tip: Measure your space first—leave at least 6 inches of clearance around the pot for airflow and easy maintenance!
How do I stabilize a heavy large flower pot?
Use non-slip pads or sand-filled bases to prevent wobbling. For outdoor setups, anchor pots with hidden weights (like gravel or bricks) or secure them to walls/rails with plant straps. Indoor pots benefit from wide, shallow trays to catch water and add stability. Warning: Never overfill with soil—keep it 20–30% lighter than the pot’s max capacity!
How often should I water a large flower pot?
Check soil moisture 1–2 inches deep—water when it feels dry. Large pots retain moisture longer, so water every 5–7 days (or less in shade). Group pots together to create a microclimate that reduces evaporation. Pro tip: Use a moisture meter or the "finger test" to avoid over- or under-watering!
Can I reuse a large container as a flower pot?
Yes! Clean and disinfect plastic, ceramic, or metal containers with soap and bleach (1:9 ratio) to kill bacteria. Drill drainage holes if missing—use a power drill with a small bit for safety. Bonus: Upcycle buckets, bathtubs, or even old boots for quirky, eco-friendly pots!
Why are my plants dying in a large flower pot?
Common culprits:
- Poor drainage: Ensure holes are unblocked and use gravel or broken pots at the bottom.
- Over/under-watering: Adjust based on plant type (e.g., succulents need less water than ferns).
- Nutrient depletion: Fertilize every 4–6 weeks with a balanced formula.
- Root-bound plants: Repot every 2–3 years or trim roots if crowded.
Start with a soil test kit to diagnose issues—often, the fix is simpler than you think!
Wrapping up and next steps
Transforming small spaces into lush vertical gardens is easier than ever with a large flower pot—your secret weapon for adding greenery, texture, and life to any corner! Whether you’re a seasoned gardener or just starting out, these bold containers prove that big impact doesn’t require big square footage. 🌿✨
Ready to take the next step? Start by sketching your vision—will it be a cascading herb garden, a vibrant succulent wall, or a mix of both? Grab your supplies, get creative, and watch your space bloom with personality! Your green thumb (and walls) will thank you.