
Flowers
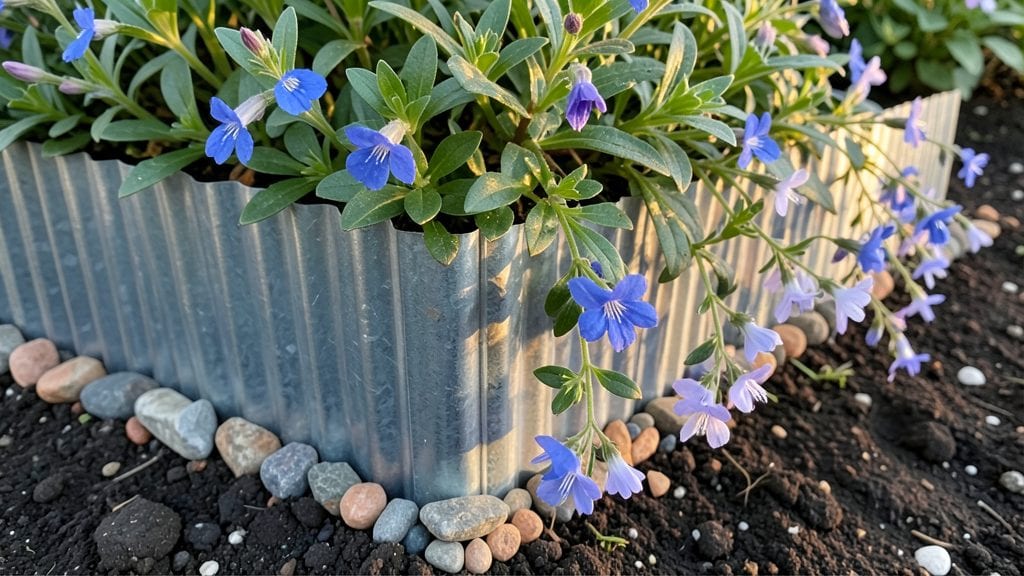
Corrugated metal flower beds turn plain garden edges into striking industrial-chic statements that last for years. 🌿 I fell in love with their bold texture after using them to frame my front yard—suddenly, my garden had depth and character without a single plant in sight.
The corrugated pattern casts intricate shadows, while the metal’s durability means no more rotting wood or crumbling stone borders.
These beds work with any style, from modern minimalism to cottage-core charm. They’re lightweight yet sturdy, resist rust when properly treated, and come in affordable sheets that cut to fit any space.
My favorite part? How they reflect light differently at dawn and dusk, adding a dynamic element to the garden. Plus, they’re easy to install—no heavy lifting or complex tools required.
You’ll notice how the metal’s sharp angles create visual interest while keeping plants neatly contained. Pair them with drought-tolerant succulents for a sleek look, or soften the edges with trailing petunias for a romantic touch.
The possibilities for color and texture are endless, and the metal’s reflective surface adds a subtle shimmer that elevates even simple plantings.
Perfect for urban gardens, small patios, or as a dramatic border in larger landscapes. Whether you’re framing a single rose bush or outlining a raised bed, these beds add instant sophistication. Ready to transform your garden’s edges? Let’s get started with the basics.
📚 In This Guide
- What you need
- Instructions
- Tips and common mistakes
- Wrapping up and next steps
What you need
- ● Corrugated metal sheets – 2–4 sheets (24–48 inches wide, 4–8 feet long; galvanized or pre-painted for durability).
- ● Metal stakes or rebar – 4–6 stakes (½-inch diameter, 12–18 inches long) for anchoring.
- ● Heavy-duty screws or nails – ½-inch galvanized screws (20–30 per bed) or 16-gauge nails.
- ● Landscape fabric – 1 roll (3–4 feet wide, weed-blocking mesh).
- ● Gravel or crushed stone – 1–2 bags (50 lbs each) for drainage.
- ● Soil or potting mix – 2–3 cubic feet (depending on bed size).
- ● Drill or hammer (for screws/nails).
- ● Measuring tape and chalk line (for precise cuts).
- ● Tin snips (for cutting metal cleanly).
- ● Work gloves (to protect your hands!).
- ○ Level (optional but helpful for even beds).
- ● Metal paint or spray (for custom colors).
- ● Decorative hardware (e.g., metal brackets or hooks for hanging plants).
- ● Edging stones or pavers (to blend into hardscapes).
- ● Solar-powered string lights (for evening ambiance!).
Step-by-Step instructions for building corrugated metal flower beds
Here's how to create striking, low-maintenance garden edges that add texture and structure.
🪴 Step 1: Measure and Cut Metal Panels to Size
First, determine your bed dimensions. Measure the length and width of your planting area, then add 2-3 inches to each side for overhang. Mark these measurements directly on your corrugated metal sheets using a measuring tape and marker—this prevents mistakes when cutting.
Use tin snips to cut along your marked lines. I like to make a small notch first, then follow through with steady pressure—this keeps the cut clean and prevents jagged edges. Wear thick gloves and safety glasses since metal shards can fly. If you're working with large sheets, ask a friend to hold the metal steady while you cut.
🌱 Step 2: Assemble the Frame Structure
Lay your cut metal panels flat and arrange them in an L-shape to form the corners of your bed. Use metal screws and a power drill to secure the corners together. Pre-drill holes to prevent cracking, then screw through both panels at a 45-degree angle for extra strength. I always use stainless steel screws to prevent rust over time.
For deeper beds, add a second horizontal panel along the bottom edge and secure it with additional screws. This creates a sturdy base that won't warp under soil weight. Test the stability by gently pressing down on each corner—if it wobbles, reinforce with more screws or add a metal corner brace for extra support.
☀️ Step 3: Position and Secure the Bed
Place your assembled metal frame in your chosen garden location. Use a level to ensure the top edges are perfectly even—this prevents water pooling or uneven planting. Once positioned, mark the screw holes through the metal and into the ground with a pencil or marker.
Remove the frame and drill 1-inch deep holes at each marked spot using a masonry bit. Reposition the frame and secure it with galvanized outdoor screws or concrete anchors for heavy-duty hold. For temporary setups, you can also use landscape stakes driven into the ground at each corner and wire-tied to the metal for stability.
💧 Step 4: Add Soil and Plant Your Garden
Fill the metal bed with garden soil, leaving about 1 inch of space below the top edge to prevent spillage. I like to mix in a 2-inch layer of landscape fabric at the bottom first—this blocks weeds while allowing water to drain. Tamp the soil lightly to remove air pockets, then add a 1-inch layer of mulch on top to retain moisture.
Plant your flowers or herbs directly into the soil, pressing roots gently to secure them. The corrugated texture gives roots something to grip, so you won’t need to worry about plants toppling over. Water thoroughly after planting, then maintain with 1 inch of water per week during dry spells. The metal will heat up in sunlight, so check soil moisture more frequently in summer.
Tips & tricks for perfect rustic industrial garden edging
Here's what I've learned after building these striking garden borders myself—tricks that make all the difference between a flimsy setup and something that lasts for years.
Precision Cutting: When marking your corrugated metal sheets in Step 1, use a straightedge to draw your lines—this ensures clean cuts with tin snips. I like to clamp the metal to a workbench before cutting to prevent flexing. For long cuts, ask a helper to hold the metal steady at both ends, especially if you're working with sheets wider than 3 feet.
Stability Secret: In Step 2, when adding that second horizontal panel for deeper beds, position it exactly 2 inches from the bottom edge. This creates a perfect ledge for soil while maintaining structural integrity. I've seen many DIYers skip this detail, only to watch their beds sag under plant weight—don't make that mistake!
Ground Prep Tip: Before drilling your 1-inch deep holes in Step 3, lay a piece of cardboard over the marked spots and trace the screw locations. This prevents soil from getting into the holes, which can make securing your bed much harder later. For rocky soil, use a hammer and nail to create pilot holes before drilling.
Planting Advantage: The corrugated texture isn't just decorative—it's functional! When planting in Step 4, position plants so their roots nestle into the grooves. This gives them extra support, especially for tall flowers like sunflowers or delphiniums. You'll notice plants stay upright even in windy conditions.
Pro Tips for Corrugated Metal Flower Beds
- Here's what I've learned after building these striking garden borders myself—tricks that make all the difference between a flimsy setup and something that lasts for years.
- Precision Cutting: When marking your corrugated metal sheets in Step 1, use a straightedge to draw your lines—this ensures clean cuts with tin snips.
- Stability Secret: In Step 2, when adding that second horizontal panel for deeper beds, position it exactly 2 inches from the bottom edge.
Frequently asked questions
Got questions about corrugated metal flower beds? You’re not alone! Here are some common queries—and their answers—to help you get started with confidence.
What’s the best way to prevent rust on corrugated metal flower beds?
Rust is the #1 concern, but it’s easy to prevent! Start by choosing galvanized or pre-coated steel for extra durability. After installation, apply a clear acrylic sealer or metal paint designed for outdoor use. Reapply every 1–2 years for long-term protection. Pro tip: Elevate beds slightly to improve drainage and reduce moisture buildup.
When is the best time to install corrugated metal edging?
Install edging before planting—ideally in early spring (after the last frost) or fall (before the first hard freeze). This gives roots time to establish without competition from weeds. If adding to an existing garden, clear the area first and water the soil to soften it for easier placement.
Can I DIY corrugated metal flower beds, or should I hire a pro?
Absolutely DIY-friendly! With basic tools—a shovel, level, and staple gun—you can install these in a weekend. For large or sloped gardens, consider renting a post-hole digger or staple gun for heavy-duty edges. No experience needed! Watch a few YouTube tutorials for step-by-step guidance.
What plants work best in corrugated metal flower beds?
These beds shine with low-maintenance, drought-tolerant plants that thrive in defined spaces. Try:
- Perennials: Lavender, sedum, or Russian sage (hardy and spill-over friendly).
- Annuals: Petunias, snapdragons, or salvia (add vibrant pops of color).
- Grasses: Ornamental grasses like fountain grass for texture.
Are corrugated metal flower beds more expensive than other materials?
Cost varies! Corrugated metal edges typically range from $1–$5 per linear foot, depending on thickness and coating. Compared to brick ($8–$15/ft) or stone ($10–$20/ft), they’re budget-friendly but offer industrial-chic style. Check local scrapyards or metal suppliers for discounted bulk deals—often 30–50% cheaper!
Wrapping up and next steps
Corrugated metal flower beds bring bold, rustic charm to any garden with minimal effort—proving that style doesn’t require perfection! Whether you’re drawn to their industrial edge, durability, or budget-friendly appeal, these beds are a game-changer for both urban and rural spaces. 🌿✨
Ready to transform your garden? Start small with a single bed or go all out—your creative vision is the only limit. Grab your tools, gather supplies, and let your green thumb (and metal flair) shine! Your future garden oasis awaits—happy planting! 🌸