Landscaping
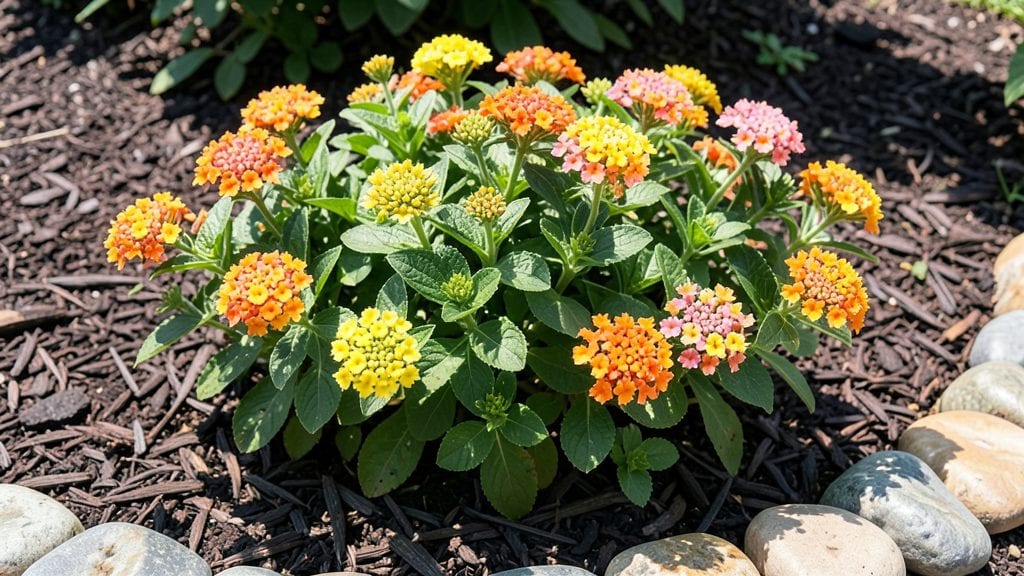
That front yard island flower bed you’ve been dreaming of can finally be the low-maintenance, high-impact centerpiece you want—no more fighting weeds or deadheading every week. 🌸 I designed mine to bloom from spring through frost with just one deep cut back in late winter, and the neighbors still ask which "magical" plants I use.
The secret isn’t fancy; it’s layering the right perennials with a few tough annuals that fill gaps effortlessly.
Start with a circular or oval raised bed (about 4 feet wide) to keep costs down and maintenance simple. Use cedar edging for a polished look that lasts years, or go for natural stone if your yard leans rustic.
Fill it with well-draining soil mixed with compost—this is where your plants will thrive without fuss. For color, pair black-eyed Susans (golden summer blooms) with Russian sage (lavender spikes that hum with pollinators) and heuchera for year-round foliage interest.
By mid-summer, your island will be a burst of color that draws the eye without screaming for attention—think soft purples blending into creamy whites, all framed by lush green foliage. The best part?
You’ll spend less than 30 minutes a month on upkeep: a quick trim in spring, deadheading spent blooms, and watering only during dry spells. It’s the kind of garden that makes passing strangers pause and smile.
Works in any climate, from hot southern summers to cool northern winters, and scales to fit tiny yards or sprawling front porches. Whether you’re starting from scratch or refreshing an existing bed, this design keeps things simple, stunning, and stress-free. Let’s get planting!
📚 In This Guide
- What you need
- Instructions
- Tips and common mistakes
- Wrapping up and next steps
What you need
- ● Flower bed soil: 2–4 cubic yards of high-quality, well-draining garden soil (amend with compost for nutrients).
- ● Mulch: 2–3 bags of organic mulch (e.g., shredded bark or pine straw) to retain moisture and suppress weeds.
- ● Perennials & annuals: Perennials (low-maintenance, year-round interest): 12–20 plants (e.g., coneflowers, black-eyed Susans, sedum, or ornamental grasses).
- ● Annuals (for seasonal pops of color): 6–10 plants (e.g., petunias, impatiens, or marigolds).
- ● Edging material: Flexible landscape edging (e.g., steel, plastic, or natural stone) to define the bed’s shape.
- ● Basic tools: Garden shovel or spade
- ● Hoe or garden fork
- ● Pruning shears
- ● Wheelbarrow (for hauling soil/mulch)
- ● Measuring tape & stakes (to mark the bed’s layout)
- ● Drip irrigation system: Automates watering and reduces maintenance.
- ● Garden kneeler or pad: Makes planting and weeding more comfortable.
- ● Slow-release fertilizer: Boosts plant health with minimal effort.
- ● Solar-powered lights: Adds ambiance and safety for evening curb appeal.
- ● Native plants: Choose drought-resistant varieties to cut back on watering.
Step-by-Step guide for designing a low-maintenance island flower bed
Here's how to create a striking focal point that thrives with seasonal interest and minimal upkeep.
🪴 Step 1: Select and Prepare the Perfect Location
Choose a spot with at least 6 hours of sunlight daily—most perennials and shrubs demand full sun for best performance. I like to position island beds where they catch morning light, which reduces water stress during peak afternoon heat. Measure your space: a 4-foot diameter island fits most front yard proportions beautifully while allowing easy access for maintenance.
Mark the circle with garden stakes and string before digging. This ensures clean edges and prevents soil from spilling into surrounding lawn. Remove any grass or weeds within the marked area—this is critical because competing roots will steal nutrients from your new plants. I use a shovel to cut a 6-inch-deep trench around the perimeter first, then dig out the center soil. This method keeps the process tidy and prevents soil from spreading.
🌱 Step 2: Build a Raised Bed Base for Drainage and Structure
For long-term success, I recommend raising the bed 4-6 inches above ground level using landscape fabric and gravel. Start by lining the trench with 12 inches of crushed gravel—this improves drainage dramatically, especially in clay-heavy soils. The gravel layer also prevents soil from mixing with the surrounding lawn, which keeps weeds at bay.
Next, layer 2 inches of coarse sand over the gravel to create a smooth base. This prevents soil from settling unevenly and helps roots penetrate the bed more easily. I always add a 1-inch layer of compost mixed into the top 6 inches of native soil before planting. This boosts microbial activity right from the start, giving your plants a nutrient head start without heavy fertilization later.
☀️ Step 3: Choose Plants for Seasonal Interest and Texture
Here's the secret to minimal pruning: layer plants by height and bloom time. Start with a 3-foot-tall ornamental grass (like little bluestem) at the center for structure. Surround it with 2-foot shrubs like butterfly bush or abelia for mid-height interest. Fill the outer ring with 18-inch perennials like coneflowers or black-eyed Susans for vibrant color.
I always include evergreen elements like boxwood or heather to maintain year-round structure. These plants provide visual continuity even when other flowers fade. For texture contrast, add silver foliage plants like lamb's ear or dusty miller—they reflect light beautifully and complement any color scheme. Space plants according to their mature size, leaving 12-18 inches between each for proper airflow and growth.
💧 Step 4: Install Irrigation and Mulch for Long-Term Care
Install a drip irrigation system with emitters placed at the base of each plant. This delivers water directly to roots and reduces evaporation by 30%. I like to run the lines along the outer edge of the bed so they're not visible but still accessible. Set the system to water deeply every 3 days during summer—this encourages deep root growth that makes plants more drought-tolerant.
After planting, cover the soil with 3 inches of mulch (I use shredded bark). This suppresses weeds, retains moisture, and regulates soil temperature. Keep mulch 2 inches away from plant stems to prevent rot. The mulch layer will need replenishing once a year—this is the only maintenance task you'll need to repeat annually. Water immediately after mulching to help it settle and begin working.
✂️ Step 5: First-Year Maintenance and Pruning Strategy
The key to minimal pruning is strategic timing. In early spring, remove any dead foliage from perennials but leave seed heads—many birds will use them for nesting, and they add winter interest. Cut back ornamental grasses to 6 inches in late winter before new growth appears. This keeps them compact and prevents them from flopping.
For shrubs, prune immediately after flowering to maintain shape. I use clean, sharp shears and make cuts at a 45-degree angle just above a leaf node. This encourages bushier growth. Avoid heavy pruning in the first year—let your plants establish their root systems first. By year two, you'll only need to do light shaping once or twice annually, and some plants (like coneflowers) require almost no attention at all.
Tips & tricks for perfect island flower beds
Here's what I've learned after designing dozens of these stunning, low-maintenance garden features.
Sunlight Strategy: The 6 hours of sunlight requirement is non-negotiable, but morning sun exposure is even more critical than most guides mention. I've seen beds in identical locations thrive differently simply because one caught morning light while another got only afternoon heat. Position your bed to catch those cool morning rays—they reduce water stress dramatically during peak summer heat.
Soil Prep Secret: When you're mixing that 1-inch layer of compost into the top 6 inches of native soil, don't just toss it in. I use a broadfork to aerate the soil first, then work the compost into the top 6 inches using a garden trowel. This creates ideal rooting conditions right from planting day. The compost layer should be visible but not dominant—think of it as a flavor enhancer rather than the main ingredient.
Plant Layering Technique: The height layering in Step 3 is where the magic happens for that "wow" factor. I recommend starting with your 3-foot ornamental grass slightly off-center rather than perfectly centered—this creates visual interest and prevents the composition from looking too symmetrical. For the 2-foot shrubs, choose varieties with different bloom times so you always have color, even when some plants are dormant.
Mulch Maintenance: That 3-inch mulch layer is your secret weapon for reducing maintenance. I've found cedar mulch works even better than shredded bark because it naturally repels insects while breaking down slowly. Just remember to refresh it annually in late winter—this is the only regular maintenance task you'll need to repeat. The mulch should settle to about 2 inches by spring, so add enough to maintain that 3-inch depth.
Pro Tips for Front Yard Island Flower Bed
- Here's what I've learned after designing dozens of these stunning, low-maintenance garden features.
- Sunlight Strategy: The 6 hours of sunlight requirement is non-negotiable, but morning sun exposure is even more critical than most guides mention.
- Soil Prep Secret: When you're mixing that 1-inch layer of compost into the top 6 inches of native soil, don't just toss it in.
Frequently asked questions
Got questions about creating or maintaining a front yard island flower bed?
Here are answers to the most common ones to help you plan with confidence!
What’s the best time of year to install an island flower bed?
Plant in early spring (after the last frost) or early fall (4-6 weeks before first frost) for the best root establishment. Avoid summer heat or winter cold, which can stress plants. If planting perennials, focus on fall—cool weather encourages strong growth before dormancy.
How often should I water an island flower bed?
Water deeply 2-3 times per week (or daily in extreme heat) for the first month to help roots establish. After that, aim for 1-1.5 inches of water weekly, either from rainfall or irrigation. Mulch (2-3 inches) retains moisture and reduces evaporation. Drip irrigation is ideal for even distribution.
Can I use annuals instead of perennials for year-round color?
Yes! Mix perennials (for structure) with seasonal annuals (e.g., pansies in winter, impatiens in summer) to extend blooms. Annuals like petunias or marigolds thrive in islands but require more frequent deadheading. For minimal effort, choose self-cleaning varieties (e.g., zinnia) that reseed easily.
Why are my island plants wilting or dying despite regular watering?
Check for:
- Poor drainage: Compacted soil or a low-lying island can cause root rot. Amend soil with compost or sand and ensure a slight slope for runoff.
- Pests: Inspect for aphids, slugs, or deer (common in island beds). Use neem oil or physical barriers (e.g., copper tape for slugs).
- Overcrowding: Too many plants competing for nutrients? Thin out or divide clumps every 2-3 years.
How can I add height and texture without overcomplicating the design?
Layer plants by height (tallest in the center, mid-height around the edges, and spillers like lobelia or ajuga at the base). Add structural elements like:
- Ornamental grasses (e.g., maiden grass) for movement.
- Evergreen shrubs (e.g., boxwood) for winter interest.
- Rocks or boulders as focal points.
Wrapping up and next steps
Creating a front yard island flower bed is a fantastic way to add year-round color with minimal upkeep—proving that stunning landscaping doesn’t have to mean endless pruning! 🌸 By choosing the right perennials, evergreens, and seasonal blooms, you’ll enjoy vibrant curb appeal that thrives on its own.
Whether you’re a seasoned gardener or just starting out, this project is a rewarding way to elevate your home’s exterior.
Ready to get started? Sketch your design, gather your plants, and dive in! Your future self—and your neighbors—will thank you for the effortless beauty. 🌿