
Flowers
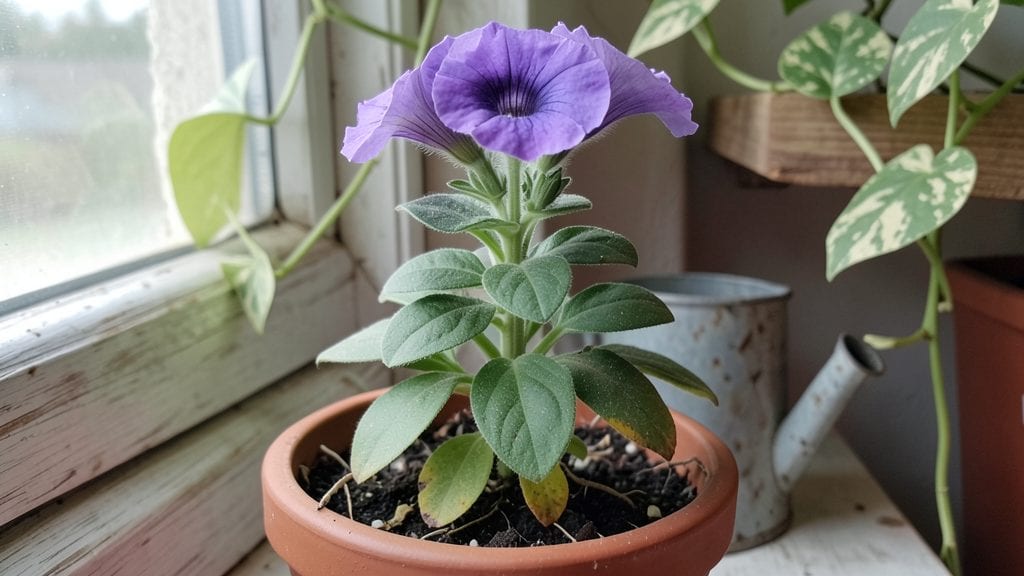
A sunny windowsill can become your most productive gardening real estate. 🌿 That perfect window spot for a flower pot transforms even the smallest space into a vibrant display—whether you're growing trailing ferns, fragrant herbs, or bold annuals.
The key lies in matching the right plants to the light they receive, and I've learned which combinations thrive where others fail.
Start by assessing your window: south-facing spots get the most light, while north-facing ones stay cooler and moister. A simple terracotta pot with drainage holes works for most flowers, but hanging baskets or wall-mounted planters free up floor space while adding vertical interest.
My favorite setups use lightweight containers that won't strain window sills, especially for plants like petunias or ivy that love to cascade.
You'll end up with a lush, fragrant corner that brightens your day—think velvety basil leaves brushing your elbow or bright orange marigolds swaying in the breeze. The best part? These plants clean the air while adding color to any room, and they're easy enough that even black-thumb gardeners succeed.
Just a few minutes of weekly care keeps them thriving all season long.
From kitchen windowsills to outdoor balcony railings, this approach works anywhere light hits. The secret is choosing plants that match your specific light conditions—herbs for bright spots, ferns for shade, and flowering annuals for maximum impact. Let's get those pots placed where they'll shine brightest!
📚 In This Guide
- What you need
- Instructions
- Tips and common mistakes
- Wrapping up and next steps
What you need
- ● Flower pot: 1 medium-to-large pot (8–12 inches in diameter) with drainage holes. Pro tip: Terracotta or ceramic pots work best for airflow! 🌱
- ● Potting soil: 1 bag (1–2 cubic feet) of high-quality, well-draining potting mix (avoid garden soil—it compacts!).
- ● Drainage material: Small pebbles, gravel, or broken pottery (½ cup) to prevent root rot.
- ● Window sill or shelf: A sturdy, level surface that gets 4+ hours of sunlight daily (south or west-facing is ideal!).
- ● Tools: 1 small trowel or spoon for planting.
- ○ 1 pair of gardening gloves (optional but recommended!).
- ● 1 watering can or spray bottle (with a gentle mist setting).
- ● Decorative elements: Paint, mosaic tiles, or a pot tray to match your decor.
- ● Self-watering system: A wick or reservoir pot to keep plants hydrated while you’re away.
- ● Plant supports: Small stakes or cages for trailing plants like ivy or petunias.
- ● Fertilizer: Slow-release granules or liquid fertilizer for a nutrient boost.
How to transform a window spot into a thriving vertical flower display
Turn overlooked windowsills into lush, eye-catching gardens with these simple steps.
🪴 Step 1: Choose the Right Window and Container
Start by selecting a window that gets at least 4-6 hours of sunlight daily—south or west-facing spots work best for most flowers. If your only option is north-facing, opt for shade-tolerant plants like ferns, impatiens, or begonias. Avoid drafty spots near air vents or doors, as cold drafts stress plants.
For containers, pick lightweight materials like fabric grow bags or plastic pots with drainage holes—they won’t crack under weight or when frozen. If using a hanging planter, ensure it has sturdy hooks rated for 10+ pounds (filled with soil and plants). I like to test-fit the container in the spot first—nothing worse than realizing it won’t stay put after planting.
☀️ Step 2: Optimize Light and Position for Growth
Place your container where it gets direct sunlight for half the day—this is critical for blooming plants. If your window is bright but indirect, rotate the pot quarter-turn weekly so all sides get even light exposure. You’ll notice leaves leaning toward the light? That’s your cue to adjust the position.
For extra brightness, add a small LED grow light (like a 6-inch clip-on bulb) if natural light is weak. Keep it 4-6 inches above the plants and on a 12-hour timer to mimic daylight. Avoid placing containers directly on glass—use a ceramic saucer or tray to protect surfaces from water damage and prevent roots from overheating in direct sun.
💧 Step 3: Select and Plant Drought-Tolerant Flowers
Pick compact varieties like petunias, geraniums, or trailing ivy—they thrive in small spaces and don’t outgrow their pots quickly. Avoid heavy feeders like tomatoes or peppers; they’ll wilt fast in limited soil. Fill the container with well-draining potting mix (not garden soil) and add a slow-release fertilizer at planting time.
Plant 2-3 plants per 6-inch pot, spacing them so leaves don’t touch. Water deeply until it drains from the bottom, then let the top inch of soil dry out before watering again. Overwatering is the #1 killer of window plants—check moisture by sticking your finger in the soil. If it’s damp 1 inch down, wait another day.
✂️ Step 4: Maintain with Minimal Effort
Deadhead spent blooms weekly to encourage more flowers—just pinch off the faded blossoms with your fingers. Prune leggy growth by cutting back to the nearest leaf with a clean pair of scissors, and pinch off new growth tips to promote bushier plants. This keeps them compact and prevents them from toppling over.
Feed every 4-6 weeks with liquid fertilizer (half-strength) during the growing season. In winter, reduce watering to once every 2-3 weeks—most window plants enter dormancy naturally. Watch for pests like aphids on the undersides of leaves; spray with neem oil if you spot them early.
Tips & tricks for perfect window spot flower displays
Here's what nobody tells you about making your window garden truly thrive without the guesswork.
Light Optimization: The 4-6 hours of sunlight rule is non-negotiable for most blooming plants, but don't assume all windows are equal. I've seen south-facing windows with direct sun for only 3 hours because of nearby buildings—use a light meter app for 24 hours to map your spot's actual sunlight patterns. For north-facing windows, rotate your shade-tolerant plants quarter-turn weekly to prevent them from stretching toward any available light.
Container Stability: That 10-pound weight rating isn't just for show—test your hanging planter's hooks immediately after planting. I learned this the hard way when a fully watered 6-inch pot (with soil and plants) pulled down a $20 hook during a summer rainstorm. For extra security, add a second hook above the first and loop the planter's strap through both.
Watering Wisdom: The "top inch dry" rule works, but here's the secret: use a moisture meter for the first two weeks to understand your specific window's drying rate. Some spots dry out in 2 days, others take 4—this varies wildly based on window size, glass thickness, and even the color of your window frame. Once you know your rhythm, stick to it religiously.
Pest Prevention: Neem oil is great, but the real defense starts at planting. I always rinse new plants under cool water for 30 seconds before repotting to remove any hitchhiking pests. Then, place a small dish of water with a drop of dish soap near your window plants—flies and gnats get trapped while doing zero harm to your flowers. Refresh the water every 3 days.
Pro Tips for Window Spot For A Flower Pot
- Here's what nobody tells you about making your window garden truly thrive without the guesswork.
- Light Optimization: The 4-6 hours of sunlight rule is non-negotiable for most blooming plants, but don't assume all windows are equal.
- Container Stability: That 10-pound weight rating isn't just for show—test your hanging planter's hooks immediately after planting.
Frequently asked questions
Got questions about creating the perfect window spot for your flower pot? You’re not alone!
Here are some of the most common queries—and their practical solutions—to help you get started with confidence.
What’s the best type of window for a flower pot?
A south- or west-facing window gets the most sunlight (6+ hours/day), ideal for sun-loving plants like succulents or herbs. East-facing windows work for medium-light plants (e.g., ferns, calatheas), while north-facing spots suit low-light varieties like snake plants or ZZ plants. Pro tip: Rotate pots weekly for even growth!
How often should I water a window flower pot?
Watering depends on the plant and season! Check soil moisture with your finger—if the top inch is dry, it’s time. Succulents need water every 2–3 weeks, while tropical plants may need weekly watering. Overwatering is the #1 killer! Use pots with drainage holes and a saucer to catch excess water.
Can I use a window seat or ledge for a heavy flower pot?
Yes, but safety first! Ensure your window seat or ledge can support the weight (most can handle 10–20 lbs). For extra stability, place the pot on a non-slip mat or use a lightweight pot with a wider base. Avoid overcrowding—leave space for airflow and easy access.
What if my plant isn’t thriving in the window spot?
Troubleshoot with these fixes:
Not enough light? Move to a brighter spot or supplement with a grow light.
Leggy or weak stems? Rotate the pot or prune for bushier growth.
Yellow leaves? Check for overwatering or nutrient deficiency (try a balanced fertilizer).
Pests? Isolate the plant and treat with neem oil or insecticidal soap.
What are some creative alternatives to traditional window pots?
Think outside the pot! Try:
- Hanging macramé planters for trailing plants (e.g., pothos, string of pearls).
- Wall-mounted geometric planters for a modern look.
- Repurposed containers like teacups, colanders, or even bookshelves with built-in planters.
- Vertical garden panels for small spaces (great for herbs or succulents!).
Wrapping up and next steps
Transforming your small space into a lush, green haven is easier than you think! A window spot for a flower pot doesn’t just brighten your home—it breathes life into every corner with minimal effort.
Whether you’re a seasoned gardener or just starting out, the key is to start small, stay consistent, and let nature do the magic. 🌱
Ready to take the next step? Pick your favorite plant, grab your supplies, and let your creativity bloom! Every pot you place is a tiny victory—so go ahead, make your windowsill your new green escape. Happy gardening! 🌸