Flowers
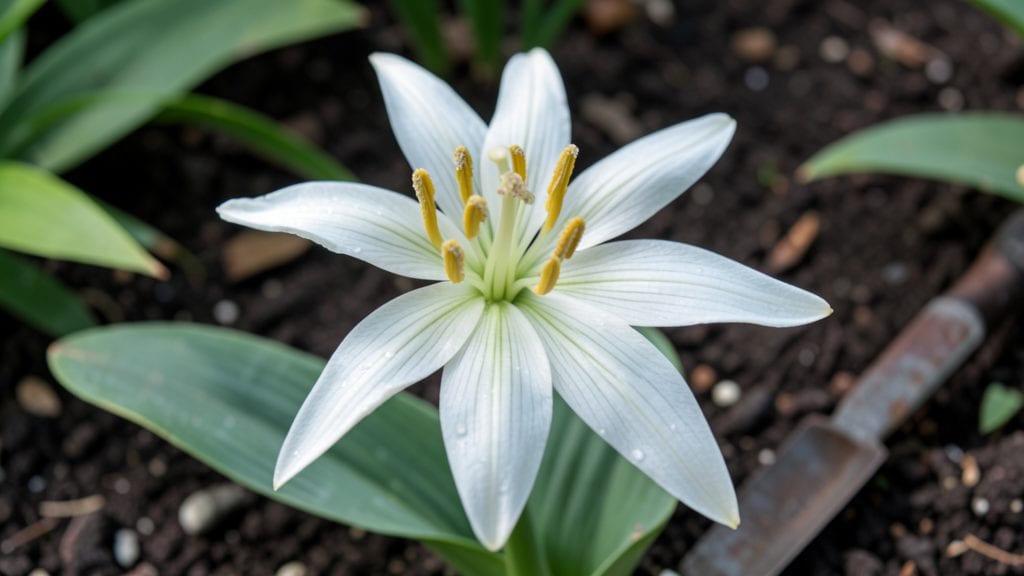
The spider lily flower (Hymenocallis) transforms any garden into a tropical oasis with its striking 3-foot spikes and glossy, strap-like leaves.
I remember the first time I saw one in a friend’s yard—those dramatic blooms looked like something out of a rainforest, yet they thrive in my dry, hot climate.
The secret lies in their drought tolerance and love for well-drained soil, making them a low-maintenance stunner for gardeners who want drama without fuss.
You’ll need a sunny spot with at least 6 hours of direct light daily, loose, sandy soil with good drainage, and patience—these bulbs take 2-3 years to reach their full, show-stopping height.
Plant them in fall or early spring, about 6 inches deep and 12 inches apart, and water moderately once established. The real magic happens when they bloom in late spring to summer, filling the air with a faint, sweet fragrance that hums with pollinators.
Once they’re settled, spider lilies are nearly foolproof. They handle drought like champions, so don’t overwater—yellowing leaves usually mean too much moisture, not too little. A light feeding with balanced fertilizer in early spring keeps them happy, and they rarely face pests.
The only challenge? Waiting for those first dramatic spikes to rise, which is worth every moment of anticipation.
Perfect for borders, containers, or as a focal point in Mediterranean-style gardens. They even naturalize over time, spreading slowly to create a lush, low-maintenance understory. Let’s get those bulbs in the ground and watch your garden transform into a tropical retreat.
📚 In This Guide
- What you need
- Instructions
- Tips and common mistakes
- Wrapping up and next steps
What you need
- ● Spider lily bulbs: 3–5 healthy, firm bulbs (choose from Lycoris or Hymenocallis for drought tolerance).
- ● Well-draining potting mix: 2–3 bags of cactus/succulent blend (or amend garden soil with perlite/coarse sand).
- ● Container or garden bed: Containers: 1–2 pots per bulb (6–8" diameter, with drainage holes).
- ● Garden beds: Full sun (6+ hours/day) and sandy/gritty soil (amend with compost if needed).
- ● Watering can or hose: With a gentle spray nozzle for post-planting hydration.
- ● Garden trowel or bulb planter: For digging holes (2–3" deep, 3x bulb width).
- ○ Mulch (optional): 1–2 inches of gravel or pine bark to retain moisture and deter weeds.
- ○ Fertilizer (optional): Balanced 10-10-10 or low-phosphorus bulb food (apply sparingly—these plants prefer lean soil!).
- ○ Stakes (optional): For tall varieties (e.g., Hymenocallis caroliniana) to support dramatic spikes.
- ● Gloves & knee pads: For comfort during planting (bulbs can be prickly!).
Step-by-step instructions for cultivating spider lilies
Here's how to grow these striking, drought-resistant perennials with minimal fuss.
Select the Perfect Planting Spot
Spider lilies thrive in partial shade to full sun, but their dramatic foliage and blooms perform best with 4-6 hours of morning sunlight—especially in hotter climates. I always choose a location where they won’t be overwhelmed by afternoon heat, which can scorch their broad leaves. The soil should drain well, as spider lilies despise soggy roots.
Test your spot by digging a hole and checking drainage: if water pools after 30 minutes, amend the soil with 2-3 inches of coarse sand or grit mixed into the top 12 inches. These plants tolerate poor soil but reward you with bigger blooms when given rich, well-draining earth. A slightly acidic to neutral pH (6.0-7.0) works best—avoid alkaline soils, which stunt growth.
Divide and Plant for Strong Establishment
Purchase mature spider lily tubers or divide established clumps in early spring before new shoots appear. Each division should have 3-5 healthy buds—these will become your new plants. Soak the tubers in lukewarm water for 1 hour to rehydrate them, then let them dry slightly to prevent rot.
Dig holes twice as wide as the tubers and 6 inches deep, spacing them 12-18 inches apart for single plants or 24 inches apart if you want a bold, clustered look. Place each tuber 2-3 inches below soil level, with the buds facing upward. Cover lightly with soil, then water deeply to settle everything in place.
Water and Mulch for Drought Resilience
Spider lilies are famously drought-tolerant once established, but young plants need consistent moisture for the first 6-8 weeks. Water deeply once a week during dry spells, ensuring the soil is 4-6 inches deep moist. Overwatering is the biggest mistake—these plants rot easily if their feet stay wet.
Apply a 3-inch layer of mulch (such as shredded bark or pine needles) around the base to retain moisture, suppress weeds, and protect tubers in winter. Keep mulch 2 inches away from the crown to prevent rot. After the first growing season, you can reduce watering to every 2-3 weeks, as the plants develop deep, drought-resistant roots.
Feed and Prune for Long-Term Blooms
In early spring, before new growth appears, apply a balanced, slow-release fertilizer (10-10-10) around the base. These plants don’t need heavy feeding, but a light application in spring and again after blooming encourages stronger foliage and taller spikes. Avoid high-nitrogen fertilizers—they promote leafy growth at the expense of flowers.
After the blooms fade, cut back the 3-foot spikes to ground level but leave the foliage until it yellows naturally. This ensures the plant stores energy for next year’s growth. Divide clumps every 3-4 years in early spring to prevent overcrowding, which reduces bloom size. Simply dig up the tubers, separate the sections, and replant as you did initially.
Protect and Enjoy Year-Round
Spider lilies are hardy to USDA Zone 7, but in colder regions, protect the tubers with an extra 2-3 inches of mulch before the first frost. They’ll lie dormant through winter and emerge again in spring. In warmer zones, they may bloom year-round with minimal care.
Watch for spider mites or aphids, which occasionally target the broad leaves. A strong spray of water usually dislodges them, but neem oil works if infestations persist. With proper placement and care, these striking perennials will reward you with dramatic, 3-foot spikes of exotic blooms for decades with almost no effort.
Tips & tricks for perfect spider lily cultivation
These pro tips will help you avoid common pitfalls and maximize those stunning 3-foot blooms.
Site Selection Secret: Pay special attention to that 4-6 hours of morning sunlight rule—especially in hot climates. I've seen spider lilies struggle when planted in full afternoon sun, where their broad leaves crisp and burn. Test your spot by observing how much direct sun hits the area between 8 AM and 2 PM. If you notice leaves curling or browning by late afternoon, consider moving your plants to a more sheltered location.
Planting Precision: When you're digging those holes twice as wide as your tubers, don't just eyeball it—use a measuring tape or even a large plate as a guide. The extra space around the tubers prevents root competition and allows for better water absorption. I've found that tubers planted in cramped holes often develop uneven growth patterns, with one side growing more vigorously than the other.
Watering Wisdom: That 6-8 week consistent moisture period is critical, but timing matters just as much as quantity. Water in the early morning so the soil has time to dry out before evening. I've ruined perfectly good tubers by keeping them too wet—always check soil moisture by sticking your finger 4-6 inches deep. If it's dry at that depth, it's time to water again.
Mulching Mastery: The 3-inch mulch layer isn't just for looks—it creates a microclimate that protects your tubers. I recommend using pine needles or shredded bark because they decompose slowly and improve soil structure over time. Keep that mulch 2 inches away from the crown to prevent fungal issues, and remember to refresh it annually as it breaks down.
Pro Tips for Spider Lily Flower
- These pro tips will help you avoid common pitfalls and maximize those stunning 3-foot blooms.
- Site Selection Secret: Pay special attention to that 4-6 hours of morning sunlight rule—especially in hot climates.
- Planting Precision: When you're digging those holes twice as wide as your tubers, don't just eyeball it—use a measuring tape or even a large plate as a guide.
Frequently asked questions
Got questions about cultivating these striking blooms? Here’s what you need to know—from timing to troubleshooting—so you can grow spider lilies with confidence!
When is the best time to plant spider lilies?
Plant spider lilies in early spring (after the last frost) or late summer (6–8 weeks before your first frost). They thrive in warm soil and need time to establish roots before winter. If planting in containers, use well-draining pots and place them in a sheltered spot during cold snaps.
How long does it take for spider lilies to bloom?
With patience, spider lilies typically bloom 1–2 years after planting from seed, though established tubers may flower sooner (sometimes in the first year). Once mature, they produce dramatic 3-foot spikes in late summer or early fall. Deadhead spent blooms to encourage next year’s growth!
Why aren’t my spider lilies flowering?
Spider lilies may skip blooming due to immature tubers, poor drainage, or overcrowding. Ensure they get full sun (6+ hours/day) and well-draining soil. Divide clumps every 3–4 years to rejuvenate growth. If planted too recently, give them another season—they’re worth the wait!
What are some low-maintenance alternatives to spider lilies?
If spider lilies seem too high-maintenance, try these drought-tolerant, dramatic bloomers:
- Black-Eyed Susan – Bright yellow flowers, thrives in poor soil.
- Daylilies – Hardy, repeat-blooming, and deer-resistant.
- Agave – Striking foliage with minimal care.
- Red Hot Poker (Kniphofia) – Tall spikes like spider lilies but more cold-hardy.
Are spider lilies toxic to pets or humans?
Spider lilies are non-toxic to both pets and humans, making them a safe choice for gardens with curious cats or kids. However, always monitor pets when introducing new plants—they might still nibble out of curiosity! Their striking blooms add beauty without worry.
Wrapping up and next steps
The spider lily flower is a stunning, low-maintenance addition to any garden—its bold spikes and drought tolerance make it a dream for both beginners and seasoned gardeners. 🌸 With the right soil, sunlight, and a little patience, you’ll be rewarded with dramatic, three-foot blooms that turn heads and attract pollinators.
Ready to transform your garden? Start by gathering your supplies, then follow the steps to plant and care for your spider lilies. Once they’re thriving, share your progress with fellow plant lovers—your green thumb will inspire others! 🌱