Flowers
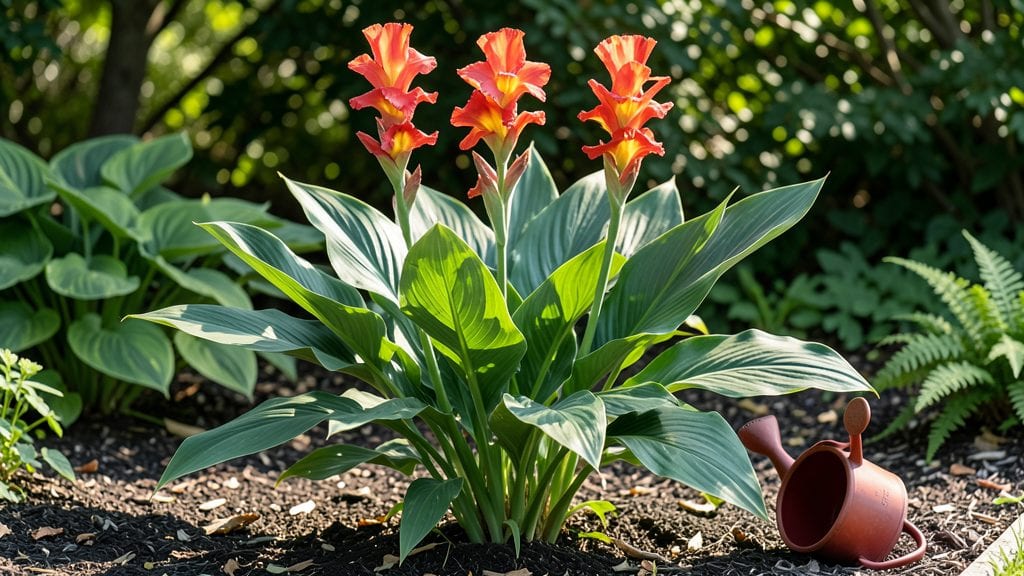
Red canna flowers bring bold tropical drama to gardens that most people think can’t handle them. 🌺 I planted mine in a shady corner last summer, and by August, they were the showstopper—deep red blooms standing like torchbearers against the green foliage.
The secret isn’t just their striking color but how they transform even the most ordinary space into something lush and exotic.
These aren’t fussy plants—just give them 6 hours of sunlight and well-draining soil, and they’ll reward you with foot-tall spikes of blooms from midsummer through frost.
Pair them with purple coneflowers or silver-leaved dusty miller for a high-contrast look, or tuck them into containers with monstera and calathea for instant tropical vibes. Near a pond or fountain, their bold petals echo the movement of water, adding depth to any setting.
What you’ll love most is how effortlessly they anchor a garden. Their leathery, arrow-shaped leaves add texture year-round, while the flowers draw the eye like a beacon. Even in cooler climates (down to Zone 7), they bounce back reliably—just cut back the foliage in fall and mulch well.
The payoff? A garden that feels like a vacation, no passport required.
Try them in border edges, mixed containers, or as a dramatic focal point near patios. For extra flair, plant in odd-numbered groupings (three or five) to create natural focal points.
The best part? They multiply easily—just divide the rhizomes every few years, and you’ll have enough to share (or fill your entire garden).
📚 In This Guide
- What you need
- Instructions
- Tips and common mistakes
- Wrapping up and next steps
What you need
- ● Red Canna Tubers: 3–5 tubers (choose healthy, firm ones with visible "eyes" or growth nodes). Pro tip: 💡 Larger tubers yield bigger blooms!
- ● Well-draining potting mix: 5–10 gallons (blend garden soil with compost and perlite for aeration).
- ● Containers or garden bed: For containers: 12–18" pots with drainage holes (1 tuber per 5–6" of pot diameter).
- ● For in-ground planting: Full sun (6+ hours/day) and rich, moist soil.
- ● Slow-release fertilizer: 10–10–10 NPK ratio (mix 1 tbsp per 1 gallon of soil).
- ● Garden trowel or hand shovel (for planting).
- ● Watering can or hose with gentle spray (keep soil moist but not soggy).
- ● Mulch (straw or shredded leaves) (1–2" layer to retain moisture).
- ● Pruning shears (for trimming dead foliage or dividing tubers later).
- ○ Epsom salt (optional) (1 tbsp per gallon of water monthly for magnesium boost).
- ○ Trellis or stakes (optional) (if growing tall varieties like Canna 'Striped Real McCoy').
Step-by-Step guide to growing stunning red canna flowers
Here's how to cultivate bold tropical cannas in cooler zones—no greenhouse needed.
🌱 Step 1: Select and Prepare Your Planting Site
Choose a location that gets at least 6 hours of morning sun and afternoon shade—cannas appreciate warmth but hate scorching afternoon rays. The soil should drain well but retain moisture; amending with 3-4 inches of compost before planting ensures nutrients stay available. I always test my soil first—cannas thrive in slightly acidic to neutral pH (6.0-7.0).
Dig a hole twice as wide as the canna's root ball but only as deep as the container it came in. Loosen the sides of the hole with a fork to encourage root spread. If your soil is heavy clay, mix in 1 part perlite to 3 parts native soil to improve aeration. Cannas are heavy feeders, so I add a slow-release granular fertilizer at planting time—just follow the package rate for bulbs.
☀️ Step 2: Plant Tubers at the Right Depth and Spacing
Place the canna tuber 2-3 inches deep with the eyes (growth points) facing upward—this ensures strong shoots emerge. I like to plant them in early spring after the last frost, when soil temperatures reach 60°F or warmer. Space tubers 18-24 inches apart in rows 2-3 feet apart for mature plants to spread comfortably.
Cover the tuber with soil, then water deeply to settle everything. The key here is not to bury the growth points too deep—they need light to sprout. If you plant too shallow, the tuber may dry out; too deep, and the shoots struggle to reach the surface. Press the soil gently around the tuber but don't compact it—cannas need loose, airy soil to establish roots quickly.
💧 Step 3: Water and Mulch for Consistent Moisture
Water cannas deeply once a week during the first growing season, aiming for 1-1.5 inches of water per week. They tolerate brief dry spells but hate soggy soil—yellowing leaves signal overwatering, while crispy edges mean thirst. I use a soaker hose to deliver water slowly at the base, avoiding wetting the foliage to prevent fungal diseases.
Apply 3-4 inches of organic mulch (like shredded bark or straw) around the base, keeping it 2-3 inches away from the stems. Mulch conserves moisture, regulates soil temperature, and suppresses weeds. Replenish it as it breaks down—cannas appreciate consistent ground cover. In cooler climates, mulch also protects tubers from frost heave in winter.
✂️ Step 4: Fertilize and Prune for Lush Growth
Feed cannas with a balanced liquid fertilizer (10-10-10) every 4-6 weeks during the growing season. I switch to a low-nitrogen, high-phosphorus formula (5-10-10) when buds form to encourage flowering. Avoid high-nitrogen fertilizers late in the season—they promote leafy growth at the expense of blooms.
Deadhead spent flowers by snipping the stem just above the next leaf node to redirect energy into new blooms. Prune leggy stems in early summer to encourage bushier growth. If cannas flop over, stake them with bamboo stakes or a small trellis—their heavy blooms need support. I also cut back 1/3 of the foliage in late fall to prepare the plant for dormancy.
⏰ Step 5: Overwinter Tubers for Next Year's Blooms
When frost threatens, cut back the foliage to 2-3 inches above the ground and remove the mulch. Dig up tubers after the first hard frost, when leaves turn brown and die back. Shake off excess soil and let them dry in a shady, well-ventilated area for 1-2 weeks. Store them in a cool (40-50°F), dry place like a garage or basement until spring.
Real talk: I’ve lost tubers to rot when stored too damp, and to shriveling when kept too dry. Wrap them in newspaper or peat moss before storing to maintain moisture without suffocating them. Label each tuber with the variety—after a few years, you’ll forget which one produces the deepest red blooms!
Tips & tricks for perfect red canna flowers
Common pitfalls—and how to sidestep every one when growing these bold tropical beauties.
Soil Prep Secret: The 3-4 inches of compost in Step 1 isn't just about nutrients—it's about creating the perfect moisture balance. I've found that mixing in 1 part perlite to 3 parts native soil (for clay-heavy areas) prevents compaction while still retaining enough moisture for those deep roots. Think of it as creating a sponge-like environment where water drains but doesn't pool. This is especially critical in cooler climates where soil can become waterlogged during rainy seasons.
Planting Depth Visual: Getting that 2-3 inches deep planting right in Step 2 can be tricky. Here's my foolproof method: Hold the tuber between your thumb and forefinger—when you place it in the hole, the top should be level with the soil surface when pressed gently. The eyes should be just below the soil line, not buried. I've ruined tubers by planting too deep (shoots can't emerge) and too shallow (tubers dry out)—this method eliminates both mistakes.
Watering Wisdom: The 1-1.5 inches per week guideline in Step 3 is your target, but timing matters just as much. Water in the morning so foliage dries completely before evening—this prevents fungal diseases that can turn your vibrant red blooms into sad, brown messes. I use the "poke test": Stick your finger 2 inches into the soil; if it's dry, it's time to water. If it's still damp, wait another day.
Fertilizer Transition: Switching from 10-10-10 to 5-10-10 when buds form (Step 4) might seem subtle, but it's a game-changer. The reduced nitrogen prevents leafy growth at the expense of blooms. I start this transition when I notice the first flower buds forming—usually about 6-8 weeks after planting. Pro tip: Mix your fertilizer with water first, then apply it directly to the soil (not leaves) to avoid burning the foliage.
Pro Tips for Red Flower Canna
- Common pitfalls—and how to sidestep every one when growing these bold tropical beauties.
- Soil Prep Secret: The 3-4 inches of compost in Step 1 isn't just about nutrients—it's about creating the perfect moisture balance.
- Planting Depth Visual: Getting that 2-3 inches deep planting right in Step 2 can be tricky.
Frequently asked questions
Can red canna flowers survive winter in cooler climates?
Yes! While Cannas love warmth, they’re surprisingly hardy. In USDA zones 7-10, they’ll overwinter in the ground with mulch. For colder zones (below 20°F), dig up tubers, trim foliage, and store them in dry peat moss or sand at 40–50°F. Pro tip: Mark their location so you don’t forget where they’re buried!
How long does it take for red canna flowers to bloom after planting?
Patience pays off! If planting tubers in spring, expect blooms 8–12 weeks later. For potted plants, they may flower in 6–8 weeks with proper sunlight (6+ hours/day) and fertilizer (use a balanced 10-10-10 mix every 4–6 weeks). Hungry for speed? Start tubers indoors 4–6 weeks before the last frost to jumpstart growth.
Why aren’t my red canna leaves turning red like in photos?
Red foliage is a sunlight response! If your leaves are green, they’re likely not getting enough direct sun (6+ hours/day). Move them to a sunnier spot—partial shade will still yield flowers but muted colors. Bonus: Fertilize with low-nitrogen food (like 5-10-10) to boost color vibrancy.
Are red canna flowers toxic to pets or kids?
Good news! Cannas are non-toxic to dogs, cats, and humans, according to the ASPCA. However, their tubers can cause mild stomach upset if ingested in large amounts. Keep them out of reach if you have curious pets or toddlers. Safe zone: Plant them in elevated containers or fenced garden beds.
Can I grow red canna flowers in containers? If so, what size pot?
Cannas thrive in containers with drainage holes. For single plants, a 12–15 inch pot works; for clusters, go 18+ inches. Use a well-draining mix (60% potting soil, 30% perlite, 10% compost). Watering hack: Let the top inch dry between waterings to prevent root rot.
What can I do if my red canna flowers look leggy or floppy?
Leggy stems or drooping leaves usually mean too little light or overwatering. Move the plant to bright, indirect sunlight (or full sun if acclimated) and reduce watering. Trim back overgrown stems to encourage bushier growth. For potted plants, fertilize lightly (half-strength) to avoid burning roots.
Wrapping up and next steps
Bringing the vibrant red canna flower into your garden is a game-changer—whether you’re a seasoned gardener or just starting out! 🌺 These bold beauties prove that tropical drama doesn’t need a warm climate to shine, and with the right care, they’ll reward you with stunning blooms year after year.
Now that you’re armed with tips on planting, maintenance, and troubleshooting, there’s no better time to dig in and get growing.
Ready to transform your space? Start small—try a single pot or a patch in your garden—and watch your confidence (and your canna collection!) grow. Happy gardening! 🌱