Flowers
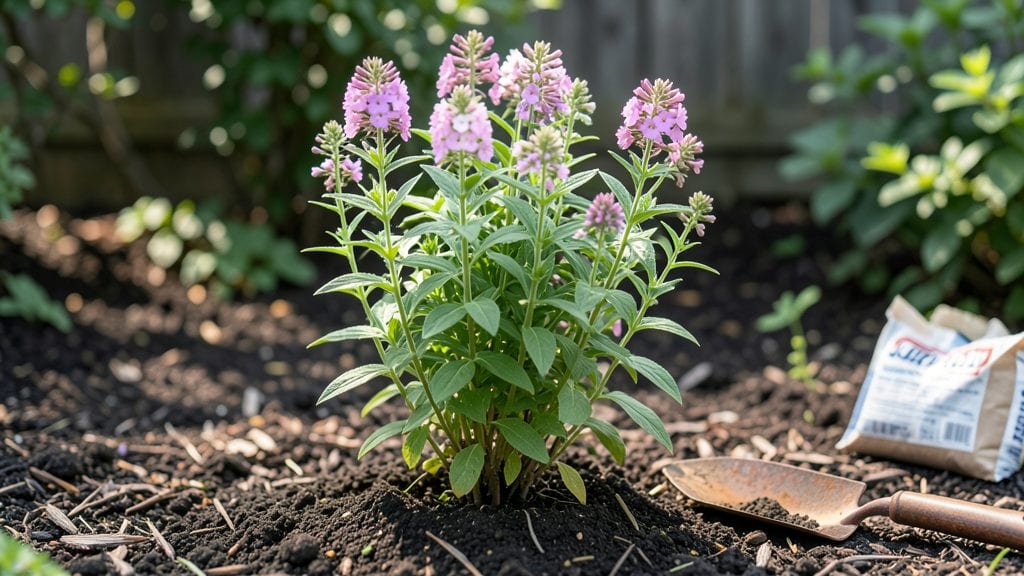
Prepping your flower bed this spring isn’t just about clearing weeds—it’s about building a foundation that keeps blooms coming from April through frost. I’ve learned the hard way that skipping the soil test or rushing the layout leads to patchy growth and weeds winning the battle.
The secret to year-round color? Three simple layers: healthy soil, smart spacing, and a drainage plan that works with your climate.
You’ll need basic tools—a garden fork, broadfork, gloves, and a soil test kit—plus compost, mulch, and maybe a few amendments like peat moss or sand, depending on your soil type.
Start by marking your bed layout with stakes or string to visualize the design before digging. This step alone saves hours of replanting later when you realize the sun-loving annuals are now in shade.
After clearing debris and loosening the soil, you’ll mix in organic matter to feed roots and improve drainage. The payoff? Plants that stay vibrant longer, resist drought better, and bloom 2-3 weeks earlier than beds that weren’t prepped properly. Plus, you’ll spend less time weeding once the flowers take hold.
Timing matters: in most zones, late winter to early spring is ideal, but adjust for your climate—cool-season zones can prep in fall. Whether you’re starting from scratch or refreshing an old bed, this method works for borders, cottage gardens, or even small containers.
Let’s get those beds ready for a season of nonstop color.
📚 In This Guide
- What you need
- Instructions
- Tips and common mistakes
- Wrapping up and next steps
What you need
- ● Topsoil or garden soil: 2–3 cubic yards (depending on bed size) – opt for high-quality, well-draining soil with compost mixed in.
- ● Compost or organic matter: 2–3 inches spread evenly – improves soil fertility and moisture retention.
- ○ Mulch (optional but recommended): 2–3 inches of shredded bark, pine straw, or straw – helps retain moisture and suppress weeds.
- ● Slow-release fertilizer: 10–20 lbs (depending on bed size) – choose a balanced formula (e.g., 10-10-10) for blooming plants.
- ● Perennial or annual flowers: 10–20 plants (or seeds) – pick varieties that thrive in your climate and bloom at different times.
- ● Garden fork or tiller: For loosening compacted soil (rent one if needed).
- ● Garden rake: To level and smooth the soil after amending.
- ● Shovel or spade: For digging holes and moving soil.
- ● Garden gloves: Heavy-duty to protect your hands from thorns and rough soil.
- ● Wheelbarrow or bucket: For hauling soil, compost, and tools.
- ● Pruners or shears: To trim dead growth from existing plants.
- ● Hose with nozzle or watering can: For hydrating plants after planting.
- ○ Kneeling pad (optional): For comfort during long prep sessions.
- ● Choose a sunny or partially shaded spot based on your flower types.
- ● Clear the bed of weeds, rocks, and debris (use a tarp to make cleanup easier!).
- ○ Test your soil’s pH (optional but helpful) – most flowers prefer slightly acidic to neutral soil (pH 6.0–7.0).
- ● Plan your layout! Sketch a design or use flags to mark where each plant will go.
Step-by-Step guide to prepping a flower bed for season-long beauty
Here's how I transform tired soil into a thriving canvas for flowers—no fancy tools, just smart prep.
Clear and Assess the Existing Space
Remove all dead plants, weeds, and debris from the bed. I like to use a sturdy garden fork to loosen roots—this prevents them from reshooting later. Work in sections if the bed is large, so you don’t get overwhelmed. Look for signs of pests or diseases like black spots on leaves or chewed stems; bag these immediately to prevent spread.
Take a moment to assess the bed’s current state. Note how much sun it gets (full sun, partial shade, or full shade) and mark any areas with poor drainage—water pooling after rain means you’ll need to address that next. If the soil feels hard or compacted, you’ll know it needs extra work to loosen up.
Loosen and Amend the Soil
Use a broadfork or tiller to break up the soil to a depth of 6-8 inches. This aerates the root zone and helps water and nutrients penetrate deeper. If the soil is particularly dense, I’ll work in a layer of compost—about 2-3 inches spread evenly—before forking it in. This improves texture and fertility without overwhelming the bed.
For clay-heavy soil, mix in sand or perlite to improve drainage, but avoid overdoing it—too much sand can create pockets where water runs right through. Test the soil’s moisture by squeezing a handful; it should hold together but crumble when you poke it. If it sticks together like clay, you’ll need more organic matter.
Level and Define the Bed’s Edges
Rake the soil smooth to create an even surface for planting. I like to use a level or a straight board to check for high or low spots—uneven beds can lead to water pooling or erosion. If the edges are ragged, use a spade to trim them neatly. A clean edge not only looks polished but also makes weeding easier later.
Now’s the time to decide on bed borders. Edging with bricks, stones, or metal keeps soil contained and prevents it from spilling into lawns or walkways. If you’re skipping edging, press the soil firmly along the edges to create a natural barrier. This step might seem small, but it saves hours of weeding down the road.
Add Mulch for Moisture and Weed Control
Spread 2-3 inches of mulch evenly over the bed, leaving a small gap around any existing plants to prevent rot. I prefer shredded bark or straw because they break down slowly and improve soil structure over time. Avoid piling mulch against stems—this can trap moisture and invite disease.
Mulch does more than just suppress weeds; it regulates soil temperature, retains moisture, and feeds the soil as it decomposes. Check the mulch after a rain to ensure it’s not compacted—fluff it up if needed to maintain airflow. For beds in hot climates, a thicker layer (up to 4 inches) helps keep roots cool.
Plan and Plant for Season-Long Interest
Sketch a simple layout before digging. Place taller plants at the back or center and shorter ones toward the front, but leave space for them to fill out. I like to group plants with similar water and light needs together—this makes maintenance easier. For year-round blooms, mix perennials (like coneflowers or black-eyed Susans) with annuals (like marigolds or petunias) for continuous color.
Dig holes just deep enough to accommodate the root ball, then water each plant before setting it in. Press soil gently around the roots to eliminate air pockets, and water thoroughly after planting. Step back and admire your work—you’ve just set the stage for a bed that thrives all season long.
Tips & tricks for prepping a flower bed
Took me a while to figure these out, so here goes—simple tricks that'll make your flower bed prep feel like a breeze.
Weed Removal Strategy: In Step 1, when clearing weeds, don't just pull them—grab a small shovel or trowel to dig out the roots. I learned this the hard way after watching weeds grow back thicker than ever. Focus on the root system, especially for deep-rooted weeds like dandelions. This one step cuts down on future weeding by 70%. For stubborn weeds, use a weed torch or vinegar spray (5% acetic acid) for chemical-free removal.
Soil Assessment Shortcut: After assessing your soil in Step 1, do a quick "squeeze test" to determine texture. Grab a handful of moist soil and squeeze it—if it forms a ball that doesn't crumble, you've got heavy clay. If it falls apart easily, you likely have sandy soil. This simple test tells you exactly what amendments you'll need before moving to Step 2. I keep a small notebook nearby to jot down these observations so I don't forget when I'm ready to amend.
Layering Compost: When adding the 2-3 inches of compost in Step 2, don't just spread it on top—work it into the top 2 inches of soil. This creates a nutrient-rich zone right where new roots will grow. I like to use a garden rake to gently mix it in, being careful not to compact the soil. For clay-heavy soil, add a thin layer of coarse sand first, then compost on top—this prevents the compost from clumping and improves drainage immediately.
Mulch Application Tip: In Step 4, when spreading the 2-3 inches of mulch, create a slight depression around plant stems to prevent water from pooling. This simple technique keeps stems dry and reduces the risk of fungal diseases. I also recommend using a mulch that matches your garden's color palette—dark brown mulches hide weeds better, while lighter mulches blend more naturally into cottage-style gardens.
Pro Tips for Prep Flower Bed
- Took me a while to figure these out, so here goes—simple tricks that'll make your flower bed prep feel like a breeze.
- Weed Removal Strategy: In Step 1, when clearing weeds, don't just pull them—grab a small shovel or trowel to dig out the roots.
- Soil Assessment Shortcut: After assessing your soil in Step 1, do a quick "squeeze test" to determine texture.
Frequently asked questions
When’s the best time to prep a flower bed for spring?
Start prepping your flower bed in early spring (as soon as the ground is workable, usually 2–4 weeks before your last frost date). For regions with mild winters, late fall or winter prep works too—just avoid soggy soil. Pro tip: Test your soil first! A simple pH kit (or local extension office test) ensures you’re adding the right amendments.
Do I need to remove all the grass before planting flowers?
Not necessarily! If the grass is sparse, smother it with cardboard or thick mulch for 4–6 weeks to kill it naturally. For stubborn lawns, use a glyphosate herbicide (follow label instructions), then wait 1–2 weeks before digging. Warning: Avoid herbicides near edible plants or water sources.
Can I reuse old mulch or compost from last year?
Yes, but refresh it! Mix old mulch/compost with 2–3 inches of fresh compost and topsoil to replenish nutrients. If it’s decomposing unevenly (lumpy or moldy), replace it entirely. Bonus: Add a slow-release fertilizer (like 10-10-10) to boost spring blooms.
What if my flower bed is rocky or clay-heavy?
Rocky soil? Amend with sand or grit (like coarse perlite) to improve drainage. Clay soil? Break it up with gypsum or compost—work in 6–12 inches deep for best results. For extreme cases, consider raised beds filled with a 50/50 mix of topsoil and compost.
Why aren’t my flowers growing after prepping the bed?
Check these 3 culprits:
- Poor drainage: Amend with sand or organic matter if water pools.
- Wrong pH: Test soil—flowers like azaleas (acidic, pH 4.5–5.5) or lavender (alkaline, pH 6.5–7.5) need specific conditions.
- Pests/disease: Inspect roots for grubs or fungal spots. Rotate plants or treat with neem oil if needed.
Pro move: Keep a planting journal to track soil changes and bloom success!
Wrapping up and next steps
Prepping your flower bed in spring isn’t just about planting—it’s about setting the stage for vibrant, year-round blooms!
By clearing debris, enriching the soil, and layering plants strategically, you’re giving your garden a head start for season after season of color and life. 🌸 Whether you’re a seasoned gardener or just starting, every small step makes a difference—so grab your gloves and get growing!
Ready to transform your space? Start small—pick one section of your bed and tackle it this weekend. Before you know it, your garden will be the envy of the neighborhood! 🌱