Flowers
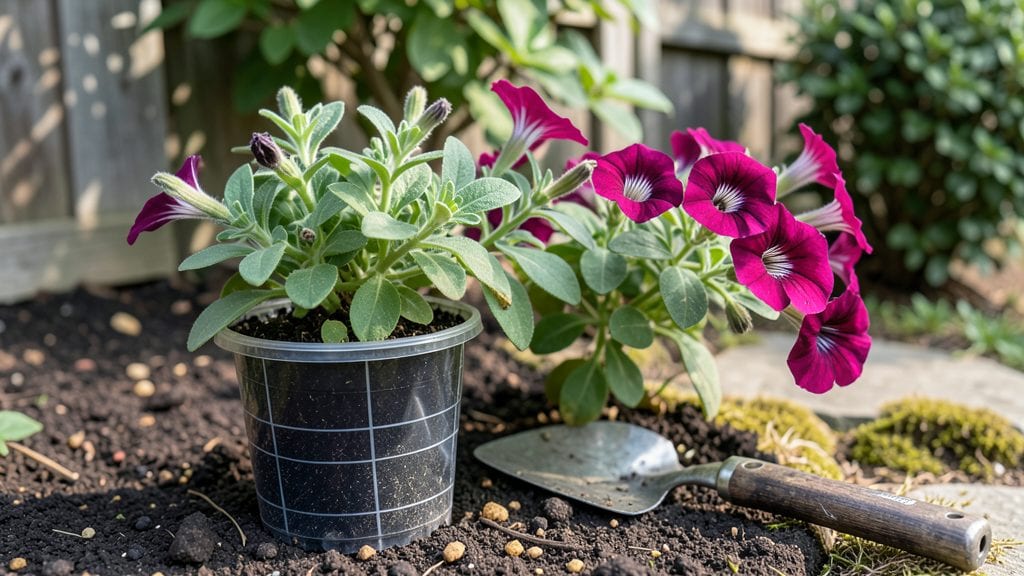
Planting flowers in planters turns even the smallest balcony into a riot of color—no yard required. 🌸 I learned the hard way that not all flowers thrive in containers, but the right choices (like petunias, geraniums, or marigolds) make this easier than you’d think.
The secret isn’t complicated: drainage, sunlight, and soil that won’t bake into a brick.
You’ll need 10-12-inch deep planters for most flowers, well-draining potting mix, and a saucer to catch overflow. Skip the garden soil—it compacts and suffocates roots.
Place your containers where they’ll get at least 6 hours of sunlight daily, and group them by water needs (succulents vs. impatiens, for example).
After planting, water thoroughly until it drains from the bottom, then let the top inch dry before watering again. Deadhead spent blooms weekly to encourage more flowers, and fertilize every 2-3 weeks with a balanced liquid feed. Within 4-6 weeks, you’ll have blooms that outshine any store-bought bouquet.
This method works for patios, windowsills, or rooftops—no green thumb needed. The only rule? Don’t overcrowd. Space plants according to their mature size, and you’ll avoid competition for water and nutrients. Ready to turn empty containers into a floral show?
📚 In This Guide
- What you need
- Instructions
- Tips and common mistakes
- Wrapping up and next steps
What you need
- ● Planters: 1–3 containers (size depends on flower type; 6–12 inches deep for most annuals, 10+ inches for perennials). Ensure they have drainage holes!
- ● Potting soil: 1–2 bags of high-quality container mix (avoid garden soil—it compacts!). Look for labels like "moisture control" or "organic blend."
- ● Flowers: 3–6 plants (check spacing needs on seed packets or tags). Opt for compact varieties like petunias, geraniums, or marigolds for planters.
- ○ Drainage medium (optional but recommended): Small pebbles, gravel, or broken pottery (1–2 inches) to prevent root rot.
- ● Gloves: 1 pair (to keep hands clean and protect from thorns).
- ● Trowel or small shovel: 1 (for digging and mixing soil).
- ● Watering can or hose with a gentle nozzle: 1 (avoid overhead watering to prevent soil erosion).
- ● Fertilizer (slow-release or liquid): 1 packet or bottle (follow package instructions for dosage).
- ○ Mulch (optional): 1 bag of organic mulch (like bark chips) to retain moisture and suppress weeds.
- ● Support stakes or cages (if needed): 1–2 for tall flowers like snapdragons or sunflowers.
Step-by-step instructions for planting flowers in containers
Here's how to create vibrant container displays that bloom effortlessly all season.
🪴 Step 1: Choose and Prepare Your Planters
Select containers with drainage holes—this prevents root rot, which kills plants faster than you'd think. I like terra cotta for annuals because it breathes, but plastic works too if you add a layer of pebbles at the bottom. Clean old planters thoroughly with a 10% bleach solution to kill any lingering pathogens.
Size matters: Aim for at least 12 inches deep for most flowering plants, with 6 inches of soil depth being the absolute minimum. Larger pots mean fewer watering sessions and more stable plants. If you're using the 4 planters you'll need, measure each one—some brands shrink after a few seasons.
🌱 Step 2: Layer Soil and Amendments for Drainage
Start with a 2-inch layer of coarse perlite or gravel at the bottom. This creates critical air pockets while allowing excess water to escape. I use the 3 gallons of potting mix you'll need, but mix in 1 cup of slow-release fertilizer per planter to feed blooms all season.
Fill containers to 2 inches below the rim—this leaves room for watering without spillage. Press the mix down gently so it's firm but not compacted. You'll see the difference when you water: soil that's too loose washes away, while properly settled mix stays put.
☀️ Step 3: Plant Flowers in the Right Groups
Group plants by sunlight needs: full sun lovers like petunias and geraniums in the brightest spots, partial shade types like impatiens in filtered light. For the 4 planters, I'd suggest 3-5 plants per container—crowding leads to weak stems and fewer blooms.
Dig holes twice as wide as the root ball but only as deep as the container's original soil line. Handle plants gently by their leaves, not stems. You'll notice some roots circling the edge of the pot—this is normal for nursery plants, but trim any that look mushy or dark.
💧 Step 4: Water Deeply and Establish a Routine
Water immediately after planting until water runs freely from the drainage holes. This settles the soil around roots and prevents air pockets. Check moisture daily for the first week—containers dry out 3 times faster than garden beds.
Once established, water when the top inch of soil feels dry to the touch. I set a timer for every 2-3 days in summer, but adjust based on your plants' color: wilting leaves mean it's time to water. Mulch with 1 inch of bark chips to retain moisture and keep roots cool.
✂️ Step 5: Maintain Blooms All Season
Deadhead spent flowers regularly—this isn't just for looks. Pinching back faded blooms encourages new growth and more flowers. I do this every 2-3 days during peak bloom, using clean scissors to cut just above a set of leaves.
Feed plants every 4-6 weeks with a balanced liquid fertilizer. You'll see the difference in 2-3 weeks: plants grow bushier, leaves stay vibrant, and blooms last longer. At season's end, compost the plants (unless diseased) and store containers for next year.
Tips & tricks for perfect container flower planting
Between us, the difference between wilted disappointment and vibrant blooms often comes down to these simple but game-changing details.
Container Selection Wisdom: For your four planters, prioritize weight and material—heavier containers (like terra cotta) won't tip over in wind, while plastic ones won't crack in freezing temperatures. If using decorative pots without drainage, drill holes yourself or create a false bottom with a plastic tray and pebbles. The 12-inch depth recommendation isn't arbitrary: it gives roots room to establish while preventing overcrowding that leads to competition for nutrients.
Soil Layering Technique: When creating that 2-inch drainage layer, don't just eyeball it—use a ruler for consistency across all four planters. I've seen beginners skip this step entirely, only to discover their plants drowning in their own soggy soil. For the 3 gallons of potting mix, consider adding a handful of worm castings to each planter—they boost microbial activity that helps roots absorb nutrients more efficiently. The firm-but-not-compacted soil texture is crucial: think of it like fluffy pancake batter rather than packed dirt.
Plant Spacing Secret: That 3-5 plants per container guideline assumes mature size—check the plant tags for final dimensions before committing. I've made the mistake of cramming too many small plants that later outgrew their space. For the four planters, arrange your plants in a "thriller-filler-spiller" pattern: one tall centerpiece (thriller), medium-height fillers, and trailing plants (spillers) that cascade over edges. This creates visual interest while optimizing sunlight exposure for all plants.
Watering Routine Hack: The 2-3 day watering schedule assumes average summer conditions, but your actual needs may vary. Invest in a moisture meter to check that top inch of soil—it's more accurate than guessing by appearance. For the first week, I recommend watering twice daily (morning and evening) to help plants establish roots. The bark chip mulch should cover the entire soil surface except where stems emerge—this prevents moisture loss while keeping roots cool during hot afternoons.
Pro Tips for Planting Flowers In Planters
- Between us, the difference between wilted disappointment and vibrant blooms often comes down to these simple but game-changing details.
- Container Selection Wisdom: For your four planters, prioritize weight and material—heavier containers (like terra cotta) won't tip over in wind, while plastic ones won't crack in freezing temperatures.
- Soil Layering Technique: When creating that 2-inch drainage layer, don't just eyeball it—use a ruler for consistency across all four planters.
Frequently asked questions
Got questions about container gardening? You’re not alone! Here are answers to the most common concerns—so you can grow stunning flowers in planters with confidence.
What’s the best soil mix for flowers in planters?
Use a lightweight, well-draining potting mix designed for flowers (avoid garden soil—it compacts and drains poorly). Mix in 20-30% perlite or compost for extra aeration. For heavy feeders like petunias or geraniums, add a slow-release fertilizer at planting time. Pro tip: Sterilize used soil with a 30-second microwave zap to kill pests!
How often should I water flowers in planters?
Check soil moisture daily in hot weather—containers dry out fast! Water when the top inch feels dry, but avoid soggy soil (overwatering causes root rot). Early morning is best to reduce evaporation. Group planters together to create a microclimate that retains moisture longer. Hot tip: Mulch with pebbles or bark to slow water loss.
Can I reuse old planters for new flowers?
Clean them thoroughly with 10% bleach water (1 part bleach to 9 parts water) to kill fungi/bacteria, then rinse well. Scrub off old soil and inspect for cracks. Terracotta planters may need a fresh coat of sealant if they’ve dried out and cracked. Warning: Never reuse soil—it can harbor diseases!
What are the easiest flowers to grow in planters?
Start with low-maintenance picks like marigolds, zinnias, or impatiens (great for shade). Petunias, geraniums, and snapdragons thrive in sun and bloom nonstop. For beginners, succulents or herbs (like basil) are nearly foolproof. Pick flowers with similar water/sun needs to simplify care!
How do I keep pests away from container flowers?
Prevent pests with neem oil spray (weekly) or companion planting (e.g., marigolds repel aphids). Check undersides of leaves for eggs. Avoid overwatering—it attracts slugs and fungus gnats. For severe infestations, handpick pests or use insecticidal soap. Bonus: Diatomaceous earth works like magic for crawling bugs!
Can I leave flowers in planters over winter?
Most annuals won’t survive frost, but hardy perennials (like pansies or lavender) can stay in containers if wrapped in burlap and moved to a sheltered spot. Empty and store planters if unused, or keep them filled with gravel to prevent cracking. Pro tip: Use insulated planter sleeves for extra protection!
Wrapping up and next steps
Planting flowers in planters is a rewarding way to bring color and life to any space—whether you’re a seasoned gardener or just starting out! 🌸 With the right containers, soil, and a little care, you can enjoy vibrant blooms without the hassle of a full garden.
Remember, consistency is key: water wisely, choose sun-loving (or shade-loving!) varieties, and don’t forget to fertilize occasionally.
Now that you’re armed with tips and tricks, why not start small? Pick a sunny spot, grab a planter, and plant a few easy-care flowers like marigolds, petunias, or geraniums. Watch your green thumb grow—one bloom at a time! 🌱