
Flowers
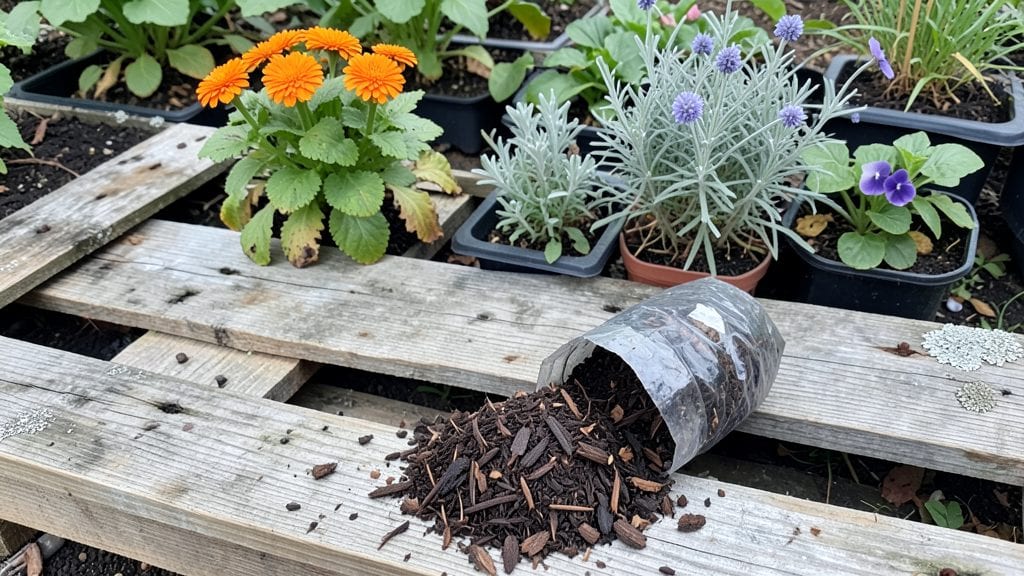
Transforming a discarded wooden pallet into a pallet flower planter is one of the most rewarding upcycling projects I’ve ever done—it turns something ordinary into a vibrant vertical garden that steals the show. 🌸 The best part?
You’re saving wood from the landfill while creating a display that’s far more eye-catching than store-bought planters. My first attempt used a weathered pallet I found behind my local hardware store, and within weeks, it became the centerpiece of my patio with trailing petunias spilling over the edges.
You’ll need just a few supplies: a sturdy pallet (check for the "HT" stamp for heat-treated wood), sandpaper, outdoor paint or sealant, screws or brackets, and plants that thrive in containers—think nasturtiums, ferns, or even small herbs like thyme.
The process is beginner-friendly, taking about two hours from prep to planting, and costs less than $30 if you skip the paint. Safety first: wear gloves and a mask when sanding, and always let sealant cure fully before adding plants.
What you end up with is a lush, three-dimensional garden that adds height and drama to small spaces. The cascading blooms create a living curtain, while the rustic wood adds texture that no plastic planter ever could.
Plus, you can customize the look—stain it to match your deck, paint it in bold colors, or leave it natural for a farmhouse vibe. Maintenance is easy: water from the top, and fertilize lightly every few weeks to keep those flowers thriving all season.
This project works for balconies, porches, or even as a backyard statement piece. Once you’ve built one, you’ll see pallets everywhere—turning them into planters is a game-changer for small-space gardens. Ready to give it a try? Let’s get started with the step-by-step guide.
📚 In This Guide
- What you need
- Instructions
- Tips and common mistakes
- Wrapping up and next steps
What you need
- ● Wooden pallet: 1 (preferably heat-treated, HT, to avoid chemicals). Standard sizes: 40" x 48" or 36" x 42".
- ● Drill: 1 (with 1/2" to 3/4" spade bit for drainage holes).
- ● Screwdriver or impact driver: 1 (for securing slats if needed).
- ○ Outdoor paint or stain: 1 quart (weather-resistant, e.g., exterior-grade acrylic). Optional colors: pastel pink, sage green, or bold terracotta.
- ● Paintbrush or roller: 1 (3"-4" wide for efficiency).
- ● Landscape fabric: 1 roll (to prevent soil from spilling between slats).
- ● Potting soil: 10–15 gallons (lightweight, well-draining mix for flowers).
- ○ Drip irrigation kit (optional but handy): 1 (with emitters for even watering).
- ● Flowering plants: 12–20 (mix of trailing and upright varieties). Top picks: Petunias (spiller)
- ● Geraniums (upright)
- ● Fuchsias (dangling blooms)
- ● Lobelia (compact filler)
- ● Mulch: 1 bag (pine bark or shredded bark to retain moisture).
- ○ Decorative accents (optional): Twine or jute rope (for hanging)
- ● Mini solar lights (for evening ambiance)
- ● Chicken wire (to secure lightweight plants)
Step-by-step instructions for building a pallet flower planter
Transform a simple wooden pallet into a stunning vertical garden that adds height and drama to any space.
🪴 Step 1: Prepare the Pallet for Planting
Start by cleaning the pallet thoroughly with warm, soapy water to remove dirt, splinters, or chemical residues. A stiff brush helps scrub between slats. Let it dry completely in direct sunlight for at least 24 hours—this ensures any hidden moisture evaporates and prevents rot later.
Check for loose boards or protruding nails. Remove any nails with pliers, leaving only the screws that hold the pallet together. If the wood feels rough, sand the edges lightly with 80-grit sandpaper to prevent splinters. Here's the thing—your pallet should be stable enough to hold soil and plants without wobbling.
🌱 Step 2: Add a Waterproof Liner and Soil
Lay a landscape fabric or heavy-duty plastic sheet over the pallet, securing it with staples or zip ties to the underside. This keeps soil from falling through the gaps and makes cleanup easier. Cut a few small holes in the fabric along the slats where you’ll plant—just big enough for roots to grow through.
Fill the spaces between the slats with moistened potting mix, pressing it gently but firmly. Don’t pack it too tightly—you want roots to spread easily. Leave about 1 inch of space at the top for watering. I like to use a mix of one-third perlite for drainage and two-thirds potting soil to keep it light and airy.
☀️ Step 3: Choose and Plant Your Flowers
Select plants that thrive in containers and have trailing or bushy habits—think petunias, geraniums, or trailing lobelia. Space them 6-12 inches apart depending on their mature size. Dig small holes in the soil with your fingers, place each plant gently, and cover the roots with more soil. Water immediately to settle everything in place.
Here’s where it gets fun: mix heights and colors for visual interest. Place taller varieties at the back (closest to the pallet’s upright boards) and shorter, cascading plants toward the front. You’ll see them spill over the edges beautifully once they establish.
💧 Step 4: Water and Maintain Regularly
Water the pallet planter thoroughly after planting, then check the soil every 2-3 days. Pallet gardens dry out faster than ground-level planters because they’re exposed on all sides. Water until it drains from the bottom—you’ll notice moisture seeping through the slats, which means the roots are getting just the right amount.
Feed your flowers with a balanced liquid fertilizer every 2-3 weeks during the growing season. Deadhead spent blooms regularly to encourage more flowers. Watch for signs of wilting or yellowing leaves—these are your cues to adjust watering or check for pests like aphids.
✂️ Step 5: Prune and Refresh for Long-Lasting Blooms
As flowers fade, trim them back to just above a set of healthy leaves. This encourages bushier growth and more blooms. Every 4-6 weeks, add a 1-inch layer of compost to the top of the soil to replenish nutrients. You’ll see a noticeable difference in plant vigor within a few weeks.
By late fall, when blooms slow down, give the pallet a final rinse and store it in a dry, sheltered spot. Next spring, refresh the soil with new potting mix and replant. Your vertical garden will be ready to steal the show again!
Tips & tricks for perfect pallet flower planters
Here's what I learned after building (and fixing) several pallet gardens—these tricks will save you time and frustration.
Pallet Selection Matters: Not all pallets are created equal! Look for heat-treated pallets (marked "HT") to avoid toxic chemicals, and choose ones with uniform, sturdy slats. Avoid pallets with visible rot or cracks—these will compromise stability. I've found that pallets with 3-4 boards across the width work best for most flowers. Confession: I skipped this step once and ended up with a wobbly planter that tipped over during my first watering!
Drainage is Everything: The 1-inch space at the top you leave for watering? That's not just for aesthetics—it's crucial for preventing overflow when you water from above. For even better drainage, consider adding a layer of small rocks or gravel at the very bottom before adding your landscape fabric. This creates extra space for water to escape while keeping roots from getting waterlogged. I learned this the hard way when my first planter developed root rot from poor drainage.
Plant Placement Strategy: When arranging your flowers, think about how they'll grow over time. Place your tallest plants (like sunflowers or snapdragons) against the back slats where they can lean against the wood for support. For trailing plants like nasturtiums or ivy, position them near the edges where they can spill over dramatically. Pro tip: Use small wooden stakes or twine to gently guide vining plants in the direction you want them to grow—it creates a more polished look.
Seasonal Prep Saves Time: Before storing your pallet planter for winter, give it a thorough cleaning by brushing off soil and debris. This prevents pests from hiding in the wood over winter. I also like to apply a light coat of outdoor wood sealant to protect the pallet from moisture and extend its lifespan. Trust me on this—your spring replanting will go much smoother when you don't have to deal with moldy soil or damaged wood!
Pro Tips for Pallet Flower Planter
- Here's what I learned after building (and fixing) several pallet gardens—these tricks will save you time and frustration.
- Pallet Selection Matters: Not all pallets are created equal!
- Drainage is Everything: The 1-inch space at the top you leave for watering?
Frequently asked questions
Got questions about creating or using a pallet flower planter?
Here are some common ones—and their easy answers—to help you grow with confidence!
What’s the best way to stabilize a pallet planter so it doesn’t tip over?
Anchor your planter with heavy-duty stakes or screws driven into the ground at each corner. For extra security, place it against a wall or fence. If using a single pallet, fill it with soil first to add weight—never place it on uneven surfaces.
How long does it take for flowers to grow in a pallet planter?
Timing depends on your plants! Fast growers like marigolds or zinnias may bloom in 6–8 weeks, while perennials like lavender take 2–3 months to establish. Start with annuals for quicker color—just check seed packets for specific timelines.
Can I use a pallet planter for vegetables or herbs instead of flowers?
Pallet planters work great for herbs (basil, thyme), greens (lettuce, spinach), or compact veggies (cherry tomatoes, peppers). Just ensure the pallet has drainage holes and use lightweight, well-draining soil. Avoid deep-rooted plants like potatoes—they’ll struggle in the limited space!
How do I keep pests away from my pallet flower planter?
Prevent pests with physical barriers like copper tape (for slugs) or neem oil spray for insects. Plant pest-repelling companions like marigolds or nasturtiums nearby. Elevate the planter off the ground to deter burrowing pests, and remove dead leaves regularly to avoid fungal issues.
What are some creative ways to decorate a plain pallet planter?
Get artistic! Paint the wood with weatherproof chalk paint or stencil designs, wrap it in burlap or lace, or add LED string lights for evening charm. For a rustic look, leave the wood natural but attach decorative hardware like hooks or metal accents. Pro tip: Use non-toxic materials to keep your plants safe!
Wrapping up and next steps
Transforming an old pallet into a stunning pallet flower planter is more than just a creative project—it’s a sustainable way to bring vibrant blooms to your space while reducing waste. 🌸 Whether you're a seasoned gardener or a DIY beginner, this project proves that beauty and eco-friendliness go hand in hand.
With just a few tools and a little imagination, you can turn plain materials into a showstopping vertical garden that elevates any yard or patio.
Ready to take the next step? Grab your pallet, gather your supplies, and let your green thumb shine! Share your finished planter with us—we’d love to see your blooming masterpiece! 📸