
Orchid Care
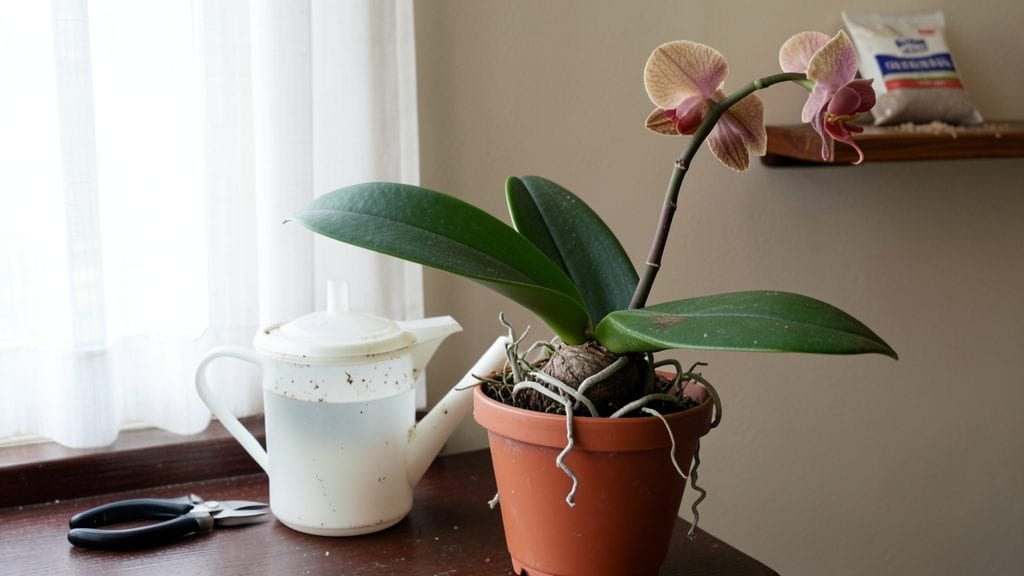
Proper orchid flower care after flowering is your secret to turning that spent bloom into a thriving plant—so don’t toss it when those petals drop. 🌸 The moment the last blooms fade, your orchid shifts into growth mode, and with the right care, you’ll coax fresh spikes and lush foliage in no time. weeks.
I’ve revived orchids that looked finished after flowering, and the secret isn’t complicated: it’s about pruning correctly, adjusting light and water, and giving them the nutrients they crave for reblooming.
The first step is pruning the spent flower spike—not always where you’d expect. For Phalaenopsis orchids, trim just above a dormant node (those little bumps) where new roots might form. Cattleyas, though, need a different approach: cut the spike at its base only if it’s completely brown.
This small detail makes all the difference between a plant that lingers and one that thrives. Most people over-prune or wait too long, and that’s when problems start.
What you’ll end up with is a stronger plant ready to produce new growth within 4-6 weeks. The leaves will firm up, new roots will emerge from the base, and—if conditions are right—you’ll spot that telltale flower spike forming.
The air will smell fresher, the roots will cling tighter to their pot, and you’ll know you’ve turned a "finished" orchid into a reblooming powerhouse. Here’s exactly how to make it happen.
This method works for both beginner and experienced growers, though Cattleyas and Phalaenopsis need slightly different timing. Whether you’re dealing with a single plant or a collection, the principles stay the same: patience, precision, and paying attention to what your orchid tells you through its growth habits.
Let’s get those blooms back!
📚 In This Guide
- What you need
- Instructions
- Tips and common mistakes
- Wrapping up and next steps
What you need
- ● Pruning shears or clean scissors – Sharp, sterilized (70% isopropyl alcohol wipe recommended)
- ● Well-draining orchid mix – 1 part bark (1-2" chunks), 1 part sphagnum moss, 1 part perlite/pumice (sterilized)
- ● 6"–8" plastic or terracotta pot – With drainage holes (slotted or perforated)
- ● Balanced orchid fertilizer – 20-20-20 or 10-10-10 (diluted to ¼–½ strength)
- ● Spray bottle (16 oz) – For gentle misting (distilled or rainwater preferred)
- ○ pH testing kit (optional but helpful) – To check water acidity (ideal: 5.5–6.5)
- ○ Humidity tray or pebble tray (optional) – For 40–70% humidity levels
- ○ Grow lights (optional) – 12–14 hours/day LED or fluorescent (5000–6500K)
Step-by-Step orchid care after the blooms fade
Here's how to nurse your orchid back to health and encourage its next spectacular show.
🌿 Step 1: Remove Spent Blooms and Inspect the Spike
Once your orchid's flowers have fully faded and turned brown, use clean, sharp scissors to cut the flower spike about 1 inch above the last node (the little bump where a flower or leaf grows). This prevents energy drain from a dead spike while allowing new growth from dormant buds.
I always check the spike carefully—sometimes hidden buds remain dormant. If the spike turns completely brown and shriveled, you can cut it all the way to the base. But if it's still green or has any life, leave those nodes intact. Here's the thing—orchids store energy in their roots and spikes, so cutting too aggressively can delay reblooming.
After trimming, wipe down the spike with a damp cloth to remove any dust or debris. This keeps potential pathogens from settling on fresh cuts. Most orchids will respond within 4-6 weeks with new growth from the remaining nodes or even the base.
💧 Step 2: Adjust Watering to Encourage New Growth
After flowering, reduce watering frequency by about 30% but maintain the same watering method (soaking and draining). Orchids need less water when they're not actively blooming because their growth cycle shifts from flowering to vegetative growth. I water mine every 7-10 days instead of weekly, checking that the top inch of the potting mix feels completely dry before watering again.
Overwatering now causes root rot, which orchids can't recover from easily. If you notice yellowing leaves or a mushy potting mix, cut back immediately. The key is balance—you want the roots to stay slightly hydrated but never soggy. A clear pot lets you monitor root health easily: healthy roots are silvery-green, while rotting roots turn brown and mushy.
Here's a trick I use: I place my orchids on a bathroom scale before and after watering. A healthy orchid should weigh about 10-15% more after soaking but return to its original weight within 24 hours. This tells me the mix is draining properly and the roots aren't waterlogged.
☀️ Step 3: Optimize Light for Leaf and Spike Development
Move your orchid to a spot with bright, indirect light—about 1,000-2,000 foot-candles. Too little light means slow growth, while too much causes leaf burn. I notice my orchids growing fastest in an east-facing window where they get morning sun and gentle afternoon light. West-facing windows can be too intense unless you use a sheer curtain.
Watch for these signs: If new leaves emerge pale or yellowish, your orchid needs more light. If leaves develop dark brown spots or crispy edges, it's getting too much direct sun. The ideal spot should provide enough light for the leaves to stay bright green without any discoloration.
This is the moment that matters: When you see new growth emerging from the base or along the spike, increase light slightly if possible. A grow light on a timer for 12-14 hours daily can make a huge difference if your home lacks natural light. Just keep it 6-12 inches away—closer than that can scorch leaves.
⏰ Step 4: Fertilize Strategically for Next Season's Blooms
Start fertilizing again after you see new growth, using a balanced orchid fertilizer (like 20-20-20) diluted to half-strength. I fertilize every 2-4 weeks during the growing season, which typically runs from spring through early fall. The goal is to build root and leaf strength for next year's flowering.
Don't fertilize when the orchid is dormant (usually winter). Cold temperatures slow metabolism, and excess nutrients can burn roots. I always check the temperature—if my home drops below 60°F at night, I stop fertilizing until spring. You'll know your orchid is ready for fertilizer again when you see fresh, firm new leaves appearing.
Real talk: Over-fertilizing is the #1 mistake I see. If your orchid's leaves turn yellow or develop dark spots, flush the pot immediately by soaking it in room-temperature water for 10-15 minutes to remove excess salts. This happens when fertilizer builds up in the potting mix over time.
Tips & tricks for perfect orchid revival after flowering
Here's what nobody tells you about getting your orchid to bounce back stronger than ever.
Spike Inspection Secret: When trimming that 1-inch above the last node in Step 1, look closely for tiny bumps along the spike—these are dormant buds that could surprise you with new blooms. I've seen orchids sprout flowers from nodes I thought were dead! If you're unsure, leave a little extra spike—you can always trim more later, but you can't regrow what you cut off.
Watering Weight Trick: That 10-15% weight increase after soaking in Step 2 is your golden rule. If your orchid doesn't return to its original weight within 24 hours, it's holding too much moisture. I use a small kitchen scale for this—it's the only way to be precise. For orchids in plastic pots, this method works perfectly since you can't see the roots directly.
Light Transition Strategy: Moving your orchid to bright indirect light (1,000-2,000 foot-candles) in Step 3 shouldn't happen all at once. Gradually increase exposure over 3-4 days to avoid shock. I start with 2 hours of light on day one, then add another hour each subsequent day until reaching the full 12-14 hours. This mimics natural seasonal changes and prevents leaf burn.
Fertilizer Flush Timing: When you notice those yellow leaves from over-fertilizing in Step 4, don't panic—just flush immediately. But here's the thing: I've found that flushing every 3 months during growing season (spring-fall) prevents buildup entirely. It takes about 10 minutes to soak the pot thoroughly, and it's worth the effort to keep your orchid healthy long-term.
Pro Tips for Orchid Flower Care After Flowering
- Here's what nobody tells you about getting your orchid to bounce back stronger than ever.
- Spike Inspection Secret: When trimming that 1-inch above the last node in Step 1, look closely for tiny bumps along the spike—these are dormant buds that could surprise you with new blooms.
- Watering Weight Trick: That 10-15% weight increase after soaking in Step 2 is your golden rule.
Frequently asked questions
Got questions about keeping your orchid thriving after those stunning blooms fade? You’re not alone! Here are some of the most common concerns—and expert-backed answers to help your orchid bounce back stronger than ever.
How do I know when my orchid is done flowering?
Orchids signal the end of their bloom cycle when the flower spikes turn yellow or brown and start to wither. If the spike itself turns woody and dry, it’s a clear sign to trim it back. Pro tip: Some orchids (like Phalaenopsis) may produce new blooms from the same spike if you leave it—just cut it above a node if you want to encourage reblooming!
Should I cut the flower spike after blooming?
Yes! Trim the spike 1–2 inches above a node (a small bump on the stem) to encourage new growth. If the spike is completely brown and shriveled, cut it down to the base. Warning: Avoid cutting green spikes unless they’re dead—healthy spikes can sometimes rebloom with proper care!
Do I change my watering routine after flowering?
Not necessarily! Orchids typically need 1–2 weeks of watering (soak-and-drain method) once the flowers fade. However, if your orchid is producing a new spike, keep it slightly drier to redirect energy. Watch for: Yellow leaves (overwatering) or wrinkled roots (underwatering)—adjust as needed!
What if my orchid doesn’t rebloom after care?
Don’t panic! Orchids need 6–8 weeks of consistent care (proper light, water, and fertilizer) before reblooming. If it’s been longer, check for light levels (bright, indirect light is key) or nutrient deficiencies. Some orchids take years to rebloom—patience is key!
Can I repurpose old orchid spikes?
If your orchid’s spike is still green but not flowering, you can propagate it by cutting it into 2–3 inch sections (each with a node) and rooting them in water or sphagnum moss. Bonus: This gives you free baby orchids—just be patient while they establish roots!
Wrapping up and next steps
Caring for your orchid after flowering is all about patience, consistency, and a little extra love—and you’ve got this! 🌱 By adjusting light, watering, and fertilizing, you’ll encourage vibrant new growth and future blooms.
Remember, every orchid thrives at its own pace, so celebrate small victories like fresh leaves or bud spikes.
Ready to take the next step? Monitor your orchid weekly and tweak care as needed. Soon, you’ll be rewarded with a stunning rebloom—and maybe even share your green thumb with fellow plant lovers! 🌸