
Flowers
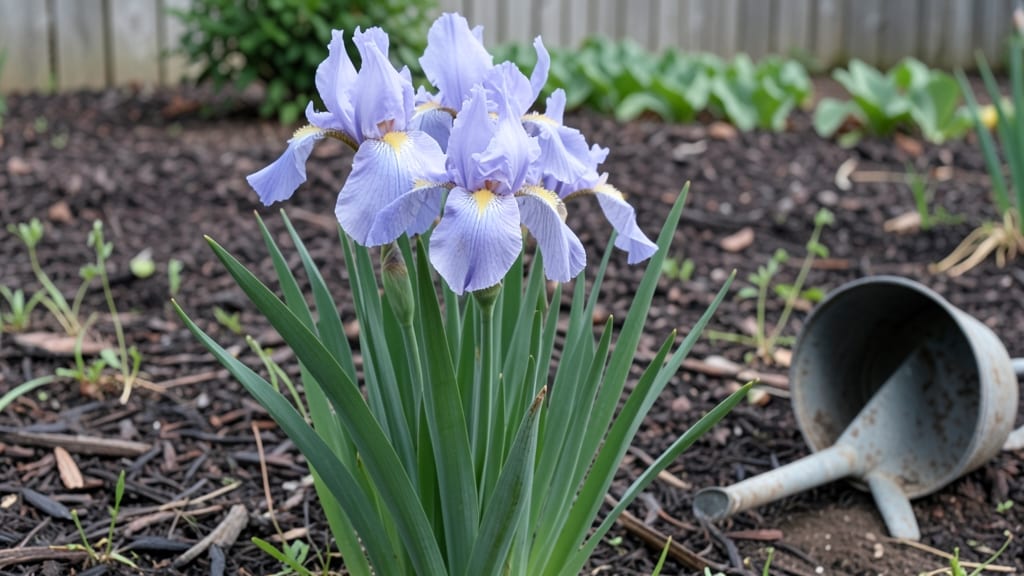
Caring for iris flowers transforms your garden from ordinary to showstopping—when you know the right timing for pruning and seasonal adjustments. 🌿 I’ve watched bearded irises go from struggling to thriving in just one season by mastering these simple science-backed steps.
The key isn’t complicated: it’s about cutting at the right time, feeding at the right moment, and letting them rest when they need it.
You’ll need well-draining soil, full sun (at least six hours daily), and sharp pruners for clean cuts. Most gardeners mess up by pruning too early or too late—both rob irises of their energy.
After blooms fade, wait 4-6 weeks before cutting back foliage, and never remove more than one-third at a time. This keeps roots strong for next year’s show.
By following this rhythm, you’ll see bold, velvety blooms that last weeks longer than average. The secret’s in the patience: irises reward consistency over fussing. Even in Zone 5 winters, they bounce back with minimal effort if you time dormancy correctly. Let’s get those clumps looking their best.
This works for bearded, Siberian, and Japanese irises alike—just adjust timing by 1-2 weeks for later-blooming varieties. The same principles apply whether you’re planting a new clump or reviving an old one. Ready to make your irises the star of the garden?
📚 In This Guide
- What you need
- Instructions
- Tips and common mistakes
- Wrapping up and next steps
What you need
- ● Iris plants: Choose bearded or sibiritica varieties (hardy in USDA zones 3-9).
- ● Well-draining soil: Mix 1 part garden soil with 1 part sand/perlite (or use pre-mixed iris soil).
- ● Pruning shears: Sharp, bypass-style (sterilized with rubbing alcohol).
- ● Gloves: Heavy-duty gardening gloves (to protect from thorns).
- ○ Stakes or supports: 3-4 ft bamboo stakes (optional, for tall varieties).
- ● Organic mulch: 2–3 inches of pine bark or straw (retains moisture).
- ● Fertilizer: Balanced 10-10-10 or iris-specific formula (spring/fall).
- ● Watering can or hose: With a gentle spray nozzle (avoids soil erosion).
- ● Soil pH test kit: Irises prefer slightly acidic to neutral (6.0–7.0).
- ● Compost: Well-aged (adds nutrients without suffocating roots).
- ● Disease spray: Copper fungicide (prevents rust/fungal issues).
- ● Plant labels: Waterproof markers (track varieties).
- ● Rain gauge: Irises need 1–1.5 inches of water/week (adjust for climate).
Step-by-Step guide to seasonal iris flower maintenance
Here’s how to keep your irises thriving with minimal effort—just focus on these key seasonal tasks.
🌱 Step 1: Prune After Blooming to Encourage Stronger Growth
Once your irises finish flowering—usually in late spring or early summer—cut back the spent blooms down to the first healthy leaf or leaf collar. This prevents seed production, which drains energy from the rhizomes. Use clean, sharp pruners to avoid damaging the leaves.
I always wait until the petals fully wilt and drop before cutting. This ensures the plant has had time to absorb nutrients from the blooms. Never cut into the leaves themselves—just remove the flower stalk above the first leaf node. This simple step keeps your irises focused on building next year’s blooms instead of wasting energy on seeds.
Here’s the thing—if you skip this, your irises may produce fewer (and weaker) blooms next season. Think of it as giving your plants a fresh start after their big spring show.
☀️ Step 2: Divide and Replant Rhizomes Every 3-4 Years
Irises need space to grow, and their rhizomes spread slowly over time. When you notice fewer blooms or crowded foliage, it’s time to divide them—typically in early fall or late winter. Lift the rhizomes carefully with a fork, then separate any that have grown more than 3 inches apart.
Discard any rhizomes that look soft, mushy, or diseased. Healthy ones should feel firm and have a few healthy roots attached. Replant the divisions with the top third exposed to sunlight—this prevents rot. Water lightly after transplanting, but don’t soak the rhizomes.
Real talk: I’ve seen irises left undivided for too long produce weak, sparse blooms. Dividing refreshes the plant and gives you extra rhizomes to share with fellow gardeners. Just don’t rush it—wait until you see clear signs of overcrowding.
✂️ Step 3: Trim Foliage in Late Summer for Winter Prep
After the blooms fade and new leaves start to grow, cut back the old foliage to about 4-6 inches tall in late summer. This clears space for fresh growth and helps prevent fungal diseases by improving airflow. Use sharp shears to make clean cuts just above the rhizome.
I like to do this in August or early September, before the first frost. The new leaves will emerge from the rhizome and carry the plant through winter. Don’t remove all the foliage—leave enough to keep the rhizomes photosynthesizing until the ground freezes.
This step might seem counterintuitive, but it’s all about balance. Too much foliage can smother the rhizomes, while too little leaves them vulnerable to winter damage. Aim for a neat, tidy look without going overboard.
💧 Step 4: Water and Fertilize Strategically for Year-Round Health
Irises are drought-tolerant once established, but they still need consistent moisture—especially during their first growing season. Water deeply once a week during dry spells, focusing on the soil around the rhizomes. Avoid wetting the leaves to prevent fungal issues like iris borer.
Fertilize lightly in early spring with a balanced, low-nitrogen fertilizer (like 5-10-5). Too much nitrogen encourages leaf growth at the expense of blooms. I sprinkle a handful of compost around the base in late winter to give the rhizomes a slow-release boost. Never fertilize after mid-summer—this can stimulate late growth that won’t harden off before winter.
Here’s where it gets fun: Watch your irises reward you with bold, vibrant blooms year after year. The key is patience—irises thrive with minimal fuss, but they do need these seasonal check-ins to perform at their best.
Tips & tricks for perfect iris flower maintenance
These simple insights will help you keep your irises thriving with minimal effort—no green thumb required.
Pruning Precision: In Step 1, when you're cutting back spent blooms, look for that first healthy leaf or leaf collar—it's your guide. I've learned the hard way that cutting too low into the leaves can damage the rhizome's energy storage system. Aim for clean cuts just above that leaf node, and always use sharp pruners to avoid tearing the delicate foliage. This targeted approach keeps your irises focused on next year's blooms rather than wasting energy on seeds.
Dividing Strategy: During Step 2's fall division, pay close attention to those 3-inch spacing guidelines. I've seen gardeners struggle with rhizomes that were either too crowded or too isolated. The key is separating them when they've naturally grown 3 inches apart—this gives each new plant enough room to establish strong roots. After replanting, the top third exposed to sunlight is crucial—it prevents rot while allowing photosynthesis to continue. Water lightly but don't soak the rhizomes, as excess moisture can cause them to rot before they have a chance to establish.
Foliage Balance: When you're trimming foliage in Step 3 to 4-6 inches, think of it as creating a protective umbrella for your rhizomes. Too much foliage blocks sunlight and air circulation, while too little leaves them vulnerable. I always leave about 4-6 inches of new growth emerging—this gives your irises enough energy to photosynthesize through winter while keeping the rhizomes protected. This mid-August timing is perfect because it allows new leaves to harden off before frost arrives.
Watering Wisdom: In Step 4, that weekly watering guideline is perfect for most climates, but I've adjusted for my region's dry summers by adding a 2-inch deep soak every 10 days instead. The key is focusing on the soil around the rhizomes—not the leaves. This prevents fungal diseases like iris borer while ensuring the roots get the moisture they need. Remember, once established, irises are remarkably drought-tolerant, so don't overwater—they'll let you know when they need more by wilting slightly.
Pro Tips for Iris Flower Care
- These simple insights will help you keep your irises thriving with minimal effort—no green thumb required.
- Pruning Precision: In Step 1, when you're cutting back spent blooms, look for that first healthy leaf or leaf collar—it's your guide.
- Dividing Strategy: During Step 2's fall division, pay close attention to those 3-inch spacing guidelines.
Frequently asked questions
Got questions about keeping your iris flowers thriving? Here are some of the most common concerns—and their solutions!
How often should I water my iris flowers?
Water irises deeply but infrequently—about once a week, or when the top 2 inches of soil feel dry. Overwatering can rot the rhizomes (those thick, fleshy roots), so prioritize drainage. A 5-10 minute soak followed by dry soil is ideal. Mulch lightly to retain moisture without suffocating the plant.
When is the best time to prune iris flowers?
Prune iris foliage after blooming (late spring to early summer) and never cut more than one-third of the leaves. The leaves store energy for next year’s blooms! Deadhead spent flowers to encourage reblooming varieties. Pro tip: Wait until foliage yellows naturally before trimming—this signals the plant is ready for dormancy.
How do I protect iris flowers from pests like iris borers?
Iris borers are the #1 enemy! Prevent them by applying neem oil or diatomaceous earth in early spring. Remove and destroy infested leaves immediately. For severe cases, dig up rhizomes, soak them in hot water (110°F for 20 minutes), and replant in fresh soil. Healthy, well-drained soil also deters pests naturally.
Can I divide iris rhizomes, and how often should I do it?
Divide irises every 3–4 years in early spring or fall to prevent overcrowding. Dig up rhizomes, separate clusters with a knife, and replant with the tops exposed (not buried). Discard old, mushy rhizomes. Pro tip: Smaller divisions (3–5 inches long) establish faster than large clumps.
Why aren’t my iris flowers blooming this year?
Bloomless irises usually need one of three fixes: too much shade (they need 6+ hours of sun), over-fertilizing with nitrogen (use a low-nitrogen, high-phosphorus fertilizer instead), or crowded rhizomes. Check soil drainage too—waterlogged roots stress the plant. If all else fails, a spring division often revives blooms.
Do iris flowers tolerate cold winters?
Most iris varieties are hardy to USDA zones 3–9, but young plants or tender types (like Japanese irises) may need winter protection. Apply a 2–3 inch layer of mulch after the ground freezes, and remove it in early spring. In extreme cold (<0°F), cover rhizomes with straw or burlap for extra insulation.
Wrapping up and next steps
Caring for your iris flowers doesn’t have to be complicated—just a little attention and timing can yield stunning, long-lasting blooms! Remember, seasonal pruning is key: trim spent blooms in late spring, divide clumps every 3–4 years, and protect them in winter with mulch.
With these simple steps, your irises will thrive for years to come.
Ready to see your garden burst with color? Grab your pruners, mark your calendar for next spring, and give your irises the love they deserve. Happy gardening! 🌸✨