
Flowers
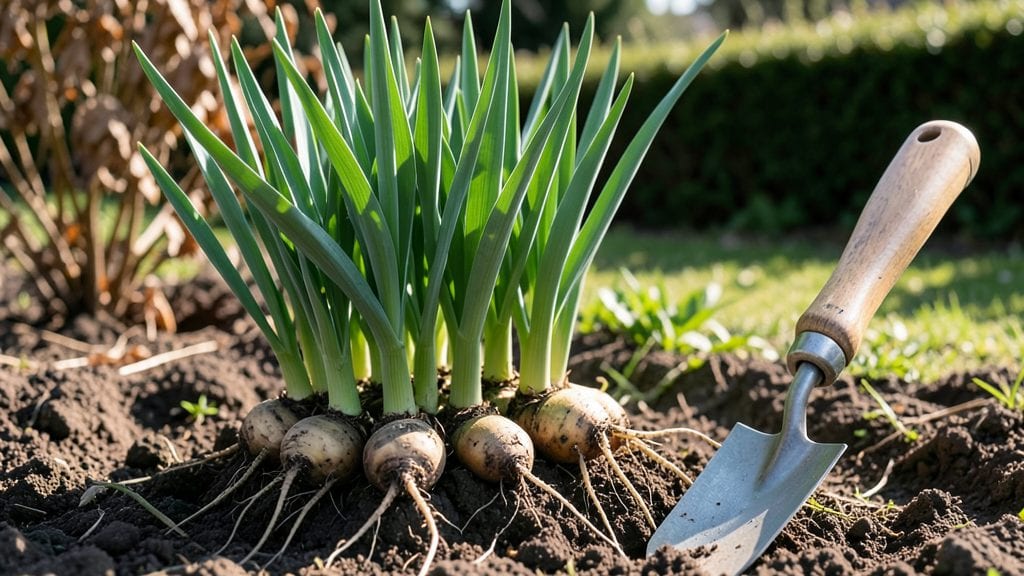
Planting iris flower bulbs in fall gives you stunning, long-lived blooms that thrive in the Pacific Northwest’s damp climate—unlike many perennials that struggle with winter wet.
I’ve grown them for years, and the secret to their reliability isn’t fancy soil or constant care—it’s timing and a few simple adjustments for our region’s unique weather patterns. The right bulbs (like Siberian irises) even multiply over time, giving you more flowers without extra work.
Here’s the thing—most gardeners plant irises in spring, but that’s a missed opportunity in our climate. Fall planting lets the roots establish before winter, so they’re ready to push through damp soil in early spring.
You’ll need cold-hardy varieties (like Louisiana or Pacific Coast irises) and well-draining soil to prevent rot, but the payoff is worth it: bold, sword-like foliage and clusters of blooms that last for weeks. Even my first attempt, with just five bulbs, produced enough flowers to fill a vase every spring.
By next summer, you’ll have clusters of irises that return year after year with minimal effort. The blooms come in shades from deep purple to soft yellow, and they attract pollinators like bees and butterflies—something you won’t get from annuals.
Plus, irises are tough enough to handle our rainy seasons, as long as you plant them at the right depth and avoid soggy spots. Let’s get those bulbs in the ground before the first frost.
This method works for both landscaping and cutting gardens, and the bulbs last for decades if cared for properly. Whether you’re lining a border or filling a container, irises bring structure and color that other perennials can’t match.
The key is patience—your first big bloom show might take a year or two, but once established, they’re nearly maintenance-free. Ready to make them part of your garden?
📚 In This Guide
- What you need
- Instructions
- Tips and common mistakes
- Wrapping up and next steps
What you need
- ● Iris bulbs: Choose Bearded, Siberian, or Japanese irises (10–20 bulbs per 10 sq. ft. for full coverage). Opt for USDA Hardiness Zones 3–9 varieties for PNW climate.
- ● Well-draining soil: Amend heavy clay soil with compost or coarse sand (1 part per 3 parts soil). Test soil pH (ideal: 6.0–7.0).
- ● Garden fork or tiller: For loosening soil to a depth of 12–18 inches.
- ○ Bone meal or phosphorus-rich fertilizer: 1–2 tbsp per bulb (boosts root growth). Optional: Slow-release bulb fertilizer.
- ● Gloves & knee pads: Protect your hands during planting!
- ● Watering can or hose with gentle nozzle: Avoid displacing bulbs.
- ● Mulch (straw or wood chips): 2–3 inches after planting to retain moisture and suppress weeds.
- ● Rhododendron or acid-loving plant fertilizer: For Siberian irises (prefer slightly acidic soil).
- ● Plant labels: Track varieties and planting dates.
- ● Soil moisture meter: Ensure bulbs stay consistently moist but not soggy.
- ○ Stakes or rings: Support tall Bearded irises (optional for windy PNW sites).
Step-by-Step guide for planting and caring for Pacific Northwest iris bulbs
Here’s how to get those bold, reliable blooms thriving in your garden.
🌱 Step 1: Choose the Right Location and Prepare the Soil
Iris bulbs love full sun—at least 6-8 hours daily—so pick a spot with unobstructed southern or western exposure. In the Pacific Northwest’s cooler climate, morning sun with afternoon shade works too, but expect fewer blooms if light drops below 6 hours. Avoid low-lying areas where cold air pools, as irises hate soggy roots.
Test your soil first. Irises prefer well-draining, slightly sandy loam with a pH between 6.0 and 7.0. If your soil is heavy clay, mix in 2-3 inches of coarse sand or gritty compost to improve drainage. I like to dig a 6-inch-deep hole for each bulb, loosening the soil to encourage root spread. The bulb’s top should sit just below soil level—burying too deep smothers blooms, while planting too shallow risks frost damage.
🪴 Step 2: Plant Bulbs at the Correct Depth and Spacing
Space iris bulbs 12-24 inches apart, depending on variety. Bearded irises need 24 inches for their full, dramatic blooms, while dwarf varieties can sit 12 inches apart. Plant in early fall, about 6-8 weeks before the first frost, so roots establish before winter. If you miss that window, spring planting works too—just get them in before new growth starts.
Place the bulb with the pointy end up (the roots will naturally orient downward). Press the surrounding soil gently but firmly—you want it snug, not packed. Water deeply after planting to settle the soil and encourage root growth. A 1-inch layer of mulch (like pine straw or shredded bark) helps retain moisture but keep it 4 inches away from the crown to prevent rot.
☀️ Step 3: Water and Fertilize for Strong First-Year Growth
Keep the soil evenly moist but never soggy for the first 4-6 weeks after planting. Irises are drought-tolerant once established, but young bulbs need consistent moisture to root. Water deeply once a week if rainfall is light, aiming for 1 inch of water total. You’ll know you’re doing it right when the soil feels damp 2-3 inches down—stick your finger in to check.
Wait until spring before fertilizing. Use a low-nitrogen, high-phosphorus fertilizer (like 5-10-10) to encourage blooms. Apply it 2-3 times during the growing season: once in early spring as new leaves appear, again after blooming, and a final light feeding in late summer. Avoid high-nitrogen fertilizers—they’ll give you lush foliage but few flowers. I like to sprinkle fertilizer 3 inches away from the base and water it in immediately.
✂️ Step 4: Prune and Divide for Long-Term Health
Deadhead spent blooms as soon as they fade to redirect the plant’s energy into next year’s flowers. Snip the stem just above the first healthy leaf with clean shears. Leave the foliage alone until it turns yellow and withers naturally—this feeds the bulb for next season. Cut it back only after it’s fully brown, usually in late summer or early fall.
Divide clumps every 3-4 years to prevent overcrowding. Dig up the bulb in early fall or late winter when the plant is dormant. Separate the rhizomes (the thick, horizontal stems) with a sharp knife, ensuring each piece has at least one fan of leaves. Replant the largest, healthiest sections immediately, spacing them as before. Smaller pieces can be potted up for next year’s garden additions.
⏰ Step 5: Protect and Prepare for Pacific Northwest Winters
Iris bulbs are hardy, but the Pacific Northwest’s wet winters can cause rot if drainage is poor. If your soil stays soggy, mound 2-3 inches of gravel or coarse sand around the base of the plant to improve drainage. Mulch lightly with straw or leaves (but avoid thick layers that trap moisture). In extreme cold zones (below 10°F), add a 3-inch layer of mulch over the crown for extra protection.
Resist the urge to fertilize in fall—irises go dormant, and feeding now can encourage weak growth. Instead, focus on clearing debris around the base to prevent fungal diseases. Come spring, you’ll see fresh, vibrant foliage signaling the bulbs are ready to bloom again. With proper care, your irises will reward you with years of stunning, low-maintenance color.
Tips & tricks for perfect Pacific Northwest iris planting
These simple strategies will help your iris bulbs thrive and bloom beautifully for years to come.
Sunlight Strategy: In Step 1, when selecting your location, prioritize areas with consistent morning sun—this is especially important in the Pacific Northwest's cooler climate. If you're working with partial shade, position your irises to catch the most direct sunlight during the warmest part of the day. I've found that even just an hour or two of afternoon sun can make a noticeable difference in bloom quantity. The goal is those 6-8 hours of direct light, but don't stress if you're slightly under—your irises will still appreciate the effort.
Soil Preparation Insight: For Step 1's soil preparation, don't overlook the importance of that 6-inch-deep hole. This depth allows roots to spread comfortably without competing with surface roots. I recommend adding a handful of perlite to your sandy loam mix—it improves drainage even further while maintaining that slightly gritty texture irises love. The key is creating an environment where water drains away quickly but nutrients remain available.
Planting Depth Tip: When planting in Step 2, remember that the bulb's top should sit just below soil level—this means about 1-2 inches of soil covering the top. I've seen many gardeners bury them too deep, which actually smothers the emerging shoots. A simple trick is to plant with the top visible, then cover it after seeing the first signs of green growth. This ensures your irises get the perfect balance of protection and exposure.
Winter Protection: For Step 5's winter preparation, focus on that 2-3 inch gravel mound around the base rather than just adding mulch. The gravel creates an air pocket that prevents soil from staying saturated during our wet winters. In particularly cold zones where temperatures drop below 10°F, I've found that adding a layer of burlap over the crown provides extra insulation without trapping moisture like thicker mulch layers might.
Pro Tips for Iris Flower Bulbs
- These simple strategies will help your iris bulbs thrive and bloom beautifully for years to come.
- Sunlight Strategy: In Step 1, when selecting your location, prioritize areas with consistent morning sun—this is especially important in the Pacific Northwest's cooler climate.
- Soil Preparation Insight: For Step 1's soil preparation, don't overlook the importance of that 6-inch-deep hole.
Frequently asked questions
Got questions about growing iris flower bulbs in the Pacific Northwest? You’re not alone! Here are some of the most common concerns—and their answers—to help you cultivate stunning, long-lasting blooms with ease.
When is the best time to plant iris bulbs in the PNW?
The ideal window is late summer to early fall (August–September), when soil temps are cooling but still warm enough for roots to establish. This timing mimics their natural dormancy cycle and ensures robust growth. Pro tip: Plant at least 6 weeks before the first hard frost for best results!
Do iris bulbs need full sun, or can they tolerate partial shade?
While irises thrive in full sun (6+ hours daily), they can adapt to partial shade (4–6 hours) in the PNW’s cooler climates—just expect slightly fewer blooms. Avoid deep shade, as it weakens stems and reduces flowering. Bonus: Morning sun + afternoon shade works well in hotter microclimates!
How often should I divide and replant iris bulbs?
Divide clumps every 3–4 years in early spring or fall to prevent overcrowding. Look for 3–4 fan-shaped leaves per rhizome—trim excess leaves but leave roots intact. Replant divided sections 1–2 inches deep and space them 12–18 inches apart for optimal airflow. Warning: Overcrowding = fewer blooms!
What pests or diseases should I watch for with iris bulbs?
Common PNW threats include iris borers (larvae that tunnel into rhizomes) and fungal leaf spots (grayish patches). Prevent borers by removing leaf debris and applying neem oil in early spring. For fungal issues, improve drainage and avoid overhead watering. Quick fix: Prune infected leaves immediately to stop spread!
Can I grow iris bulbs in containers, or do they need garden beds?
Yes! Irises adapt well to containers if the pot has drainage holes and depth (at least 12 inches). Use a fast-draining mix (like cactus soil + perlite) and repot every 2–3 years. Container hack: Place pots in full sun and overwinter them in a sheltered spot to protect from freezing temps.
Wrapping up and next steps
Growing iris flower bulbs in the Pacific Northwest is a rewarding way to add vibrant color and lasting beauty to your garden. With the right care—like well-draining soil, proper spacing, and seasonal attention—your irises will thrive for years, gracing your landscape with their striking blooms.
Whether you’re a seasoned gardener or just starting out, this perennials are a fantastic choice for low-maintenance elegance.
Ready to get started? Dig in, plant those bulbs, and watch your garden transform! 🌸 For extra inspiration, browse iris varieties or check local nurseries for the perfect match for your space. Happy gardening!