
Flowers
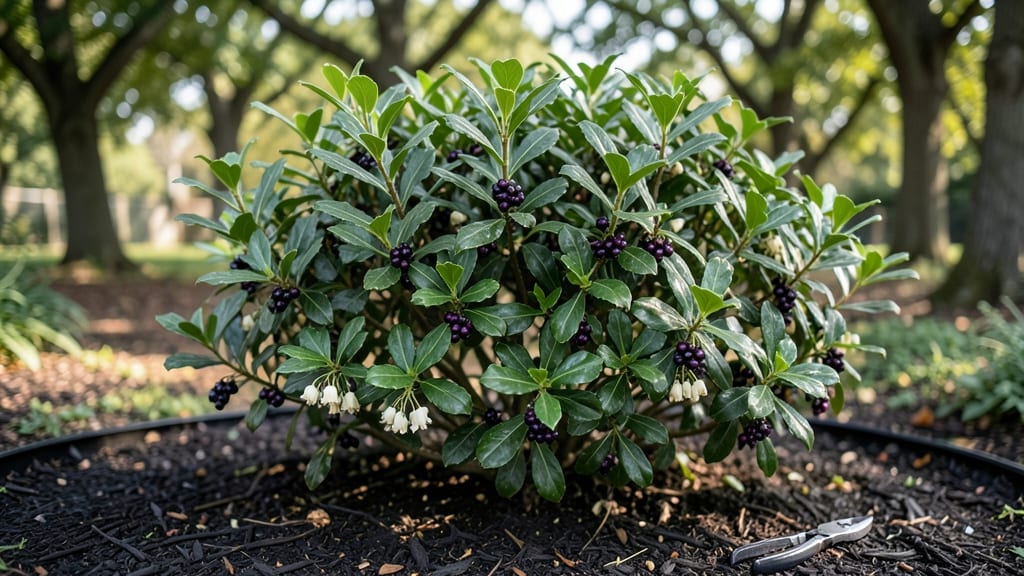
Inkberry holly flowers bring quiet elegance to Pacific Northwest gardens with their frost-resistant charm and year-round appeal. 🌿 I fell for this plant after seeing how it thrived through our damp winters and hot summers—no fuss, just reliable beauty.
The small white blooms in spring transform into glossy berries, and the dark green leaves add texture all season long.
The secret to growing inkberry holly lies in its adaptability—it handles partial shade, moist soil, and even urban pollution better than many ornamental shrubs. You’ll need well-draining soil (amend with compost if yours is heavy) and a spot that gets morning sun or dappled shade.
Once established, it’s nearly indestructible, making it perfect for beginners or busy gardeners.
By late spring, you’ll be rewarded with fragrant clusters of white flowers that attract pollinators, followed by clusters of deep blue-black berries that persist through winter. The berries aren’t edible, but they provide food for birds and add a striking contrast to the evergreen foliage.
Prune lightly in late winter to shape the plant and encourage new growth.
This shrub thrives in zones 5-9, making it ideal for Pacific Northwest climates where frost and rain can challenge other plants. Whether you’re lining a pathway, adding height to a border, or creating a wildlife-friendly hedge, inkberry holly delivers effortless beauty with minimal care. Let’s get yours planted!
📚 In This Guide
- What you need
- Instructions
- Tips and common mistakes
- Wrapping up and next steps
What you need
- ● Inkberry Holly Plants: 1–3 Ilex glabra (choose dwarf varieties like 'Strongbox' or 'Compacta' for smaller spaces).
- ● Well-Draining Soil: Mix of native soil, compost (20–30%), and perlite/sand (10–15%) for aeration. pH 5.0–6.5 (acidic).
- ● Organic Mulch: 2–3 inches of pine bark or shredded leaves to retain moisture and suppress weeds.
- ● Slow-Release Fertilizer: 10-10-10 or acid-loving plant formula (apply in early spring).
- ● Pruning Shears: Sharp, sterilized shears for shaping and maintenance.
- ● Garden Gloves: Heavy-duty for thorn protection.
- ● Watering Can/Hose: Drip irrigation or soaker hose for consistent moisture (especially in drought).
- ● Plant Stakes: 1–2 per plant for young or windy sites.
- ○ Fungicide (Optional): Copper-based spray for prevention of leaf spot.
- ● Container (If Potted): 15–20 gallon pot with drainage holes (use for urban gardens).
Step-by-step guide to planting and caring for inkberry holly in the Pacific Northwest
Here's how to establish this hardy shrub for year-round color and wildlife support.
🌱 Step 1: Choose the Perfect Planting Location
Inkberry holly thrives in partial shade to full sun, but in the Pacific Northwest's cooler climate, I find morning sun with afternoon shade works best. Look for spots where the soil stays consistently moist but well-drained—this shrub hates soggy roots. A location near a foundation or along a fence line provides natural protection from winter winds while still getting enough light.
Test the soil pH before planting—inkberry holly prefers slightly acidic to neutral soil (pH 5.0-7.0). If your yard soil is heavy clay (common in PNW), amend with 2-3 inches of compost mixed into the top 12 inches of soil. The reason we amend is that clay soil can become compacted easily, restricting root growth. You'll know you've improved drainage when water soaks in within 10-15 minutes instead of pooling on the surface.
🪴 Step 2: Dig and Plant with Proper Spacing
Dig a hole twice as wide as the root ball but only as deep—planting too deep can suffocate the roots. For 4 plants, space them 6-8 feet apart in a row or 8-10 feet apart for a more natural woodland look. The wider spacing gives branches room to spread without crowding, which is especially important in wet climates where fungal diseases spread easily.
Gently remove the plant from its container and loosen any circling roots with your fingers. Place it in the hole so the top of the root ball sits 1 inch above ground level—this prevents water from pooling around the stem during heavy PNW rains. Backfill with native soil mixed with 1 part compost to improve fertility without overwhelming the plant. Water deeply right after planting to settle the soil and eliminate air pockets.
💧 Step 3: Establish a Consistent Watering Routine
Water newly planted inkberry holly deeply twice a week for the first 3-4 weeks, providing about 1 gallon per plant per watering. You'll know it's enough when water drains 4-6 inches deep into the soil. After the initial establishment period, reduce to once a week unless you experience a prolonged dry spell—this shrub is drought-tolerant once established but benefits from regular moisture in its first growing season.
Here's the thing—I've seen many gardeners overwater in the PNW because we get so much rain. The key is to check the soil 2 inches below the surface before watering. If it feels dry, water; if it's still moist, hold off. Mulching with 2-3 inches of wood chips around the base (but not touching the stem) helps retain moisture and regulate soil temperature, which is especially helpful during our cool, damp summers.
☀️ Step 4: Prune for Shape and Health
Prune inkberry holly in late winter or early spring before new growth begins. Remove any dead, diseased, or crossing branches first—this prevents the spread of fungal issues common in our wet climate. For shaping, I like to trim back one-third of the oldest stems each year to encourage new growth from the base. You'll see fresh green shoots emerge within 2-3 weeks of pruning, signaling the plant is responding well.
Use clean, sharp pruners to make cuts just above a leaf node or bud. Avoid shearing the foliage into a formal shape—inkberry holly looks best with a natural, layered appearance. If you notice berries (which are actually drupes) appearing in fall, leave them on the plant—they provide food for wildlife and add winter interest. The berries are non-toxic, so they're safe for birds and small mammals that visit your garden.
✂️ Step 5: Winterize for Pacific Northwest Conditions
Inkberry holly is famously frost-resistant, but our PNW winters can still be harsh with wet, heavy snow. To protect young plants, apply a 2-3 inch layer of mulch around the base in late fall. This insulates the roots from temperature fluctuations and keeps the soil from freezing solid. I also like to wrap the stems of newly planted shrubs with burlap for the first winter to prevent sunscald, which can occur when winter sun hits frozen stems.
Once established (after 2-3 years), inkberry holly rarely needs winter protection. The key is to avoid heavy pruning in fall—wait until late winter when you can assess which branches died back over winter. You'll often find the plant has already pushed out new growth by early spring, proving its resilience. This shrub truly earns its reputation as a low-maintenance, year-round beauty for our climate.
Tips & tricks for perfect inkberry holly planting in the Pacific Northwest
Here's what I learned after years of planting these resilient shrubs in our rainy climate—tricks that'll help your inkberry holly thrive.
Soil Test First: Before amending that heavy PNW clay, grab a soil test kit from your local garden center. The results will tell you exactly how much compost to add—sometimes less is more. I once over-amended a spot and ended up with soggy roots because the soil couldn't drain properly. The goal is to improve drainage while keeping that slightly acidic to neutral pH (5.0-7.0). If you're impatient like me, mix in some sulfur to lower pH if needed, but do this before planting.
Root Ball Handling: When removing your inkberry holly from the container, run your fingers gently along the edges to break up any circling roots. These roots can strangle your plant if left intact. I've seen gardeners skip this step and end up with stunted growth for years. After loosening, place the plant so the root ball sits just 1 inch above ground level—this prevents water from pooling during our relentless winter rains.
Watering Wisdom: Those first 3-4 weeks are critical. I recommend using a moisture meter to check soil depth—aim for water draining 4-6 inches down. If you're watering by hand, dig a small hole 2 inches deep near the plant. If it's dry, water; if it's still moist, hold off. Our PNW climate tricks us into overwatering, but inkberry holly actually prefers slightly drier conditions once established.
Pruning Pro Tip: When you're trimming back one-third of the oldest stems in late winter, look for stems that are thicker than your thumb. These are the ones that need renewal. I've noticed that cutting just above a leaf node (where the leaf meets the stem) encourages faster regrowth. And here's a secret—if you're patient, you can wait until spring to prune and still get great results, though late winter gives you the most control.
Pro Tips for Inkberry Holly Flower
- Here's what I learned after years of planting these resilient shrubs in our rainy climate—tricks that'll help your inkberry holly thrive.
- Soil Test First: Before amending that heavy PNW clay, grab a soil test kit from your local garden center.
- Root Ball Handling: When removing your inkberry holly from the container, run your fingers gently along the edges to break up any circling roots.
Frequently asked questions
Got questions about growing inkberry holly flowers in the Pacific Northwest? You’re not alone! Here are some of the most common queries—and their answers—to help you cultivate this frost-resistant beauty with confidence.
When is the best time to plant inkberry holly in the PNW?
The ideal time to plant inkberry holly (Ilex glabra) in the Pacific Northwest is early spring or early fall. This gives the roots time to establish before summer heat or winter frost sets in. Avoid planting in late fall, as young plants may struggle with early cold snaps.
How cold-hardy is inkberry holly, and does it survive PNW winters?
Inkberry holly thrives in USDA Zones 5–9, making it perfect for the PNW’s chilly winters. It’s highly frost-resistant and can handle temperatures as low as -20°F (-29°C) without issues. Just ensure it’s planted in well-draining soil to prevent root rot from winter moisture.
Do inkberry holly plants produce flowers, and are they fragrant?
Yes! Inkberry holly produces small, white, or greenish flowers in late spring (May–June), but they’re not fragrant. The real star is the berry-like fruit that follows—though it’s not edible for humans. The flowers are subtle but add a delicate touch to shade gardens.
Can I grow inkberry holly in containers, or does it need to be planted in the ground?
While inkberry holly prefers ground planting for long-term health, it can grow in large containers (15+ gallons) for 2–3 years. Use a well-draining potting mix and move pots to a sheltered spot in winter. Just know it may need repotting as it matures.
Are inkberry holly plants prone to pests or diseases in the PNW?
Inkberry holly is generally pest-resistant, but watch for scale insects or spider mites in dry conditions. Overwatering can lead to root rot, so ensure soil drains well. Prune affected branches and treat with neem oil if needed. Healthy plants rarely have issues!
Pro Tip: Mulch matters!
Apply a 2–3 inch layer of mulch around the base (but not touching the trunk) to retain moisture and insulate roots in winter. Use wood chips or pine bark for best results.
Wrapping up and next steps
Growing inkberry holly flowers in the Pacific Northwest isn’t just about adding beauty to your garden—it’s about creating a resilient, evergreen statement that thrives year-round. With the right soil, sunlight, and care, this frost-resistant plant will reward you with lush foliage and delicate blooms for seasons to come.
Whether you’re a seasoned gardener or just starting, now’s the perfect time to plant one!
Ready to get started? Pick your spot, prep the soil, and plant your inkberry holly today! 🌱✨