
Flowers
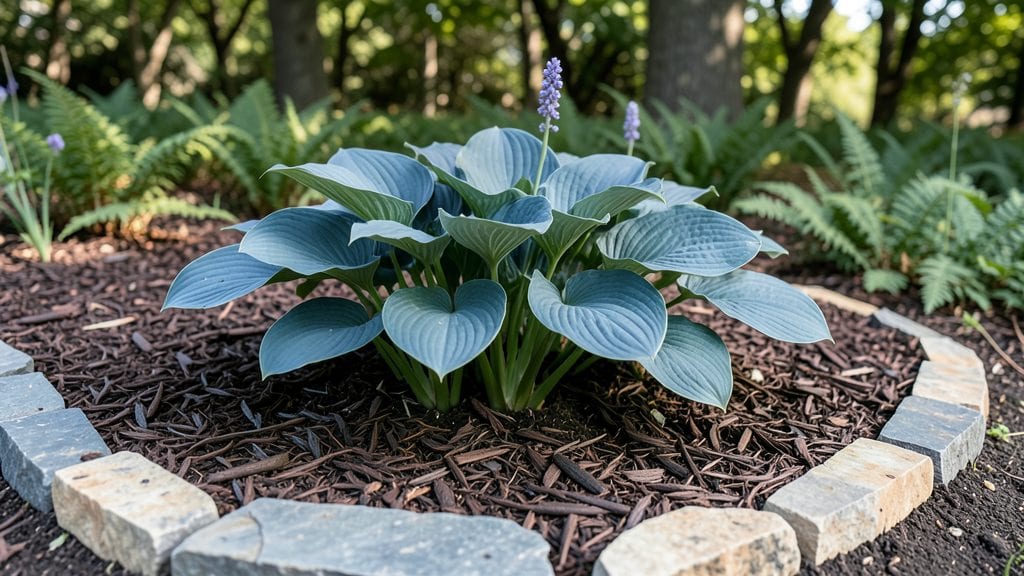
An in-ground flower bed that stays vibrant through all four seasons is the secret weapon of low-maintenance gardens. 🌸 I designed mine after realizing my raised beds were too much work for the color payoff—now I get months of blooms with just a few hours of prep each spring.
The key isn’t fancy plants; it’s smart layering of perennials, bulbs, and annuals that pick up where others leave off.
Start with a sunlight map of your yard—most beds need 6+ hours of sun daily for best results. Dig in 2-3 inches of compost before planting, then shape the bed with clean edges (a sharp spade makes this easier than you’d think).
Choose 3-5 plants that bloom at different times: early spring bulbs, summer perennials, and fall annuals keep it lively without constant replanting.
By late summer, you’ll have a bed that looks intentional, not labor-intensive. The fragrant peonies in June give way to black-eyed Susans in August, while winter aconites pop through snow. Mulch with 3 inches of shredded bark to suppress weeds and retain moisture—this single step cuts maintenance by 70%.
Works for any yard size, from small city lots to sprawling backyards. The same principles apply whether you’re filling a 4x8-foot rectangle or a curved border—just adjust plant spacing. Here’s how to make it happen without the summer headaches.
📚 In This Guide
- What you need
- Instructions
- Tips and common mistakes
- Wrapping up and next steps
What you need
- ● Soil & Amendments: Native topsoil (1–2 cubic yards, depending on bed size)
- ● Compost (1–2 bags, 40–60 lbs each) – boosts nutrients naturally
- ● Organic mulch (straw or shredded bark, 2–3 bags, 2–3 cubic feet each)
- ● Plants: Perennials (3–5 varieties, 1–3 plants per type for full coverage)
- ● Annuals (2–4 fast-growing varieties, 1–2 plants per type)
- ○ Ground cover (optional, e.g., creeping thyme or clover, 1–2 plants)
- ● Tools: Shovel or spade (for digging)
- ● Garden rake (for leveling soil)
- ● Wheelbarrow (for hauling materials)
- ● Gloves & knee pads (because comfort matters!)
- ● Hose with spray nozzle (for watering)
- ● Sunlight assessment: Measure how much sun/shade your bed gets daily.
- ● Drainage check: Ensure no standing water after rain (add sand if needed).
- ● Local plant hardiness zone knowledge: Pick plants suited to your climate!
How to design a low-maintenance in-ground flower bed
Here’s how I create vibrant, self-sustaining flower beds that thrive with seasonal rotation and smart layering.
🌱 Step 1: Test and Amend the Soil
Dig a 6-inch-deep trench across your bed to assess drainage and soil quality. Clay soil? Amend with 2 inches of compost and 1 inch of coarse sand to improve aeration. Sandy soil? Blend in 3 inches of organic matter (like aged manure or leaf mold) to retain moisture.
Use a soil test kit to check pH—most flowers prefer 6.0 to 7.0. If your soil is too acidic, sprinkle dolomitic lime at 1 pound per 100 square feet and mix it in. For alkaline soil, add elemental sulfur at 2 pounds per 100 square feet. Wait 2-4 weeks before planting to let amendments integrate.
I always spread a thin layer of mulch (like shredded bark) after amending. This locks in moisture, suppresses weeds, and gives roots a cozy start. Just skip the mulch if you’re planting bulbs—they need direct contact with soil for optimal growth.
☀️ Step 2: Plan for Seasonal Layers
Design your bed in three tiers: tall back-row plants (like delphiniums or hollyhocks), mid-height fillers (such as black-eyed Susans or coneflowers), and low ground covers (like creeping thyme or ajuga). This creates depth and ensures no bare soil shows between seasons.
For year-round color, pair spring bulbs (tulips, daffodils) with summer perennials (daylilies, salvia) and fall/winter interest plants (ornamental grasses, hellebores). I like to sketch a rough layout first—it’s easier to visualize spacing and color transitions that way.
Space plants based on their mature size. A 2-foot-tall perennial needs 18-24 inches between it and neighbors, while a 6-inch ground cover can sit 8-12 inches apart. Crowding leads to competition for nutrients and air flow, which invites disease.
💧 Step 3: Plant and Water Deeply
Dig holes twice as wide as the root ball but only as deep as the plant’s container level. Gently loosen roots if they’re circling (a sign of pot-bound stress). Place the plant in the hole, backfill with native soil, and press firmly around the base to eliminate air pockets.
Water deeply right after planting—1 gallon per plant for small perennials, 2-3 gallons for shrubs. This helps soil settle and encourages roots to spread outward. Use a soaker hose or drip irrigation to avoid disturbing the soil surface, which can dislodge new plants.
Mulch again after watering, this time with 2-3 inches of organic mulch. Keep it 2 inches away from plant stems to prevent rot. Mulch breaks down over time, so top it up every 3-4 months to maintain coverage.
✂️ Step 4: Maintain with Seasonal Pruning
Deadhead spent blooms weekly during the growing season to encourage more flowers and prevent self-seeding (unless you want volunteer plants). For perennials, cut back one-third of the foliage in early spring to stimulate fresh growth.
In late fall, remove all dead foliage from perennials but leave ornamental grasses and seed heads for winter interest. These provide texture and shelter for beneficial insects. I also add a light layer of compost (about 1 inch) around plants in early spring to replenish nutrients.
Fertilize once a year in early spring with a balanced, slow-release fertilizer (like 10-10-10). Over-fertilizing leads to lush foliage but fewer flowers—so follow the package rates precisely. Water thoroughly after applying to help nutrients reach the roots.
Tips & tricks for perfect in-ground flower beds
Here's what nobody tells you about creating flower beds that stay vibrant with almost no effort.
Soil Science Matters: When amending your soil in Step 1, mix the compost and sand/sulfur into the top 6 inches of soil, but don't dig deeper than necessary. Deeper amendments can disrupt root systems of existing plants and create anaerobic pockets where roots suffocate. Test your soil pH again after 2-4 weeks—sometimes the first adjustment isn't enough, and you'll need a second application.
Visual Planning Wins: Before breaking ground, sketch your design on graph paper using the three-tier system from Step 2. Color-code each plant type and note their mature heights. This prevents the "oops, this plant is too tall" moment after planting. I always include a scale drawing showing both the front and side views of my beds.
Watering Wisdom: The 1-3 gallon watering guideline in Step 3 is your baseline, but adjust based on weather. In hot, dry climates, water deeply every 2-3 days rather than lightly daily. Use the "poke test"—stick your finger 2 inches into the soil; if it's dry, it's time to water. This builds drought-resistant roots over time.
Mulch Maintenance: That 2-3 inch mulch layer in Step 3 isn't a one-time application. Break down the 3-4 month top-up into quarterly checks: every spring, summer, and fall. Rake back the mulch slightly to check for weeds, then replenish. This prevents mulch from becoming compacted and losing its effectiveness.
Pro Tips for Inground Flower Bed
- Here's what nobody tells you about creating flower beds that stay vibrant with almost no effort.
- Soil Science Matters: When amending your soil in Step 1, mix the compost and sand/sulfur into the top 6 inches of soil, but don't dig deeper than necessary.
- Visual Planning Wins: Before breaking ground, sketch your design on graph paper using the three-tier system from Step 2.
Frequently asked questions
Got questions about creating and maintaining an in-ground flower bed?
You’re not alone! Here are some of the most common concerns—and their straightforward solutions—to help you design a stunning, low-maintenance garden that thrives year-round.
What’s the best time of year to plant an in-ground flower bed?
For most regions, spring (after the last frost) and early fall (6–8 weeks before the first frost) are ideal. Spring gives plants time to establish roots before summer heat, while fall planting avoids drought stress. Check your USDA Plant Hardiness Zone for local timing tips!
How do I prevent weeds from taking over my flower bed?
Start with a thick layer of mulch (2–4 inches)—like shredded bark or straw—to block sunlight and suppress weeds. Use landscape fabric under mulch in high-weed areas, but avoid smothering plant roots. Regularly pull weeds early (before they seed) for long-term control.
Do in-ground flower beds need irrigation systems, or is hand-watering enough?
Hand-watering works for small beds, but drip irrigation or soaker hoses save time and ensure consistent moisture—critical for deep roots. Install systems before planting to avoid damaging roots later. Water early morning to reduce evaporation and fungal risks.
Can I use perennials alone, or should I mix them with annuals for year-round color?
Perennials (like coneflowers or black-eyed Susans) return yearly with minimal replanting, but annuals (e.g., petunias or marigolds) fill gaps and extend blooms seasonally. Aim for a 70/30 perennial-to-annual ratio for balance. Annuals also let you experiment with bold colors!
How do I keep pests (like deer, rabbits, or insects) out of my flower bed?
Start with native plants (deer often avoid them!) and use physical barriers like chicken wire for veggies or tall plants as natural deterrents. For insects, introduce beneficial predators (ladybugs, lacewings) or use organic sprays like neem oil. Avoid chemical pesticides—they harm pollinators!
What’s the easiest way to refresh an old or overgrown in-ground flower bed?
Start by removing dead plants and weeds, then loosen soil with a garden fork. Add compost or aged manure (2–3 inches) to replenish nutrients. Replant with low-maintenance perennials or divide existing clumps. A fresh layer of mulch finishes the reset!
Wrapping up and next steps
Creating a stunning in-ground flower bed doesn’t have to be complicated—it’s all about smart planning and a little seasonal love! 🌸 With the right perennials, mulch, and low-maintenance plants, you’ll enjoy vibrant blooms year-round with minimal effort.
Whether you’re a gardening pro or just starting, this blueprint makes it easy to transform your space into a colorful, thriving haven.
Ready to take the next step? Sketch your design, gather your supplies, and start planting! Your future self (and your garden) will thank you. 🌱✨