
Planting
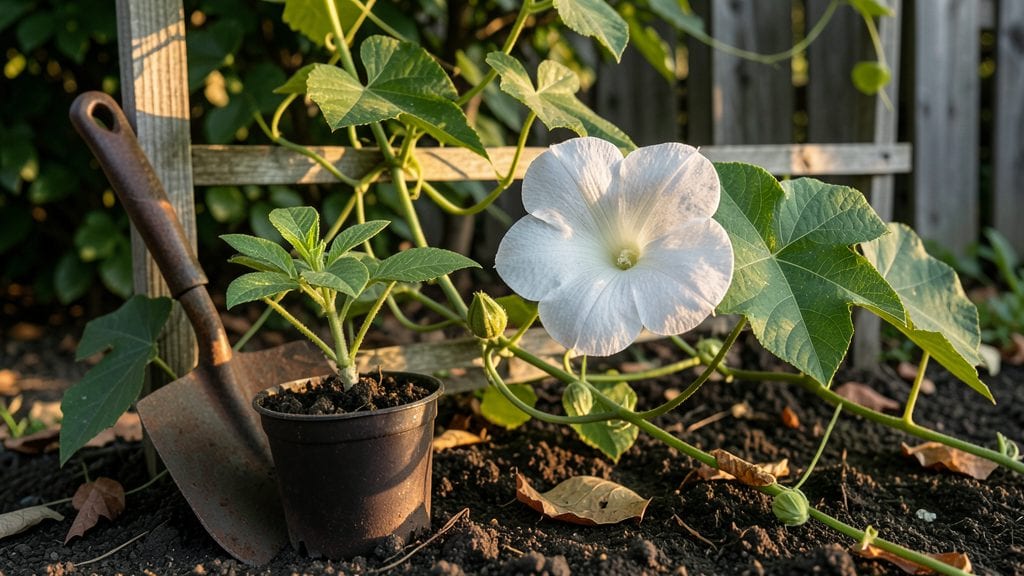
Planting moonflower vines transforms your garden into a magical nighttime retreat—those silvery-white blooms only open after sunset, filling the air with a sweet, intoxicating scent. 🌙 I’ve planted mine along trellises and fences, and within 6-8 weeks, they’ll climb aggressively, covering structures in lush foliage before revealing their moonlit spectacle.
The key? Starting with healthy seeds or transplants in warm soil (after your last frost date) and giving them room to sprawl—these vines can reach 10-15 feet if left unchecked.
Moonflowers thrive in full sun to partial shade, though they appreciate afternoon shade in hot climates to prevent wilting before their evening show.
The soil mix should drain well but stay moist—think rich, loamy garden soil amended with compost. Avoid soggy roots, which lead to rot, and plant seeds ½ inch deep, spacing them 12-18 inches apart if sowing directly.
For faster results, transplants work beautifully, just bury them deeper than their nursery pots to encourage stronger stems.
Watering is simple: keep the soil consistently moist but not waterlogged, especially during the first 4-6 weeks while roots establish. Once established, moonflowers are drought-tolerant, but consistent moisture ensures those stunning nighttime blooms appear reliably.
The real magic happens after dark—when the flowers unfurl, they attract moths and other nocturnal pollinators, turning your garden into a living lantern display. Just don’t expect daytime color; these blooms close by mid-morning, only to reopen as the sun sets.
Here’s the secret to foolproof growth: prune aggressively in early spring to control size and encourage bushier vines. Deadhead spent blooms to redirect energy into new growth, and watch as your moonflowers reward you with weeks of nocturnal beauty.
Perfect for pergolas, arbors, or even container gardens with trellises—just be prepared for neighbors to ask how you create such enchanting evenings.
📚 In This Guide
- What you need
- Instructions
- Tips and common mistakes
- Wrapping up and next steps
What you need
- ● Moonflower seeds: 5–10 seeds (or a small packet for multiple plants). Look for organic, non-GMO seeds for best results.
- ● Well-draining potting mix: 1–2 gallons (or a 5–10 gallon container if planting directly in the ground). Mix in perlite or sand for aeration.
- ● Container or garden bed: Containers: 5–10 gallon pots with drainage holes (1 per plant). Terracotta or fabric pots work great!
- ● Garden beds: A sunny spot with loose, fertile soil (at least 6 inches deep). Moonflowers love to climb, so avoid tight spaces.
- ● Support structure: A trellis, fence, or sturdy post (6–8 feet tall) for vines to twine around.
- ● Garden trowel or small shovel (for digging holes).
- ● Watering can or hose with a gentle spray nozzle (moonflowers love moisture but hate soggy roots!).
- ○ Mulch (optional but helpful): Straw or shredded leaves to retain soil moisture and suppress weeds.
- ○ Fertilizer (optional): A balanced, slow-release fertilizer (10-10-10 ratio) or compost to boost growth.
- ○ Plant markers (optional): Labels or stakes to track your moonflower’s progress!
Step-by-step instructions for planting moonflower vines
Moonflowers transform any garden into a magical nighttime retreat—here's how to grow them with minimal fuss.
🌱 Step 1: Choose the Perfect Location and Timing
Moonflowers thrive in full sun with at least 6-8 hours of direct light daily, but they'll tolerate partial shade in hotter climates. I always plant mine near a trellis or fence—these vines can reach 10-15 feet in a single season, so secure support is non-negotiable. The key is timing: sow seeds 2-3 weeks after your last frost date when soil temperatures reach at least 60°F. Cold soil slows germination dramatically.
Here's the thing—moonflowers are annuals, so I treat them like a seasonal spectacle rather than a permanent addition. Plant them in spring for summer blooms, or in late summer for fall displays. If you live in a mild climate, you can even get two cycles in one year by planting successive batches.
🪴 Step 2: Prepare the Soil and Plant Seeds
Moonflowers aren't picky about soil but perform best in well-draining, moderately fertile ground. Work in 2-3 inches of compost or aged manure into the top 6 inches of soil before planting. I like to add a handful of bone meal for extra phosphorus—this encourages strong root development and more vigorous vines. The seeds are large and easy to handle, so I plant them ½ inch deep and 12 inches apart in rows 18 inches apart for proper air circulation.
Don't overthink the spacing—these plants self-seed aggressively, so you'll likely have volunteers popping up next year. Water the soil thoroughly 24 hours before planting to create an ideal moisture environment for germination. Once planted, keep the soil consistently moist but not soggy until you see those first true leaves appear—usually within 7-14 days depending on your climate.
☀️ Step 3: Provide Support and Encourage Vertical Growth
The moment seedlings reach 3-4 inches tall, it's time to introduce their trellis. I use 4-foot tall bamboo stakes connected with twine for a simple, rustic look, but you can also use metal cages or wire fencing. Gently guide the main vine along the support as it grows—moonflowers have a natural climbing habit but need encouragement to reach their full height.
Here's where it gets fun: these vines grow 1-2 feet per week under ideal conditions. You'll notice the leaves developing in a distinctive heart shape with rough edges. Prune any side shoots that form below the first 12 inches of the main stem to direct energy upward. This ensures the plant puts all its effort into reaching the trellis and producing those spectacular night-blooming flowers.
💧 Step 4: Water and Fertilize for Maximum Blooms
Moonflowers are surprisingly drought-tolerant once established, but consistent moisture during the growing season leads to larger, more abundant blooms. Water deeply 2-3 times per week during dry spells, aiming for 1 inch of water per week. The best time to water is in the early morning so the foliage has time to dry completely before nightfall—this prevents fungal issues that can rot the tender vines.
About 4-6 weeks after planting, when you see the first true leaves developing, apply a balanced 10-10-10 fertilizer at half strength. I use 1 tablespoon per plant dissolved in a gallon of water. This gives them a gentle nutrient boost without risking over-fertilization, which can lead to excessive foliage at the expense of flowers. Stop fertilizing 6-8 weeks before your first frost to encourage the plant to focus on seed production for next year's crop.
✂️ Step 5: Deadhead and Prepare for Next Season
Once the large, fragrant white flowers appear in the evening, they'll last just one night before wilting by morning. That's why I deadhead spent blooms immediately after they fade—this redirects the plant's energy into producing more flowers rather than setting seed. Simply pinch off the faded blossoms with your fingers or use clean pruners. You'll see a noticeable increase in flower production within 2-3 weeks of consistent deadheading.
As fall approaches and the vines begin to yellow, it's time to harvest any remaining seeds you want to save. The seed pods turn brown and papery—simply twist them off the vine and dry them in a paper bag. I like to plant a few extra seeds each year so I always have fresh moonflowers popping up where I want them. The vines themselves can be cut back to the ground after the first frost, but the roots will often survive in mild climates, giving you an early start next spring.
Tips & tricks for perfect moonflower planting
Here's what nobody tells you about growing moonflowers—these little details make all the difference between a few blooms and a magical nighttime display.
Location and Lighting: While moonflowers tolerate partial shade, they truly shine in full sun. I've seen them produce twice as many blooms when planted in the sunniest spot of my garden. If you're in a hot climate, provide afternoon shade to prevent stress, but morning sun is non-negotiable. The 6-8 hours of direct light mentioned in Step 1 should ideally be spread throughout the day rather than concentrated in just a few hours.
Timing Secret: That 2-3 weeks after last frost window is your sweet spot, but don't stress if you're a week late. Moonflowers are forgiving annuals that can handle a bit of flexibility. I've successfully planted them as late as mid-May in my zone 6 garden and still gotten full-season blooms. The real key is making sure soil temperatures hit at least 60°F—this is what triggers germination, not just calendar dates.
Soil Preparation Upgrade: The instructions mention well-draining soil, but I take it a step further by adding a thin layer of perlite or vermiculite to the planting hole. This ensures excellent drainage while retaining enough moisture for those large seeds. I also mix in ½ cup of coffee grounds per planting hole (optional but effective)—the acidity helps prevent fungal issues while the nitrogen boosts early growth. Just be sure to water thoroughly after planting to settle the soil around the seeds.
Trellis Installation Hack: When your seedlings hit 3-4 inches and it's time for trellis support, I recommend installing a second trellis nearby about 3 feet away. This gives you a backup if your first choice fails or if you want to train multiple vines together. Use soft twine or garden tape to gently weave the vines onto the support—they'll cling naturally but need encouragement to climb properly. The 1-2 feet per week growth rate means you'll need to guide them regularly, especially in windy conditions.
Pro Tips for Plant Moonflower
- Here's what nobody tells you about growing moonflowers—these little details make all the difference between a few blooms and a magical nighttime display.
- Location and Lighting: While moonflowers tolerate partial shade, they truly shine in full sun.
- Timing Secret: That 2-3 weeks after last frost window is your sweet spot, but don't stress if you're a week late.
Frequently asked questions
Got questions about growing moonflowers? You’re not alone! Here are answers to the most common queries to help you succeed with these enchanting night-bloomers.
When is the best time to plant moonflower seeds?
Moonflower seeds thrive in warm soil, so plant them after the last frost when temperatures stay above 60°F (15°C). For tropical climates, sow seeds in early summer to avoid winter frost. If you’re in doubt, use a soil thermometer—aim for 70°F (21°C) or warmer!
How long does it take for moonflower vines to bloom?
Patience is key! Moonflowers typically take 60–90 days to bloom after planting, depending on conditions. Fastest results come from pre-soaked seeds or starter plants. If blooms don’t appear, check for adequate sunlight (6+ hours/day) and consistent watering—they’re sensitive to drought.
Can moonflowers grow in containers or do they need a trellis?
Yes! Moonflowers are perfect for containers (use a 10+ gallon pot) or trellises. Without support, vines sprawl 10–15 feet—ideal for fences or pergolas. For containers, choose a fast-climbing structure (like a tomato cage) to save space. Just ensure drainage holes are present to avoid root rot.
Why aren’t my moonflower leaves looking healthy?
Yellowing or wilting leaves often signal overwatering or pests. Check for:
Moonflowers are tender annuals in most climates, dying after frost. However, in USDA Zones 9–11, they may self-seed or return if protected. For repeat blooms, save seeds from dried pods or replant fresh seeds each spring. Bonus: Deadhead spent blooms to encourage more flowers!
Pro tip: Feed with balanced fertilizer (10-10-10) every 4–6 weeks for lush growth.
Do moonflowers grow back every year, or are they annuals?
Wrapping up and next steps
Planting moonflowers is a rewarding way to invite enchanting nighttime beauty into your garden! 🌙 With just a few simple steps—choosing the right soil, spacing seeds properly, and providing consistent care—you’ll soon enjoy their fragrant, ephemeral blooms.
Don’t let their delicate appearance fool you; these vines are surprisingly resilient and perfect for beginners.
Now that you’re ready to grow, take the next step and mark your calendar for planting season. Whether you’re adding them to a trellis, fence, or container, your moonflowers will thrive with a little patience and love. Happy gardening—your night garden is about to get magical! ✨