
Lawn
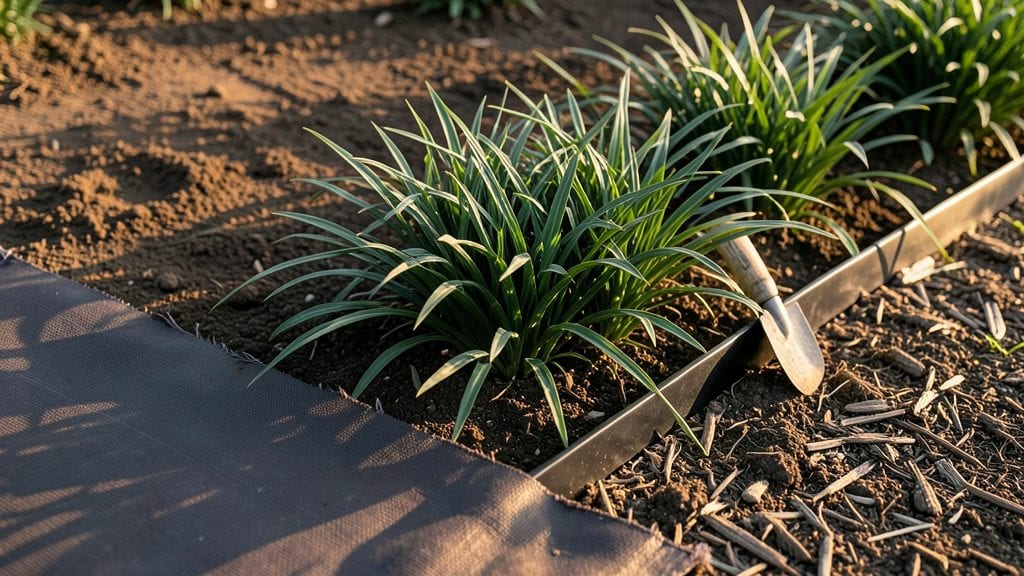
Keeping grass out of flower beds feels like an endless battle—until you try the right permanent barrier. I’ve spent years fighting creeping grass that turns my neat borders into a patchwork of green weeds, and these methods finally gave me the clean edges I wanted without constant weeding.
The key is blocking sunlight and roots before they start, not just after they’ve taken over.
You don’t need fancy (or expensive) tools—just a few supplies like landscape fabric, mulch, or even a sharp edging tool to create a physical barrier. For organic gardeners, corn gluten meal or vinegar sprays work as natural pre-emergents, while chemical options like pre-emergent herbicides offer faster results.
The best part? Once installed, these solutions stay effective for years with minimal upkeep.
Imagine stepping outside to see vibrant blooms framed by crisp, weed-free edges instead of struggling to pull grass by the roots every week. With the right technique, you’ll spend less time weeding and more time enjoying your garden’s full potential.
The secret lies in timing—apply barriers in early spring before grass seeds germinate, and maintain them with regular mulch top-ups.
Whether you prefer chemical-free methods or stronger solutions, these strategies adapt to any garden style. The goal is a low-maintenance border that keeps grass at bay while letting your flowers shine. Let’s get those flower beds looking their absolute best—no more grass in sight!
📚 In This Guide
- What you need
- Instructions
- Tips and common mistakes
- Wrapping up and next steps
What you need
- ● Landscape Fabric: A breathable, non-woven fabric (30–45 inches wide, enough to cover your flower bed area + 6–12 inches overlap). Pro tip: Look for fabric labeled "UV-stabilized" for longevity! 🌞
- ● Edging Material: Metal or Plastic Edging: Galvanized steel (12–18 inches tall) or heavy-duty plastic strips (6–12 inches wide). Measure your flower bed’s perimeter and add 10% extra for cuts/waste.
- ○ Natural Edging (Optional): Pavers, bricks, or stones (check local suppliers for flat, uniform pieces).
- ● Mulch: 2–3 inches of organic mulch (shredded bark, pine straw, or cypress mulch). Calculate coverage by multiplying flower bed area (sq ft) by 0.083 (for 2 inches) or 0.125 (for 3 inches).
- ○ Weed Barrier (Optional but Recommended): Cardboard or thick newspaper (for smothering grass before edging) or a pre-cut landscape barrier mat.
- ● Tools: Shovel or spade (for digging)
- ● Handsaw or heavy-duty scissors (for cutting fabric/edging)
- ● Staple gun or landscape staples (to secure fabric)
- ● Measuring tape and stakes (for marking edges)
- ● Garden gloves (to protect your hands!)
- ● Clear the flower bed of existing grass, weeds, and debris (use a sod cutter or shovel if needed).
- ● Check soil moisture—work when the ground is slightly damp (not muddy) for easier digging. 💧
- ● Sunlight access: Ensure your flower bed gets the right light conditions for your chosen plants (full sun, partial shade, etc.).
- ● For permanent barriers, consider hard edging (like metal or concrete) if you’re dealing with aggressive grass species.
- ● If using cardboard as a weed barrier, remove all tape/staples and wet it down to prevent decomposition.
- ● For sloped areas, use landscape pins or bricks to weigh down fabric and prevent shifting. 🏔️
Step-by-Step guide to creating permanent grass barriers in flower beds
Here’s how to stop grass from creeping into your flower beds for good.
Define the Flower Bed Edges Clearly
Use a garden hose or string to outline the exact boundary where you want the flower bed to begin. Press the hose or string into the soil to create a visible line—this will guide your barrier placement. Measure the length of each side to calculate how much barrier material you’ll need. I like to mark the corners with small stakes so I don’t accidentally cut the barrier too short.
If your flower bed has curves, use a flexible ruler or follow the natural shape of existing plants. The key here is precision: grass will find even the smallest gap to spread through. Double-check your measurements before cutting any materials to avoid waste.
Install a Physical Barrier to Block Grass Spread
Lay down a hardware cloth or landscape fabric along the marked edges, extending it 6-12 inches deep into the soil. This prevents grass roots from migrating into your flower bed. Secure the edges with landscape staples or galvanized nails every 12 inches to keep it in place. If you’re using a thicker barrier like corrugated plastic, overlap the edges by 4 inches to seal any potential entry points.
For a more permanent solution, consider edging metal or plastic edging buried 4-6 inches deep. This creates a physical barrier that grass can’t penetrate. I’ve found that brass or aluminum edging lasts the longest and looks more polished in a garden setting.
Apply Mulch or Ground Cover to Suppress Grass Growth
Once the barrier is in place, cover the soil within the flower bed with a 2-3 inch layer of mulch, such as wood chips, straw, or shredded bark. This blocks sunlight from reaching grass seeds and smothers any existing grass trying to grow. Organic mulches also improve soil health over time. Avoid using rocks or gravel alone—they don’t suppress grass roots as effectively.
For extra protection, top the mulch with a layer of cardboard or newspaper before adding the final mulch layer. This creates an additional barrier that grass can’t penetrate. Just make sure to overlap the edges by 4 inches and weigh them down with rocks or soil to prevent wind from blowing them away.
Maintain the Barrier and Monitor for Grass Intrusions
Check the edges of your flower bed weekly for any grass sprouts that might have slipped through. Use a hand weeder or small trowel to remove them immediately—don’t let them go to seed. Over time, the mulch and barrier will work together to keep your flower bed grass-free, but vigilance is key in the first few months.
Replenish mulch as it breaks down, especially in high-traffic areas or after heavy rain. If you notice grass creeping along the barrier’s top edge, press the mulch deeper into the soil to seal any gaps. A little maintenance now saves hours of weeding later.
Tips & tricks for permanent flower bed barriers
Here's what I've learned after years of battling grass invasions—these small details make all the difference between a temporary fix and a lasting solution.
Precision is everything in Step 1: When marking your flower bed edges, don't just eyeball it. Use a flexible tape measure to verify your string or hose line is perfectly straight. Grass will exploit even a 1-inch gap over time. I've seen grass sneak through diagonal cuts where the barrier wasn't properly aligned with the marked line. Take the extra 10 minutes to make it perfect from the start.
Barrier depth matters more than you think: The instructions mention 6-12 inches for hardware cloth, but I've found that for aggressive grass species, going deeper—up to 18 inches—can be worth the extra effort. This is especially true if your lawn has established roots. For the edges buried 4-6 inches deep, use a garden spade to create a clean trench rather than just pressing the barrier into the soil. Compacted soil creates gaps that grass will exploit.
Mulch thickness makes the difference: That 2-3 inch mulch layer is non-negotiable, but here's the secret: press the mulch firmly against the barrier's top edge. I've seen grass sprout right at the mulch-barrier interface when this step was skipped. For extra protection, especially in high-traffic areas, consider adding a 1-inch layer of coarse sand between the mulch and barrier. This creates an additional physical barrier that grass roots can't penetrate.
Weekly checks are your best defense: Those weekly inspections in Step 4 aren't just about removing visible grass. Run your fingers along the entire barrier edge to feel for any rough spots that might indicate grass roots trying to push through. I've caught early invasions by noticing tiny bumps before any shoots appeared. A 5-minute weekly check prevents hours of weeding later.
Pro Tips for Keep Grass Out Of Flower Beds
- Here's what I've learned after years of battling grass invasions—these small details make all the difference between a temporary fix and a lasting solution.
- Precision is everything in Step 1: When marking your flower bed edges, don't just eyeball it.
- Barrier depth matters more than you think: The instructions mention 6-12 inches for hardware cloth, but I've found that for aggressive grass species, going deeper—up to 18 inches—can be worth the extra effort.
Frequently asked questions
Got questions about keeping grass at bay in your flower beds? You’re not alone! Here are some of the most common concerns—and their straightforward solutions.
What’s the best time of year to install a grass barrier?
The ideal time is early spring or fall when soil is workable but not frozen. Avoid installing during peak summer heat or winter—extreme temperatures can stress plants and reduce effectiveness. If you’re in a mild climate, late winter (before grass sprouts) is perfect!
Can I use cardboard or newspaper as a grass barrier?
Yes! Unbleached cardboard or newspaper works as a temporary or long-term barrier if layered correctly (3–4 sheets thick). Moisten it first to prevent wind from blowing it away, then cover with mulch or landscape fabric. Just avoid colored paper—ink can leach chemicals into the soil.
Are permanent barriers like plastic or metal worth the cost?
if you want zero-maintenance results. Plastic (like corrugated sheets) or metal edging blocks grass roots while looking sleek. They’re pricier upfront but save time and labor long-term. For a budget-friendly middle ground, try landscape fabric with mulch on top.
What if grass keeps growing through my barrier?
This usually means the barrier isn’t deep enough or has gaps. Dig 6–8 inches deep and extend it <2–3 inches beyond the flower bed’s edge. For stubborn sprouts, spot-treat with a vinegar-based herbicide (1 part vinegar, 1 part water) or hand-pull with a weeding tool. Consistency is key!
Will mulch alone stop grass from invading?
Mulch slows grass growth but won’t eliminate it permanently. For best results, pair it with a physical barrier (like fabric or edging) and keep mulch 3–4 inches thick. Replenish annually to maintain the barrier effect. Organic mulch (straw, wood chips) also improves soil over time!
How do I remove grass before installing a barrier?
Start by smothering the grass with black plastic for 4–6 weeks to kill it, or use a glyphosate-free herbicide. For small areas, dig out roots with a shovel or garden fork. Pro tip: Rent a sod cutter for large patches—it’s faster than manual removal!
Wrapping up and next steps
Keeping grass out of your flower beds doesn’t have to be a never-ending battle—with the right permanent barriers and a little consistency, you’ll reclaim that pristine, weed-free space in no time! 🌿✨ Whether you opt for landscape fabric, cardboard, or edging materials, the key is choosing a method that fits your garden’s style and your maintenance preferences.
Now that you’re armed with solutions, roll up your sleeves and get creative! Start small—pick one bed to transform—and watch your garden flourish without the grass takeover. Happy gardening! 🌸