Flowers
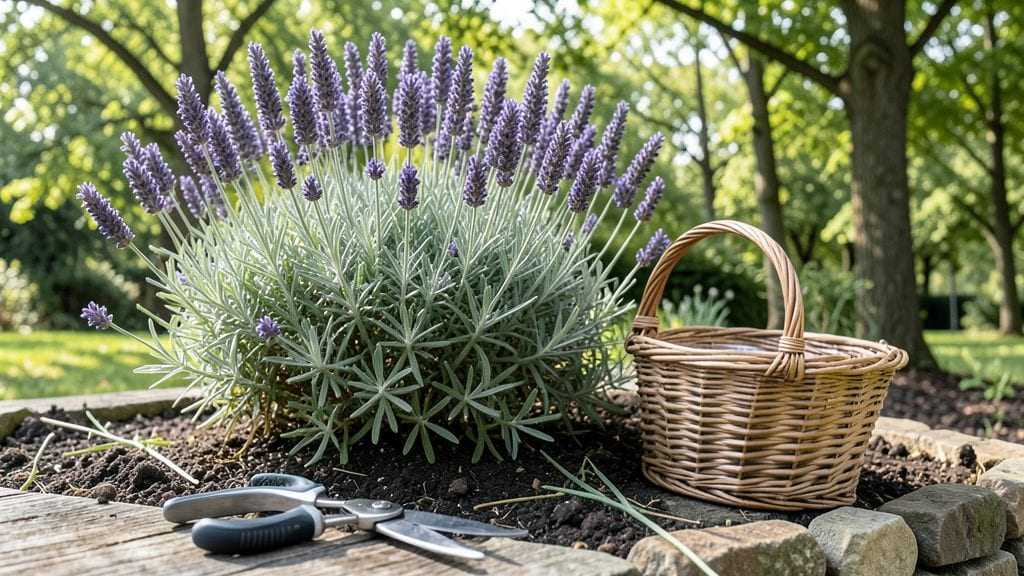
Cutting lavender flowers at the right time transforms your plant from scraggly to showstopping—here’s how to do it without sacrificing next year’s blooms. ✂️ The secret lies in timing: prune right after flowering (late summer to early fall) when stems turn woody, not when buds are still forming.
This keeps your plant compact, encourages dense growth, and preserves that signature lavender fragrance you love.
You’ll need sharp pruning shears (dull blades tear stems), gloves to protect your hands from the sharp edges, and a clear day to work—lavender hates wet trimming. Start by removing any dead or leggy stems at the base, then cut back the rest by about one-third to maintain shape.
The goal is to expose fresh green growth while leaving enough foliage to photosynthesize through winter.
What you’ll end up with is a bushier, more fragrant lavender that blooms harder next season—think velvety purple spikes instead of sparse, weak stems. The trimmed stems make perfect sachets or dried arrangements, and your plant will reward you with stronger scent and fuller blooms year after year.
Just avoid cutting into old wood (the brown, woody stems), or you’ll stunt new growth.
This method works for all lavender varieties, from English lavender to Spanish types, and adapts to containers or garden beds. The key? Consistency—prune the same way every year, and your lavender will thrive for decades. Ready to give it a try?
📚 In This Guide
- What you need
- Instructions
- Tips and common mistakes
- Wrapping up and next steps
What you need
- ● Fresh lavender stalks: Choose fully bloomed, healthy lavender with vibrant purple flowers (avoid woody or dried stems). Aim for at least 10-15 stems for a standard cutting session.
- ● Sharp pruning shears or floral scissors: Must be clean and sterilized (alcohol wipes work great!). Avoid dull scissors—they crush stems and reduce fragrance.
- ● Rubbing alcohol (70% or higher) or hydrogen peroxide: For disinfecting tools between cuts (1-2 sprays per session).
- ○ Glass jar or vase: A wide-mouth jar (8–12 oz) for holding water if hydrating stems (optional but recommended for freshness).
- ● Paper towels or clean cloth: For blotting excess moisture and protecting surfaces.
- ● Pruning gloves: Protect your hands from prickly stems (lightweight gardening gloves suffice).
- ● Spray bottle with water: Lightly mist lavender before cutting to preserve oils (especially in dry climates).
- ● Drying screen or mesh bag: If preserving lavender, use a breathable bag or screen for airflow.
- ● Essential oil diffuser: For a post-cutting aromatherapy boost (lavender + a few drops of oil = bliss!).
Precision trimming techniques for lavender blooms
Here's my foolproof method for harvesting lavender—when to cut, how to do it, and why it matters.
✂️ Step 1: Time Your Cut Correctly for Peak Fragrance
Wait until at least 50% of the flower buds have opened fully but before they turn brown. This is when lavender's oils are most concentrated. I check by running my thumb over a few buds—if they feel slightly fuzzy and release that signature scent, they're ready. Morning cuts yield the strongest fragrance because the oils are most potent after a cool night.
Never cut lavender in full bloom—those dried, brown flowers won't release their scent nearly as well. The ideal moment is when half the buds are open and the stems feel sturdy. If you wait too long, the stems become woody and the flowers lose their aromatic punch. I like to harvest on a dry morning after the dew has evaporated to prevent moisture from weakening the stems.
✂️ Step 2: Use the Right Tools for Clean Cuts
Grab your sharp, clean pruning shears—never use scissors or dull blades. I always sterilize my tools with rubbing alcohol before cutting to prevent spreading disease between plants. The right cut is just above a set of leaves where the stem meets the woody base. This encourages new growth from that node while keeping the plant healthy.
Make your cuts at a 45-degree angle about ¼ inch above the leaf set. This prevents water from pooling on the cut and rotting the stem. If you're harvesting multiple stems, cut them at slightly different angles so they don't all end up in the same drying bundle. I like to gather stems in small handfuls and trim them all at once for efficiency—just be careful not to crush the delicate buds.
☀️ Step 3: Harvest at the Right Time of Day
Always cut lavender early in the morning when the air is cool and the oils are most concentrated. The scent is strongest right after sunrise because the plants have absorbed moisture overnight. Avoid cutting in the heat of the day—lavender's essential oils can degrade quickly in direct sunlight, and the stems may wilt before you even get them indoors.
Work quickly once you start cutting. Bundle stems into 3-4 inch lengths and tie them with twine or rubber bands immediately. Hang them upside down in a dry, dark, well-ventilated space like a closet or shed. Within 2-3 weeks, the flowers will dry completely and release their full fragrance. If you're in a humid climate, add a small fan to circulate air and speed up the drying process.
🌿 Step 4: Maintain Your Lavender Plant After Cutting
After harvesting, give your lavender plant a light drink of water if the soil feels dry to the touch. Lavender is drought-tolerant, but it still needs moisture after being cut back. I avoid watering the leaves directly—always water at the base to prevent fungal issues. The plant will send out new growth from the nodes you left exposed during cutting.
Here's the thing—don't overdo it. Harvest no more than ⅓ of the plant at a time, and wait 6-8 weeks between cuts to let the plant recover. Over-harvesting weakens lavender and can kill it. If you're growing lavender for both fragrance and beauty, I recommend cutting only the flowering stems and leaving the lower foliage intact. This keeps the plant looking lush while still giving you plenty of cuttings.
Tips & tricks for perfect lavender harvesting
These little details make all the difference between fragrant bundles and disappointing stems.
Timing Secret: The 50% bloom rule in Step 1 is your sweet spot—overlooking this means you'll either get underripe buds that lack scent or woody stems that won't dry properly. I test by gently rubbing a bud between my fingers: if it releases that signature lavender aroma and feels fuzzy, it's ready. Morning harvests are non-negotiable because cooler temperatures preserve those precious essential oils that evaporate quickly in heat.
Tool Technique: That 45-degree angle cut in Step 2 isn't just about aesthetics—it's about plant health. The angled cut prevents water from pooling on the stem, which would otherwise cause rot. I keep a small bottle of rubbing alcohol handy to sterilize my shears between cuts; it's a 10-second habit that prevents disease spread between plants. And never, ever use kitchen scissors—they'll crush those delicate stems and ruin your harvest.
Drying Wisdom: The 3-4 inch bundle size in Step 3 is perfect for airflow while preventing breakage. I've learned the hard way that larger bundles take forever to dry evenly, while smaller ones can dry too quickly and lose their scent. For humid climates, that small fan makes all the difference—it cuts drying time from weeks to days without sacrificing fragrance. Just make sure it's not blowing directly on the bundles, or you'll end up with scattered flowers everywhere.
Plant Recovery: That 6-8 week wait between harvests in Step 4 is crucial for lavender's survival. I've killed three plants by over-harvesting, so I now mark my calendar with harvest dates. The plant needs this time to rebuild its energy reserves. When you do cut back, focus only on the flowering stems—leave those lower leaves intact to keep the plant looking full and healthy between harvests.
Pro Tips for Cut Lavender Flowers
- These little details make all the difference between fragrant bundles and disappointing stems.
- Timing Secret: The 50% bloom rule in Step 1 is your sweet spot—overlooking this means you'll either get underripe buds that lack scent or woody stems that won't dry properly.
- Tool Technique: That 45-degree angle cut in Step 2 isn't just about aesthetics—it's about plant health.
Frequently asked questions
Got questions about cutting lavender like a pro? Here are some of the most common ones—plus quick, practical answers to keep your plants thriving and your bouquets stunning.
1. When is the best time of day to cut lavender flowers?
The ideal time is early morning after the dew has dried but before the sun gets too intense (around 8–10 AM). This ensures the stems are hydrated, and the flowers retain their fragrance and color longer. Avoid cutting in the heat of the day—it can wilt the blooms faster.
2. How do I know which stems to cut to encourage regrowth?
Always cut lavender stems from the base of the plant, leaving about 1–2 inches of green growth above the woody base. Avoid trimming the very center of the plant, as this can stunt new growth. Focus on outer stems to keep the plant bushy and healthy!
3. Can I cut lavender flowers that haven’t fully opened yet?
Yes! In fact, bud-stage lavender lasts longer in arrangements because it hasn’t yet expended energy blooming. Cut stems when about half the buds are open for the best balance of fragrance and longevity. Just ensure the buds are firm, not mushy.
4. What should I do if my cut lavender stems wilt quickly?
Wilting often happens if stems aren’t properly rehydrated after cutting. Trim the bottom inch of each stem at an angle, then place them in lukewarm water immediately. Add a flower food packet (or a splash of bleach + sugar) to extend vase life. Avoid cold water—it can shock the stems!
5. Is it okay to cut lavender from potted plants, or will it harm them?
Potted lavender can be trimmed, but go easy—they have less root space to recover. Never cut more than 1/3 of the plant at once, and avoid over-trimming in the first year. If your plant is small, limit cuts to just a few stems to avoid stressing it. Potted lavender also benefits from annual pruning in late winter to shape it.
6. Can I use dried lavender stems after cutting fresh ones?
After cutting, bundle stems with rubber bands and hang them upside down in a dry, dark, well-ventilated spot for 2–4 weeks. Once fully dry, strip the flowers from the stems and store them in a jar. Dried lavender lasts years and makes perfect sachets, potpourri, or homemade remedies.
Wrapping up and next steps
Cutting lavender with care ensures a fragrant harvest and healthier plants for years to come! Remember to use sharp shears, trim just above a leaf node, and avoid over-pruning—your patience will reward you with abundant blooms and that signature lavender scent.
Now that you’re ready to snip like a pro, why not put your skills to the test? Try drying your freshly cut lavender for sachets, wreaths, or even homemade potpourri—your home (and senses) will thank you! 🌿✨