How To
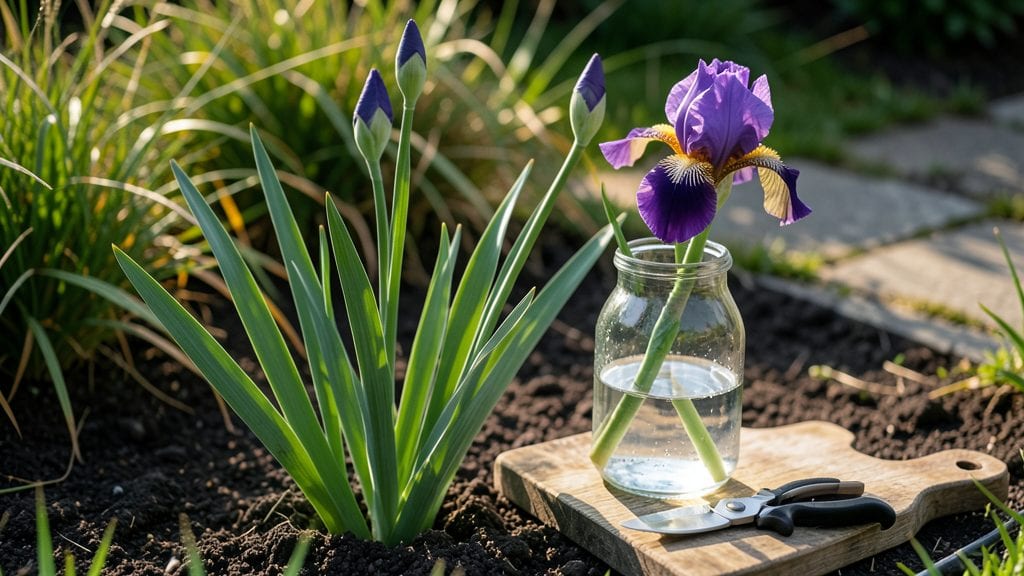
Cutting iris flowers for your vase at the perfect moment keeps them fresh for 10-14 days—and here’s how to do it without wrecking your plants or triggering that sticky sap mess. The key is timing, technique, and a sharp pair of pruners, not just any scissors.
I’ve learned the hard way that cutting too early or too late ruins both your bouquet and next year’s blooms.
First, wait until the buds are fully open but still firm to the touch—think of them like a ripe peach, not overripe. Then, use clean, sharp pruners to slice the stems at a 45-degree angle about 2 inches below the flower head.
This prevents air bubbles from blocking water uptake, and the angled cut mimics natural stem structure. Avoid crushing the stems, or you’ll trigger that yellowish sap that stains everything.
Once cut, strip the lower leaves to reduce bacterial growth in the water, then place them in a vase with fresh, room-temperature water. Change the water every 2-3 days and trim the stems again at the same angle to extend their life.
Your garden will thank you too—proper harvesting encourages even more robust blooms next season.
For post-cut care, store unused stems in a bucket of water in the fridge overnight if you’re not arranging them immediately. This keeps them crisp while you decide which vase to fill first.
The secret? Treat them like you would any other cut flower—respect the timing, protect the stems, and you’ll get vase-worthy irises every time.
📚 In This Guide
- What you need
- Instructions
- Tips and common mistakes
- Wrapping up and next steps
What you need
- ● Fresh iris flowers: 1–3 stems (depending on vase size; choose fully bloomed or partially opened buds for longevity).
- ● Sharp floral shears or clean scissors: 1 pair (avoid kitchen knives—they crush stems!).
- ● Vase or container: 1 (clean, with a narrow neck for hydration; glass or ceramic works best).
- ● Room-temperature water: Enough to cover 1–2 inches of stem (chlorinated tap water can harm flowers—let it sit out for 4+ hours if possible).
- ○ Floral preservative (optional but recommended): 1 packet (e.g., Floralife or homemade mix: 1 tsp sugar + 2 drops bleach per quart of water).
- ● Hydrogen peroxide (3% solution): 1 tsp per quart of water (helps prevent bacterial growth).
- ● Aspirin (crushed): 1 tablet (dissolve in water to extend vase life).
- ● Decorative elements: Gravel, pebbles, or floral foam (for deeper vases).
- ● Newspaper or damp paper towels: 1–2 sheets (to line the vase and keep water clean).
Step-by-Step guide for cutting iris flowers for long-lasting arrangements
Here's how I ensure iris blooms stay fresh and vibrant in vases for weeks.
Choose Mature, Fully Open Blooms
Select iris flowers that have fully unfurled their petals but haven't begun to droop or brown at the edges. The best time to cut is in the early morning when the stems are fully hydrated and the blooms are at their peak. Look for stems that are firm to the touch and free of any signs of wilting or damage.
I always check the base of the stem for any signs of rot or softness—this is a red flag that the plant might be stressed. Healthy stems should feel crisp and sturdy when you gently squeeze them. Cutting from healthy plants ensures your vase arrangement will last longer and look more vibrant.
Use Sharp Pruners or Scissors for Clean Cuts
Grab your sharp pruners or clean scissors—dull blades crush stems and block water uptake, which shortens vase life dramatically. Make your cut at a 45-degree angle about 2 inches below the bloom cluster. This angled cut increases the surface area for water absorption, helping the flowers stay hydrated longer.
I like to make the cut just above a leaf node or side shoot if possible. This encourages the plant to produce more blooms later in the season. Avoid cutting too close to the base of the plant, as this can damage the rhizome and weaken future growth.
Remove Lower Leaves and Trim Stems Properly
Strip away any leaves that would sit below the waterline in your vase. These leaves will rot in water and create a breeding ground for bacteria, which can cause your arrangement to wilt prematurely. Use your fingers or a clean knife to gently remove the lower leaves, leaving only the top portion of the stem intact.
For stems that are too long, trim them to a uniform length—typically 6 to 12 inches—depending on the size of your vase. Uniform stems create a balanced look in your arrangement. If you notice any side shoots or small buds along the stem, leave them on unless they’re below the waterline, as they’ll help extend the life of your cut flowers.
Prepare the Stems for Immediate Water Uptake
Place the cut stems in a bucket of lukewarm water for about 30 minutes before arranging them in your vase. This rehydration step helps revive the stems and ensures they absorb water more efficiently. While they soak, you can also recut the stems under water at the base to open up the vascular system for better hydration.
I always change the water in the bucket every few hours if I’m prepping a large batch of flowers. Fresh, clean water is key to keeping iris blooms fresh. Once rehydrated, your stems will feel firmer and stand taller—this is your signal that they’re ready for the vase.
Arrange and Maintain for Maximum Freshness
Fill your vase with room-temperature water and add a flower food packet if available—this extends vase life by preventing bacterial growth. Arrange the stems loosely in the vase, allowing them to spread naturally without overcrowding. Overcrowding can lead to uneven water distribution, causing some stems to wilt faster than others.
Change the water every 2 to 3 days and trim the stems by about ½ inch each time you refresh the water. This keeps the cuts fresh and encourages continuous water uptake. Place the vase in a spot away from direct sunlight and drafts, as both can cause the flowers to wilt quickly. With these steps, your iris arrangement should stay beautiful for at least 7 to 10 days.
Tips & tricks for perfect iris flower arrangements
Here's what I've learned after years of keeping iris arrangements vibrant for weeks.
Timing is Everything: The 30-minute soak in Step 4 isn't just a suggestion—it's critical. I've found that stems soaked longer than this can develop bacterial growth, while shorter soaks don't fully rehydrate. For extra insurance, add a splash of white vinegar (1 tablespoon per quart of water) to the soaking bucket. This natural preservative helps prevent bacterial buildup that can shorten vase life.
Cutting Technique Matters: When making that 45-degree angle cut in Step 2, I recommend using a new blade each time you cut a batch. Even slightly dull blades can crush stem fibers, which dramatically reduces water uptake. If you're working with a large number of stems, take a moment to sharpen your pruners between batches. The slight extra time is worth the longer vase life you'll get.
Leaf Removal Strategy: In Step 3, I've noticed that many people make the mistake of removing ALL leaves from the stem. While you should definitely remove leaves below the waterline, leaving 1-2 leaves near the top actually helps the stem absorb water more efficiently. These upper leaves act like little straws, drawing water up the stem to the bloom.
Vase Placement Wisdom: After arranging your irises, place the vase in a spot with indirect light—like an east-facing window or a table away from direct sunlight. I've seen arrangements wilt dramatically when placed in south-facing windows, where the intense afternoon sun can cause the blooms to dry out within 24 hours. Evenings are actually ideal for iris arrangements, as the cooler temperatures help preserve moisture.
Pro Tips for Cut Iris Flowers For Vase
- Here's what I've learned after years of keeping iris arrangements vibrant for weeks.
- Timing is Everything: The 30-minute soak in Step 4 isn't just a suggestion—it's critical.
- Cutting Technique Matters: When making that 45-degree angle cut in Step 2, I recommend using a new blade each time you cut a batch.
Frequently asked questions
Got questions about cutting iris flowers for your vase? Here are some common ones—and their easy answers!
How do I know when irises are ready to cut for a vase?
Cut irises when their buds are just starting to open but haven’t fully bloomed. This ensures they’ll continue opening in your vase. Avoid cutting fully open flowers—they’ll wilt faster. Pro tip: Early morning is the best time to harvest for maximum freshness!
Should I cut the leaves when trimming iris stems?
No, never trim the leaves! They help the flowers absorb water and nutrients. Only cut the stems at a 45-degree angle, about 2–3 inches from the base. Leave the foliage intact to keep your irises vibrant longer.
How long will cut irises last in a vase?
With proper care, iris flowers can last 5–10 days in a vase! Change the water every 2–3 days and trim stems by ½ inch daily. Keep them in a cool spot away from direct sunlight or heat sources to extend their life.
Can I use irises from my garden that have already bloomed?
Yes, but they may not last as long. If you must use spent blooms, recut the stems underwater and place them in fresh water immediately. For the best results, always harvest bud-stage irises—they’ll open beautifully in your vase!
Why are my iris flowers wilting or drooping after cutting?
Wilting can happen if stems aren’t cut underwater or if the vase water is dirty. Always trim stems under running water to prevent air bubbles from blocking absorption. Also, avoid overcrowding flowers in the vase—give each stem space for hydration.
Wrapping up and next steps
Cutting iris flowers for your vase is easier than you think—and the results will leave your space blooming with fresh, long-lasting beauty! 🌸 By following these simple steps, you’ll ensure your irises stay vibrant, hydrated, and stunning for days.
Now that you’re armed with the know-how, why not grab a pair of sharp scissors and get creative? Experiment with different arrangements, mix colors, or even try pairing irises with complementary blooms for a showstopping centerpiece.
Ready to elevate your floral game? Head to your garden or a local flower shop, pick your favorite irises, and start trimming—your vase is waiting! 🌿✨