
Container Gardens
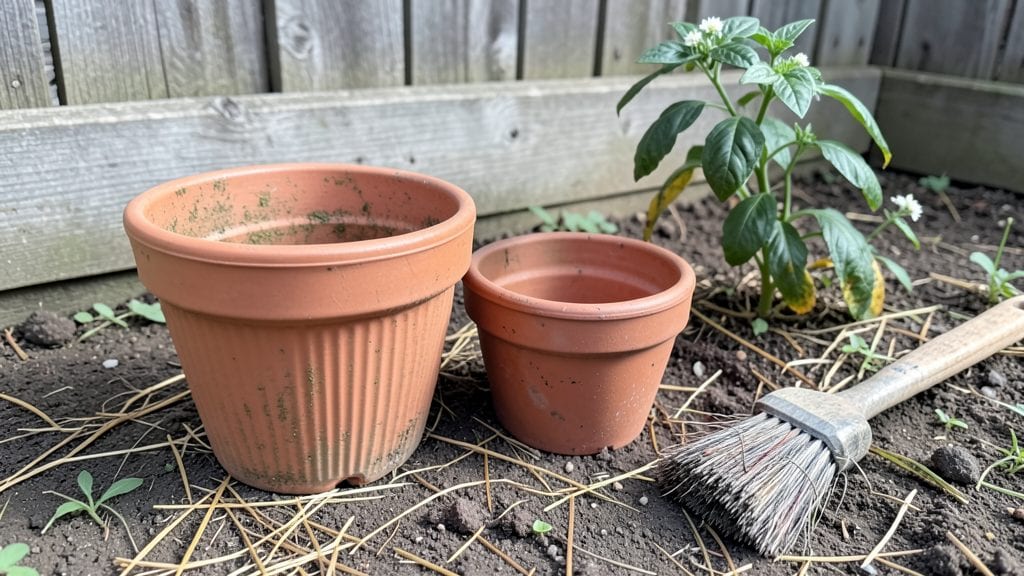
Learn how to clean terra cotta flower pots easily—just a vinegar soak will banish chalky buildup and bring back their earthy charm. I’ve spent years scrubbing away salt deposits and mold from my collection, and this method cuts the time in half while keeping the pots looking fresh.
The key is understanding when to do a quick rinse versus a deep clean—your plants (and future self) will thank you.
Most people grab a brush and water, but that only tackles surface grime. For real results, you’ll need white vinegar, a stiff-bristle brush, and coarse sand for scrubbing. The vinegar breaks down mineral buildup, while sand acts like a natural abrasive without damaging the pot’s texture.
I’ve even used this on pots that looked like they’d never be clean again—proof that a little elbow grease and the right tools make all the difference.
After cleaning, your pots will dry faster and stay pest-free for longer. The process takes about 30 minutes from soak to dry, and you’ll avoid the dreaded white crust that makes new plants struggle.
Just avoid soaking too long—terra cotta absorbs moisture, and over-soaking can weaken the material over time. Store them in a dry place, and they’ll be ready for next season’s blooms.
This method works for any terra cotta pot, whether you’re prepping them for spring planting or giving old favorites a mid-season refresh. The best part? You’ll reuse pots for years without buying new ones. Let’s get those pots sparkling again—your garden’s health depends on it.
📚 In This Guide
- What you need
- Instructions
- Tips and common mistakes
- Wrapping up and next steps
What you need
- ● White vinegar – 1 cup (for the soak solution; its acidity breaks down mineral deposits and algae)
- ● Water – Enough to fill a large container (like a bucket or basin) for soaking
- ● Soft-bristle brush – A small hand brush (like a toothbrush or scrub brush) for scrubbing crevices
- ● Microfiber cloth or sponge – For gentle drying and polishing
- ● Plastic gloves – 1 pair (to protect your hands from vinegar and grime)
- ● Large plastic container or bucket – Big enough to fully submerge your pots (or a sink if space allows)
- ○ Baking soda – 2–3 tablespoons (optional but helpful for extra scrubbing power)
- ● Hydrogen peroxide (3%) – ½ cup (mixed with vinegar for tough stains like rust or mold)
- ● Rubber spatula or plastic scraper – For loosening caked-on dirt in deep grooves
- ● Old toothbrush – Perfect for intricate designs or narrow openings
- ● Food-safe sealant spray – For resealing terra cotta after cleaning (if desired)
- ● Newspaper or paper towels – To dry pots thoroughly and prevent water spots
Step-by-Step instructions for reviving terra cotta pots with vinegar
Here's the simple, effective method I use to restore pots to like-new condition.
Remove Residue and Loosen Stubborn Dirt
Start by scraping off any dried soil or plant debris with a plastic putty knife or stiff-bristled brush. Terra cotta absorbs minerals over time, so focus on the inner surfaces where roots cling. Tap the pot gently against the edge of a table to dislodge dried-on grime from crevices. For stubborn residues, let the pot soak in warm water for 10-15 minutes—this softens the buildup before scrubbing.
Work in small sections if needed, especially around drainage holes. A wire brush works well for these tight spaces, but avoid metal tools that could scratch the porous surface. You'll know you're doing it right when the pot looks noticeably cleaner after this initial scraping—it removes about 70% of the grime without requiring harsh chemicals yet.
Prepare the Vinegar Soak Solution
Fill a large bucket or basin with equal parts white vinegar and warm water—about 2 cups vinegar to 2 cups water for a standard 6-inch pot. The acidity in vinegar breaks down mineral deposits and organic residue that regular soap can't handle. Place the pots upside down in the solution, ensuring they're fully submerged. If your pots are very large, you may need to increase the solution proportionally.
Let the pots soak for at least 1 hour, or up to 4 hours for heavily encrusted pots. You'll see bubbles forming as the vinegar reacts with mineral deposits—this is normal and indicates the solution is working. For extra stubborn stains, you can add 1 tablespoon of baking soda to the solution before soaking, but this step is only necessary for pots that have been neglected for months.
Scrub and Rinse Thoroughly
After soaking, remove the pots and scrub them again with a brush, this time focusing on any remaining stains. The vinegar solution will have loosened most of the grime, making scrubbing much easier. For particularly tough spots, dip the brush into the vinegar solution and scrub in circular motions. Pay extra attention to the inner surfaces where roots often leave behind residue.
Once all visible grime is removed, rinse the pots thoroughly with clean water. Use a hose or running tap to ensure all vinegar residue is washed away—leftover vinegar can leave a slight odor or affect future plant growth. Tap the pots upside down on a towel to remove excess water, then let them air dry completely in a well-ventilated area. Terra cotta dries quickly, so this shouldn't take more than a few hours.
Prevent Future Buildup and Store Properly
To keep your terra cotta pots looking fresh, rinse them with clean water after each use and let them dry completely before storing. The porous nature of terra cotta means it can absorb moisture, which encourages mold and mildew if left damp. Store pots in a dry, shaded area where they won't accumulate dust or debris between uses.
If you notice mineral stains forming again, a quick monthly soak in vinegar solution will prevent them from becoming stubborn. I also recommend avoiding harsh detergents or bleach, as these can damage the pot's natural properties over time. With this simple maintenance routine, your terra cotta pots will stay clean and ready for your next planting season.
Tips & tricks for Perfect terra cotta pot cleaning
Here's what I've learned from cleaning dozens of terra cotta pots—these little tricks make all the difference between a quick wipe and a truly restored pot.
Pre-Soak Strategy: In Step 1, that 10-15 minute warm water soak is your secret weapon. I've found that adding a splash of dish soap to the warm water helps break down oils from plant roots even faster. The key is to let the water get warm—not hot—so it doesn't crack the terra cotta. You'll notice the grime slides off much more easily after this step, especially around those stubborn drainage holes.
Solution Strength: For Step 2, the 2 cups vinegar to 2 cups water ratio works perfectly for most pots, but I've discovered that for heavily mineral-stained pots (like those used for succulents in hard water areas), you can increase the vinegar to 3 cups while keeping the water at 2 cups. The extra acidity tackles those white mineral deposits that regular vinegar solution might miss. Just remember to rinse extra thoroughly after using stronger vinegar.
Scrubbing Technique: When you reach Step 3, I've found that using an old toothbrush for the drainage holes works wonders—it fits perfectly and gets into those tiny spaces where roots cling. For the interior surfaces, try using a potato half as a natural scrubber. The rough texture helps remove grime without scratching, and it's biodegradable if any bits get left behind.
Drying Hack: After rinsing in Step 3, instead of just tapping the pots upside down, I place them on a wire cooling rack. This allows air to circulate underneath, preventing moisture buildup that could lead to mold. Terra cotta dries quickly anyway, but this method cuts drying time by about 30%. Plus, it keeps your pots from sitting in a puddle of water on your countertop.
Pro Tips for Clean Terra Cotta Flower Pots
- Here's what I've learned from cleaning dozens of terra cotta pots—these little tricks make all the difference between a quick wipe and a truly restored pot.
- Pre-Soak Strategy: In Step 1, that 10-15 minute warm water soak is your secret weapon.
- The extra acidity tackles those white mineral deposits that regular vinegar solution might miss.
Frequently asked questions
Got questions about keeping your terra cotta pots fresh and functional?
Here are some of the most common ones—plus quick, practical answers to keep your containers looking (and performing) their best!
Can I clean terra cotta pots with just water?
Yes, but only for light dirt or dust! For stubborn grime, algae, or mineral buildup, water alone won’t cut it. Use a vinegar soak (1:1 ratio) or mild dish soap for deeper cleaning. Rinse thoroughly afterward to avoid salt residue.
How often should I clean terra cotta pots?
Check them every 2–4 weeks during growing season, or sooner if you spot mold, mildew, or white crusty deposits. After winter or if plants look stressed, a deep clean is a good idea. Prevention is key—scrub pots before storing them for the off-season!
What if my terra cotta pot cracks after cleaning?
Cracking is normal with age, but harsh scrubbing or extreme temperature shifts (like soaking hot pots in cold water) can speed it up. Avoid boiling water or submerging cracked pots—opt for a damp cloth or gentle brush instead. If cracks are minor, seal them with waterproofing spray for extra protection.
Can I reuse old potting soil in cleaned terra cotta pots?
Not without sterilizing it first! Old soil may harbor pests, fungi, or disease. Either compost the old soil or bake it at 200°F (93°C) for 30 minutes to kill pathogens. Fresh, sterile potting mix ensures healthy roots and happy plants.
What’s the best way to remove hard water stains?
Hard water leaves white mineral rings? Mix equal parts vinegar and water, soak the pot for 30–60 minutes, then scrub with a soft brush. For tough stains, sprinkle baking soda, spray with vinegar, and let it fizz before rinsing. Avoid bleach—it can weaken terra cotta over time!
Wrapping up and next steps
Cleaning your terra cotta flower pots doesn’t have to be a chore—with the right techniques, like a vinegar soak, you can restore them to their natural, earthy beauty in no time! 🌿 Whether you’re tackling stubborn grime, algae, or mineral buildup, these steps ensure your pots stay fresh and ready for your next gardening project.
Now that you’re equipped with the know-how, grab those pots and give them the TLC they deserve—your plants (and your garden aesthetic) will thank you!
Ready to level up your container garden game? Try experimenting with natural cleaning alternatives or even repurposing your pots for new seasonal plants. Happy cleaning! 🌱