
Container Gardens
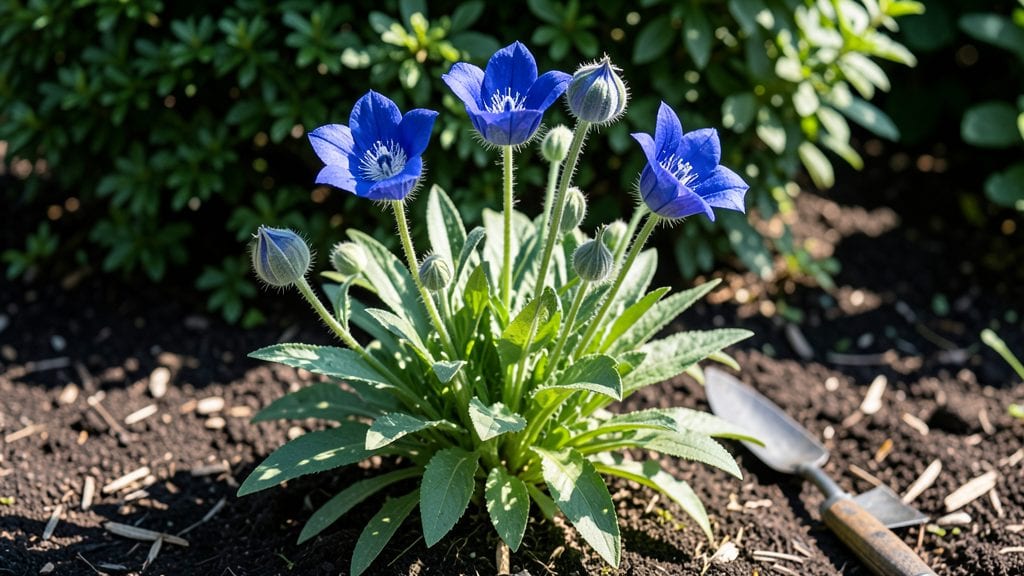
Balloon flower’s frost-resistant blue blooms transform containers into whimsical pollinator magnets—just wait until you see those balloon-shaped buds pop into starry flowers. ✨ I’ve grown them in pots for years, and they thrive where other perennials struggle, even in colder zones.
The secret lies in their love of well-draining soil, bright light, and a little winter protection.
You’ll need a 5-7 gallon container with drainage holes, a mix of potting soil and perlite, and a spot that gets 6+ hours of sun daily.
Plant the bulbs 1-2 inches deep, spacing them 12-18 inches apart—close enough to create a lush display, but not so crowded they flop. Water deeply after planting, then keep the soil evenly moist but not soggy.
By midsummer, you’ll be rewarded with vibrant blue, purple, or white blooms that attract bees and butterflies while lasting weeks. The plants handle frost beautifully, making them perfect for spring or fall planting. Just snip back dead flowers to encourage more blooms, and you’ll enjoy this low-maintenance stunner for years.
Even in small spaces, balloon flowers bring bold color and texture without the fuss of high-maintenance perennials. Their unique blooms and hardy nature make them a container gardener’s dream—easy to grow, impossible to resist. Let’s get those bulbs in the ground!
📚 In This Guide
- What you need
- Instructions
- Tips and common mistakes
- Wrapping up and next steps
What you need
- ● Balloon flower plants: 3–5 young nursery-grown plants (6–12 inches tall) or seeds (if starting from scratch). Pro tip: Choose blue or purple varieties for the most dramatic container display!
- ● Containers: 1–2 large pots (12–18 inches in diameter) with drainage holes. Material matters: Terracotta, ceramic, or fabric grow bags work best.
- ● Potting soil: 1–2 bags of high-quality, well-draining container mix (avoid garden soil—it compacts!). Look for blends labeled for perennials or flowering plants.
- ● Organic fertilizer: A balanced, slow-release granular fertilizer (10-10-10 or 5-10-10) or liquid bloom booster (like fish emulsion). 💡 Follow label instructions for dosage!
- ● Mulch: 1–2 inches of organic mulch (e.g., shredded bark or straw) to retain moisture and regulate soil temperature.
- ● Watering can or hose with a gentle spray nozzle: Balloon flowers love moisture but hate soggy roots!
- ● Slow-release fertilizer spikes: For hassle-free nutrition over 3–6 months.
- ● Companion plants: Pair with salvia, ornamental grasses, or heuchera for a stunning container combo.
- ● Epsom salt: 1 tablespoon mixed into soil at planting to boost magnesium (great for vibrant blooms!).
- ○ Plant supports: Small stakes or rings (optional for tall varieties like ‘Mariesii’).
- ● Self-watering container: If you travel often—balloon flowers appreciate consistent moisture!
Step-by-step guide to cultivating balloon flower in containers
Here’s how to grow these striking perennials with minimal fuss—perfect for frost-hardy container displays.
🌱 Step 1: Select and Prepare the Right Containers
Balloon flowers thrive in containers with excellent drainage. Choose pots at least 12 inches deep and 12 inches wide for each plant—these roots need room to spread. I prefer terracotta because it breathes and helps prevent root rot, especially in cooler climates. If using plastic, drill extra drainage holes along the sides to mimic terracotta’s airflow.
Fill the bottom 2 inches with gravel or coarse perlite to create a drainage layer. This prevents water from pooling at the roots, which balloon flowers despise. The reason we add this layer is simple: soggy roots lead to fungal diseases that can kill plants before they even bloom. Pack it firmly but don’t tamp it down—just enough to hold its place.
🌿 Step 2: Use a Well-Draining, Fertile Soil Mix
Balloon flowers prefer loamy, well-draining soil with a slightly acidic to neutral pH (6.0-7.0). Mix equal parts of garden soil, compost, and perlite or coarse sand to create the ideal texture. I like to add a handful of worm castings to the mix—it boosts microbial activity without overfeeding, which can burn tender roots.
Fill the container to within 2 inches of the rim, leaving room for watering. Press the soil down gently to remove air pockets, but don’t compact it too tightly. You’ll know it’s right when a handful of soil holds together but crumbles easily when squeezed. This balance ensures roots get both oxygen and moisture without suffocating.
☀️ Step 3: Plant Seeds or Transplants at the Right Depth
If starting from seed, sow them ¼ inch deep in early spring, about 6 inches apart. Balloon flower seeds germinate best in 60-70°F soil, so I use a seedling heat mat if my spring nights are still chilly. Cover the seeds lightly with soil and mist the surface—don’t soak it, or the seeds may wash away.
For transplants, dig a hole twice as wide as the root ball but no deeper. Place the plant so the top of the root ball sits just below the soil line—balloon flowers hate being buried too deep. Gently firm the soil around the roots and water deeply to settle everything. You’ll see the first true leaves emerge in 4-6 weeks—that’s your signal the plant is established.
💧 Step 4: Water and Fertilize for Strong Growth
Water container-grown balloon flowers deeply once a week, allowing the top 2 inches of soil to dry out between waterings. Overwatering is the fastest way to kill them—yellowing leaves or mushy stems are sure signs you’re keeping them too wet. I use a moisture meter to check, but a simple finger test works too: stick your finger in the soil. If it feels dry, it’s time to water.
Feed plants with a balanced, water-soluble fertilizer (10-10-10) every 4-6 weeks during the growing season. I dilute it to half-strength to avoid burning the roots. Stop fertilizing in late summer to encourage blooming rather than leafy growth. The key here is consistency—too much fertilizer leads to weak stems, while too little results in sparse flowers.
✂️ Step 5: Prune and Deadhead for Continuous Blooms
Pinch back the top set of leaves when the plant is 6 inches tall to encourage bushier growth. This step is crucial—without it, balloon flowers grow leggy and produce fewer blooms. Use clean, sharp scissors to make the cut just above a set of leaves. You’ll see new side shoots emerge within 2-3 weeks, signaling the plant is responding well.
Deadhead spent blooms by snipping the flower stem just above the next set of leaves. This redirects the plant’s energy into producing more flowers instead of seeding. I do this every 2-3 days during peak bloom—it’s a small effort that pays off with weeks of vibrant blue flowers. If you skip this, the plant will focus on seed production, and your blooms will fade faster.
Tips & tricks for cultivating thriving balloon flowers in containers
These insights will help you avoid common pitfalls and maximize your balloon flower's potential for vibrant, frost-resistant blooms.
Container Selection Wisdom: Terracotta pots are ideal because they wick away excess moisture, but if plastic is your only option, add extra drainage holes—not just at the bottom. I’ve seen balloon flowers in plastic pots without modifications struggle with root rot after just two weeks. The key is mimicking terracotta's breathability by creating airflow pathways along the sides. For larger containers (18+ inches), consider adding a second drainage layer of gravel halfway up the sides to prevent waterlogging in deeper soil.
Soil Texture Secrets: The equal parts garden soil, compost, and perlite mix creates the perfect balance, but don't skip the worm castings—they're the unsung heroes of soil health. I've found that adding a handful of biochar to this mix further improves drainage and microbial activity. When pressing the soil down, think "light hug"—just enough to remove air pockets without compacting. Overly dense soil suffocates roots, while soil that's too loose can't retain moisture or nutrients effectively.
Seedling Heat Mat Strategy: That 60-70°F soil temperature range is non-negotiable for seed germination, but here's what nobody tells you—place the heat mat under the container before sowing, not after. This creates a consistent warm environment from day one. If you don't have a heat mat, try placing your seed container on top of a refrigerator or in a sunny windowsill with a clear plastic wrap tent to trap heat. Monitor soil temperature with a small thermometer—consistency is more important than exact numbers.
Fertilizer Timing Technique: The 4-6 week feeding schedule works perfectly, but here's my pro move: alternate between the 10-10-10 fertilizer and a liquid seaweed fertilizer every other feeding. The seaweed provides trace minerals that container plants crave, while the balanced fertilizer gives them the nitrogen they need. Always dilute that seaweed fertilizer to half-strength too—it's more potent than you'd think. And remember, the late-summer feeding break isn't just about blooms—it gives your plants time to harden off for winter.
Pro Tips for Growing Balloon Flower
- These insights will help you avoid common pitfalls and maximize your balloon flower's potential for vibrant, frost-resistant blooms.
- Container Selection Wisdom: Terracotta pots are ideal because they wick away excess moisture, but if plastic is your only option, add extra drainage holes—not just at the bottom.
- Soil Texture Secrets: The equal parts garden soil, compost, and perlite mix creates the perfect balance, but don't skip the worm castings—they're the unsung heroes of soil health.
Frequently asked questions
Got questions about growing Platycodon grandiflorus (balloon flower)?
You’re not alone—this frost-hardy beauty has a few quirks! Here are answers to the most common queries to help you cultivate stunning blooms in containers.
How long does it take for balloon flower to bloom after planting?
Balloon flowers are patient! From seed, expect blooms in 1–2 years, while container-grown plants may flower the first year if planted in early spring. Patience pays off—just ensure they’re in full sun (6+ hours) and well-drained soil for speedier results.
Can balloon flowers survive winter in containers?
These frost-resistant stars thrive in USDA Zones 3–9. For containers, move them to a sheltered spot (like a garage or under eaves) before temps drop below 10°F (-12°C). Mulch the soil lightly with straw or leaves for extra protection.
Why aren’t my balloon flowers blooming?
No blooms? Check these fixes:
- Light: They need full sun—move to a sunnier spot if shaded.
- Food: Feed with a balanced fertilizer (10-10-10) in spring.
- Overcrowding: Thin plants if roots are tangled in containers.
- Age: Young plants (under 2 years) may focus on foliage first.
What’s a good alternative if balloon flowers are hard to find?
Try these low-maintenance, frost-tolerant container picks:
- Delphiniums (tall, dramatic spikes)
- Lobelia (trailing, blue blooms)
- Primroses (early spring color)
- Catmint (drought-resistant, long-lasting)
How often should I water balloon flowers in containers?
Keep soil consistently moist but not soggy. Water when the top 1 inch (2.5 cm) of soil feels dry—usually 2–3 times per week in summer, less in cooler months. Containers dry out faster, so check daily during heatwaves! Mulch helps retain moisture.
Wrapping up and next steps
Growing balloon flower in containers is a rewarding journey that brings vibrant blue blooms to your space—even in chilly climates! 🌿 With the right soil, sunlight, and care, these frost-resistant beauties thrive while adding a pop of color to patios, balconies, or windowsills.
Whether you're a beginner or seasoned gardener, their low-maintenance nature makes them a perfect choice for container gardens.
Ready to dive in? Start by gathering your supplies, then plant with confidence—your future blue blooms will thank you! 💙 For extra inspiration, explore companion plants or creative container styling to elevate your garden game. Happy growing!