Tools
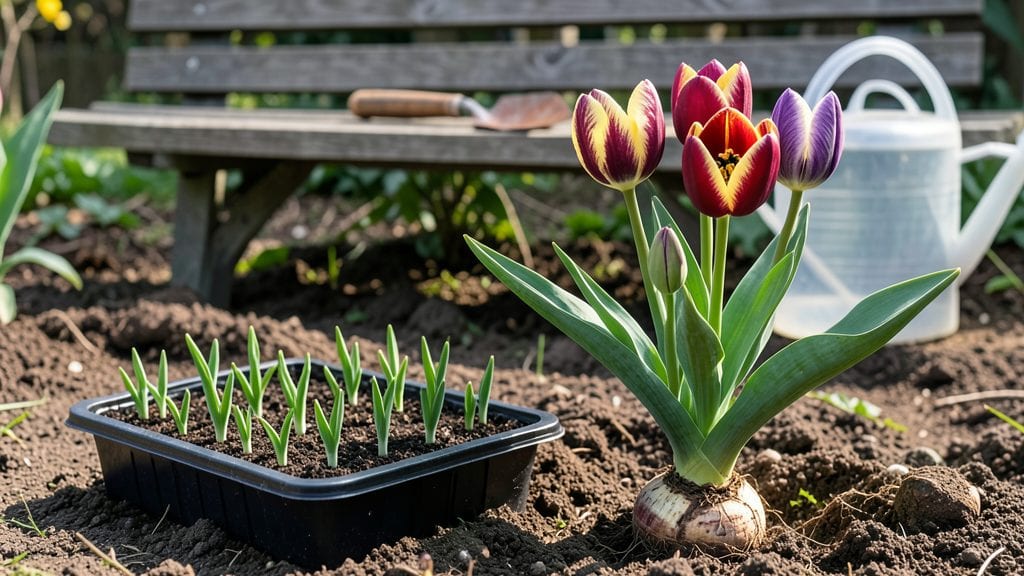
Creating a flower bulb garden that bursts with color from early spring through late fall is easier than you think—and it requires almost no pruning once established. 🌷 I’ve designed mine to bloom in waves, so there’s always something vibrant to catch the eye, whether it’s the delicate petals of crocuses in March or the bold drama of dahlias in October.
The secret lies in layering bulbs by height and bloom time, creating a living tapestry that evolves with the seasons. Start with early bloomers like tulips and daffodils at the front, then add mid-season favorites like alliums and irises, and top it off with late-season stars like lilies and crocosmias.
Mix in a few perennials for structure, and you’ll have a garden that feels lush and intentional without constant upkeep.
Imagine stepping outside in April to find your yard alive with purple hyacinths, then transitioning seamlessly to pink peonies in May, followed by the fiery hues of fall crocuses.
The best part? Once the bulbs are planted, they multiply year after year, reducing your workload while increasing your garden’s beauty. It’s like having a self-sustaining masterpiece.
This approach works for borders, containers, or even small pockets of space—no need for a sprawling backyard. Whether you’re starting fresh or refreshing an existing garden, these techniques will give you year-round color with minimal effort. Let’s bring that vision to life!
📚 In This Guide
- What you need
- Instructions
- Tips and common mistakes
- Wrapping up and next steps
What you need
- ● Flower bulbs: Choose 20–50 bulbs (depending on garden size) of varieties like tulips, daffodils, hyacinths, or alliums. Opt for disease-resistant or perennial types for long-term beauty.
- ● Well-draining soil: 5–10 bags of garden soil or compost (enrich with organic matter for nutrient-rich beds).
- ● Mulch: 2–3 bags of straw, wood chips, or pine needles (3–4 inches deep) to protect bulbs in winter.
- ● Fertilizer: 1 bag of bulb-specific fertilizer (high in phosphorus) or a balanced 10-10-10 blend.
- ● Hand trowel or bulb planter (for precise digging—6–8 inches deep).
- ● Garden gloves (to protect hands from soil and sharp bulb edges).
- ● Measuring tape or ruler (to space bulbs 3–6 inches apart, depending on variety).
- ● Watering can or hose with a gentle spray nozzle (bulbs need consistent moisture but hate soggy soil).
- ○ Optional: Soil pH tester (aim for 6.0–7.0 for most bulbs).
- ● Bulb chitting tray (to pre-sprout bulbs indoors in cooler climates).
- ● Edging stones or landscape fabric (to define garden borders neatly).
- ● Sunlight: A spot with 6+ hours of sunlight daily (partial shade works for some varieties like hyacinths).
- ● Drainage: Avoid low-lying areas where water pools—bulbs rot in soggy soil!
- ● Timing: Plant bulbs in fall (6–8 weeks before frost) for spring blooms, or in late summer for fall/winter flowers.
Step-by-Step instructions for designing a low-maintenance flower bulb garden
Here's how to create a vibrant display that thrives with minimal effort after the initial setup.
🌱 Step 1: Plan Your Bulb Layering and Placement
Start by sketching your garden layout on paper. Group bulbs by height—tall varieties like alliums and tulips go in the back, while shorter daffodils and crocuses belong in the front. I like to use a 12-inch spacing between clusters to allow roots to expand without crowding. Choose a location with 6+ hours of sun daily, as most spring bulbs need full light for strong blooms.
Here's the thing—layering bulbs by bloom time ensures continuous color. Plant early bloomers like snowdrops in fall, mid-season tulips in late fall, and late summer bloomers like dahlias in spring. Mark your planting spots with small stakes so you don't mix varieties. Real talk: I once planted all my tulips in one spot and ended up with a sea of identical flowers—boring!
🪴 Step 2: Prepare the Soil and Plant Bulbs
Loosen the soil to a depth of 12-15 inches using a garden fork or tiller. Amend with 2-3 inches of compost mixed into the top 6 inches of soil. This improves drainage and nutrients—critical for bulb health. For containers, use a well-draining potting mix with added perlite.
Plant bulbs at a depth equal to 2-3 times their height (check the bulb packaging for specifics). For example, tulips (about 2 inches tall) go 4-6 inches deep. Space them 4-6 inches apart in rows. I tap the seed packet gently to release one bulb at a time—planting too many in one hole leads to weak, crowded blooms. Water immediately after planting to settle the soil around the bulbs.
☀️ Step 3: Mulch and Protect for Winter
Apply 2-3 inches of mulch (like shredded bark or straw) after planting to insulate bulbs through winter. This prevents frost heave, where freezing and thawing cycles push bulbs too close to the surface. In colder climates, add an extra 4 inches of mulch for extra protection. Wait until the ground freezes before mulching—early mulch can trap moisture and rot bulbs.
Here's where it gets fun—watch for the first shoots in early spring. You'll see green tips poking through the soil around March or April, depending on your climate. Don't be tempted to dig them up or fertilize yet. Bulbs need time to establish roots before they bloom. A light hand now means stronger flowers later.
✂️ Step 4: Maintain Through the Growing Season
Water bulbs deeply once a week during the growing season, aiming for 1 inch of water per week. You'll know you're doing it right when the soil feels moist 2 inches below the surface. Stop watering once the foliage yellows—this signals the bulb is storing energy for next year. I always set a reminder to stop watering by mid-summer to avoid rot.
Deadhead spent blooms to encourage more flowers, but leave the foliage until it turns yellow. This ensures the bulb replenishes its energy. If you see any bulbs pushing up through the soil too early (like tulips in late winter), cover them with a light layer of mulch to protect them from late frosts. This is the moment that matters: balance between encouraging blooms and protecting tender growth.
🌿 Step 5: Plan for Year-Round Interest
After blooms fade, let the foliage die back naturally. In late summer, fertilize with a balanced, slow-release fertilizer (like 10-10-10) to strengthen bulbs for next year. For containers, mix a handful of fertilizer into the soil during repotting. This ensures bulbs have the nutrients they need to multiply and return bigger and better each season.
To extend your garden's life, interplant bulbs with perennials or annuals that bloom in the gaps. For example, pair tulips with low-growing ferns or pansies. This creates a seamless transition from spring bulbs to summer bloomers. I know it seems like extra work, but it pays off with a garden that looks stunning from early spring to late fall with almost no effort.
Tips & tricks for perfect flower bulb gardens
Creating a stunning flower bulb garden that thrives with minimal effort takes a few strategic moves—here's what I've learned after years of trial and error.
Layering Strategy: When planning your bulb clusters in Step 1, consider adding a few late-season bloomers like crocosmia or fall-blooming anemones to extend your color palette into autumn. These varieties bridge the gap between summer and winter interest. I like to sketch my layout with colored pencils—each color represents a different bloom time, making it easy to visualize the seasonal progression.
Soil Prep Secret: In Step 2, don't skip the soil test if possible—many garden centers offer inexpensive kits. If your soil tests acidic (pH below 6.5), add pelletized lime to the top 6 inches of soil before planting. Most bulbs prefer a slightly acidic to neutral pH (6.0-7.0). I've seen dramatic improvements in bloom size and color intensity after adjusting soil pH—it's worth the small investment.
Winter Protection: For Step 3, if you're in a zone with particularly harsh winters (below Zone 5), consider adding a layer of evergreen boughs over your mulch for extra insulation. The needles release beneficial acids as they decompose, which helps protect tender bulbs. Just remove them in early spring before new growth appears. This simple trick has saved my tulips from winter heave in years past.
Watering Wisdom: In Step 4, use a soil moisture meter to check that water reaches 2 inches deep after each watering. Many gardeners overwater because they only check surface moisture. I've found that bulbs actually prefer slightly drier conditions once they've established roots—this prevents rot while keeping them hydrated. Aim for that "squeeze-a-spoonful-of-soil-and-it's-damp-but-not-wet" consistency.
Pro Tips for Flower Bulb Garden
- Creating a stunning flower bulb garden that thrives with minimal effort takes a few strategic moves—here's what I've learned after years of trial and error.
- Layering Strategy: When planning your bulb clusters in Step 1, consider adding a few late-season bloomers like crocosmia or fall-blooming anemones to extend your color palette into autumn.
- Soil Prep Secret: In Step 2, don't skip the soil test if possible—many garden centers offer inexpensive kits.
Frequently asked questions
Got questions about creating a stunning flower bulb garden with minimal fuss? You’re not alone! Here are answers to the most common queries—so you can dive in with confidence.
When is the best time to plant flower bulbs?
For most climates, plant spring-blooming bulbs (like tulips and daffodils) in fall (6-8 weeks before the ground freezes). Fall-blooming varieties (e.g., crocuses) go in late summer or early fall. Check your USDA zone for exact timing—cool soil is key!
How long do flower bulbs take to bloom?
Bloom times vary! Spring bulbs like tulips may take 4-6 weeks after planting, while summer bloomers (e.g., dahlias) can take 8-12 weeks. Patience pays off—some bulbs (like alliums) even reward you with year-round foliage interest even if they don’t rebloom.
Can I plant flower bulbs in containers?
Containers are perfect for small spaces or renters. Use a well-draining mix (add perlite or sand) and choose bulbs with similar care needs. Daffodils and hyacinths thrive in pots—just ensure they get 6+ hours of sunlight and winter protection in cold zones.
What do I do if my bulbs aren’t blooming?
No flowers? Check these fixes:
- Depth: Plant bulbs 2-3x their height deep (shallow = no blooms!).
- Sunlight: Most bulbs need full sun (6+ hours/day)—move them if shaded.
- Soil: Amend heavy clay with compost for better drainage.
- Patience: Some bulbs (like lilies) take 2-3 years to reach full potential.
Do I need to fertilize flower bulbs?
Light feeding helps! Use a balanced bulb fertilizer (10-10-10) at planting and again in early spring. Skip heavy nitrogen—it promotes foliage over flowers. Pro tip: Add a handful of bone meal at planting for an extra phosphorus boost!
Are there low-maintenance bulb alternatives for hot climates?
Yes! Try heat-tolerant bulbs like:
- Rain lilies (survive drought and partial shade).
- Society garlic (perennial, fragrant, and pest-resistant).
- Bearded irises (thrive in full sun, minimal watering).
Plant in well-draining soil and mulch to retain moisture.
Wrapping up and next steps
Creating a flower bulb garden is one of the easiest and most rewarding ways to bring vibrant color to your outdoor space with minimal effort! 🌸 With the right bulbs, soil, and a little planning, you’ll enjoy stunning blooms year after year—even in winter.
Whether you’re a beginner or an experienced gardener, this low-maintenance approach makes it simple to transform any patch of earth into a lively, ever-changing display.
Ready to dive in? Start by sketching your design—pick your favorite bulbs, mark their planting spots, and grab your tools. Then, roll up your sleeves and gather your supplies (or revisit our FAQs for quick tips).
Before you know it, you’ll be savoring the fruits of your labor with a garden that practically takes care of itself!