Container Gardens
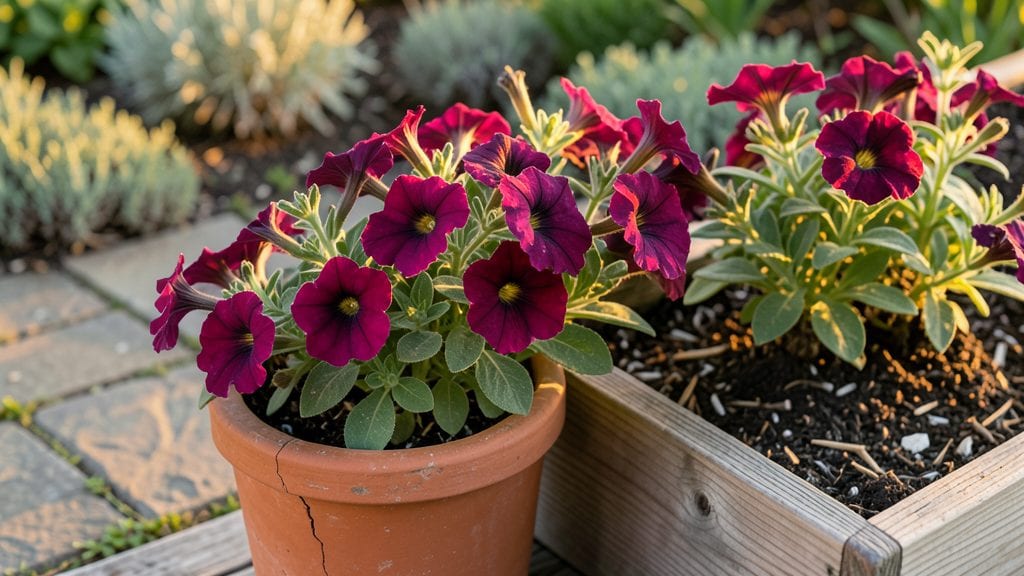
Combining flower beds with flower pots turns even the tiniest yard into a vibrant garden oasis—no sprawling space required. 🌸 I transformed my 50-square-foot patio into a layered display using raised beds, hanging pots, and window boxes, proving that vertical gardening isn’t just for urban balconies.
The key is treating containers as intentional design elements, not afterthoughts.
Start with a mix of heights: tall pots along fences, mid-size planters at eye level, and shallow beds for ground-hugging perennials. Color coordination matters—try three shades of one palette (like purple, white, and lavender) for harmony, or bold contrasts (red geraniums against silver foliage) for drama.
For small spaces, prioritize thriving annuals like petunias, snapdragons, and calibrachoa—they spill beautifully over edges while requiring minimal care.
What you’ll end up with is a garden that feels intentional and lush, not cramped. The right plant choices mean you’ll enjoy blooms from spring through fall with minimal deadheading, and the layered design creates visual depth that tricks the eye into seeing more space.
Plus, pots let you swap out seasonal favorites without digging—think cool-season pansies in winter and sun-loving zinnias by summer.
This approach works for any small yard, from city stoops to suburban sideyards. The same principles apply whether you’re working with a single raised bed or a wall of hanging pots.
Let’s make your outdoor space feel like a curated garden, not just a patch of dirt with a few plants stuck in it.
📚 In This Guide
- What you need
- Instructions
- Tips and common mistakes
- Wrapping up and next steps
What you need
- ● Flower Pots: 6–12 pots (varies by design; mix sizes for visual interest—6–12" diameter for small plants, 14–18" for shrubs)
- ○ Optional: Self-watering pots (💡 great for drought-prone areas!)
- ● Potting Mix: 2–3 bags of high-quality well-draining mix (e.g., 50% peat/coir, 30% perlite, 20% compost)
- ○ Optional: Slow-release fertilizer (mix 1 tbsp per gallon of soil)
- ● Plants: 3–5 varieties (e.g., petunias, ferns, succulents, or trailing ivy for texture)
- ● Pro Tip: Choose plants with similar sunlight/water needs! 🌞💧
- ● Tools: Trowel or small shovel
- ● Gloves (gardening or work gloves)
- ○ Optional: Pot saucers (to catch runoff) or decorative trays
- ● Extras (for style!):strong> Mulch (e.g., cocoa hulls or gravel for a polished look)
- ● Decorative pebbles or moss (for a Zen garden vibe)
- ● Stakes or trellises (if growing climbing plants like jasmine or morning glories)
- ● ✅ A sunlight assessment (note which pots get full sun, partial shade, or full shade)
- ● ✅ A level surface (or a sturdy shelf/railing if vertical gardening)
- ○ ✅ Optional but fun: A sketch of your pot arrangement (for symmetry or theme cohesion!)
How to create stunning vertical flower beds using flower pots
Transform tight spaces into lush displays with these clever, space-saving techniques.
🪴 Step 1: Select and Prepare Your Containers
Choose pots with drainage holes—terracotta, plastic, or even repurposed buckets work well. I recommend 6-12 inch pots for small yards, as they balance stability and mobility. If using stacked pots, ensure each level has at least 4 inches of depth to accommodate root systems without crowding.
Clean containers thoroughly with a 10% bleach solution (1 part bleach to 9 parts water) to prevent disease. Rinse well and let dry completely. Here's the thing—skipping this step can lead to mold or fungal issues down the line, especially in humid climates. For extra stability, anchor stacked pots with plastic zip ties or landscape fabric straps around the edges.
🌱 Step 2: Layer Soil and Plants Strategically
Fill each pot with high-quality potting mix (not garden soil) mixed with perlite or vermiculite for drainage. Leave 1 inch of space at the top to prevent overflow when watering. For a 4-pot vertical arrangement, I use 2 gallons of mix per pot—this ensures enough moisture retention without becoming waterlogged.
Plant your tallest flowers at the bottom layer, medium-height varieties in the middle, and trailing plants (like petunias or ivy) at the top. This creates a natural, cascading effect that maximizes visual impact. Watch for first true leaves—this is your signal that roots are establishing. If a plant looks leggy, it needs more light or deeper soil.
☀️ Step 3: Position for Optimal Sunlight and Airflow
Place your vertical garden where it receives at least 6 hours of sunlight daily, though most flowering plants thrive with morning sun and afternoon shade in hot climates. Avoid tight corners where airflow is restricted—poor circulation invites pests like aphids or powdery mildew.
Rotate the pots quarter-turn weekly so all sides get even light exposure. You’ll notice leaves leaning toward the light? That’s your cue to adjust the position. For extra protection, place pots on elevated stands (like wooden crates) to keep them off damp ground, which can rot containers over time.
💧 Step 4: Water and Maintain for Long-Lasting Blooms
Water deeply every 2-3 days, checking that the top inch of soil feels dry before adding more. Vertical pots dry out faster than ground beds, so consistency is key. I use a watering can with a long spout to reach the bottom layers without disturbing the plants. Mulch the top layer with 1 inch of shredded bark to retain moisture and suppress weeds.
Fertilize lightly every 4-6 weeks with a balanced, water-soluble fertilizer (like 10-10-10). Over-fertilizing burns roots, so always follow the package instructions. Deadhead spent blooms regularly—this encourages more flowers and keeps your display looking fresh. If leaves yellow, it’s usually a sign of overwatering or poor drainage.
Tips & tricks for perfect vertical flower pots
Here’s what nobody tells you—these tricks will keep your vertical garden thriving without the common pitfalls.
Container Selection: For stacked arrangements, choose pots with consistent diameters—this ensures stability and prevents wobbling. I’ve learned the hard way that mismatched sizes create uneven weight distribution, especially after watering. Terracotta pots dry faster but require more frequent watering, while plastic holds moisture longer but can overheat in direct sun. A good rule of thumb: if you’re using four pots, opt for 8-10 inch diameters to balance aesthetics and weight.
Soil Mix Strategy: The 2 gallons of potting mix per pot in Step 2 is perfect, but here’s the secret: mix in 10% coconut coir with your perlite for extra moisture retention. This combo prevents the soil from compacting too quickly, which is crucial in vertical setups where drainage is already a concern. Confession: I skipped this for years and wondered why my plants always looked thirsty—until I adjusted the mix.
Light Rotation Hack: That quarter-turn weekly in Step 3 isn’t just about even light—it’s also a growth regulator. Plants naturally lean toward light, and this gentle adjustment prevents them from becoming lopsided. Pro tip: Use a small mirror propped against the pots to reflect light onto shaded sides for an extra boost, especially in north-facing setups where sunlight is limited.
Watering Wisdom: The top inch dry rule works, but here’s the catch: Vertical pots dry out fastest at the top layer. I use a long-handled moisture meter to check the bottom of 4-inch-deep pots—if it’s dry there, water immediately. For multi-level arrangements, start watering from the bottom pot upward to ensure even moisture distribution throughout the stack.
Pro Tips for Flower Beds With Flower Pots
- Here’s what nobody tells you—these tricks will keep your vertical garden thriving without the common pitfalls.
- Container Selection: For stacked arrangements, choose pots with consistent diameters—this ensures stability and prevents wobbling.
- Soil Mix Strategy: The 2 gallons of potting mix per pot in Step 2 is perfect, but here’s the secret: mix in 10% coconut coir with your perlite for extra moisture retention.
Frequently asked questions
Got questions about transforming your small space with flower beds in flower pots? You’re not alone! Here are some of the most common queries—and their practical solutions—to help you garden smarter, not harder.
Can I use any type of flower pot for a vertical flower bed?
Not all pots work equally well! Opt for lightweight, durable materials like plastic, fabric grow bags, or ceramic with drainage holes. Avoid heavy stone or oversized containers—they’ll strain your vertical structure (like trellises or shelves) over time. Pro tip: Choose pots with built-in saucers to catch runoff and keep your space tidy!
What’s the best time of year to start a vertical flower bed?
Spring and early fall are ideal for most climates—soil is warm enough for roots to establish, but temperatures aren’t extreme. Cold-hardy plants (like pansies or ornamental kale) can go in late fall, while tropical varieties (e.g., impatiens) thrive when planted after the last frost. Troubleshoot: If your area has a short growing season, start seeds indoors 6–8 weeks before the last frost date!
Are vertical flower beds more expensive than traditional ones?
Not necessarily! While initial costs for structures (like wall planters or tiered stands) may be higher, they save money long-term by reducing soil and mulch needs and eliminating the cost of large garden beds. Budget hack: Repurpose old wooden pallets, ladders, or even hanging baskets to slash expenses. DIY kits (e.g., PVC pipe planters) can cost under $50!
How do I keep pests away from my vertical flower pots?
Pests love vertical gardens too! Prevent problems with these tricks:
- Neem oil spray (weekly preventative)
- Companion planting (e.g., marigolds repel aphids)
- Copper tape around pot edges to deter slugs
- Regular pruning to improve airflow (pests hate dry leaves!)
Do vertical flower beds need special watering?
Pots dry out faster than ground soil, especially in wind or sun. Watering tips:
- Use a drip irrigation system or self-watering pots for consistency.
- Water early morning to reduce evaporation.
- Check moisture with your finger—top inch should be dry before watering again.
What are the best low-maintenance plants for beginners?
Start with resilient, drought-tolerant varieties like:
- Succulents (e.g., sedum, echeveria)
- Herbs (thyme, rosemary—perfect for pots!)
- Annuals (petunias, vinca—they bloom nonstop)
- Fern (e.g., Boston fern—lush and forgiving)
Wrapping up and next steps
Transforming your small yard into a vibrant, space-efficient garden is easier than ever with flower beds made from flower pots! These vertical solutions maximize beauty while minimizing footprint, proving that creativity and greenery can thrive—even in tight spaces. 🌿✨
Ready to get started? Grab your pots, choose your plants, and let your imagination bloom! Whether you’re a gardening newbie or a seasoned pro, this project is the perfect way to add charm and functionality to your outdoor space. Happy planting!
Next step: Sketch a quick design or browse local nurseries for your favorite flowers—your dream vertical garden awaits!