Landscaping
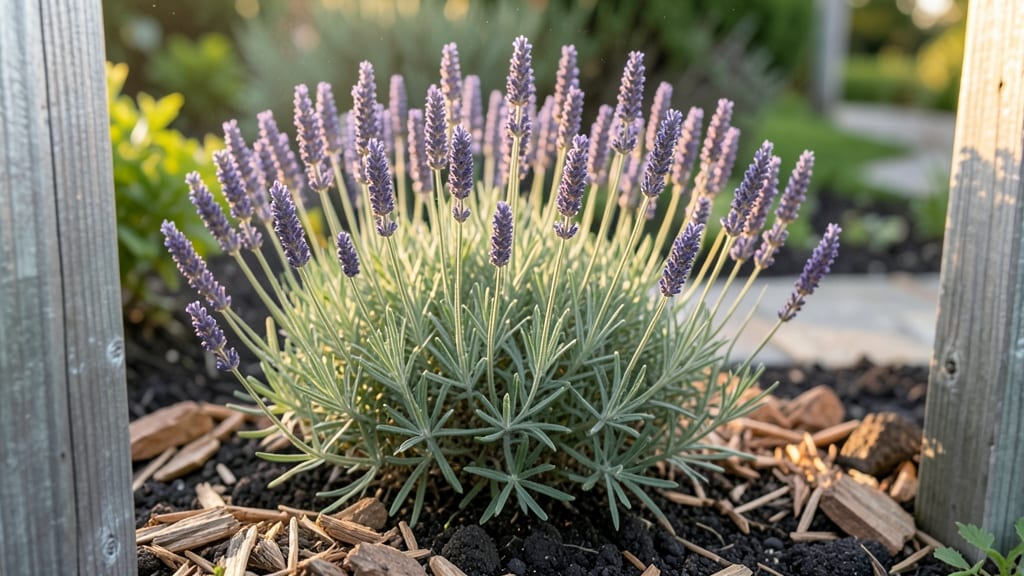
A flower bed against a fence transforms an overlooked space into a lush, private retreat—layering plants strategically creates both beauty and seclusion. I learned this the hard way after planting tall grasses too close to my neighbor’s view, only to realize they blocked sunlight from reaching my shorter perennials.
The key is balancing height, texture, and seasonal interest so every inch feels intentional and every season offers something new.
Start with soil prep—amend heavy clay or sandy soil with compost to ensure roots thrive, then choose plants that fit your light conditions. For shady fences, try hostas and ferns; for sun, consider lavender, coneflowers, or ornamental grasses.
My modern-themed bed uses sleek boxwoods at the base, mid-height hydrangeas, and towering black bamboo for drama—all while keeping maintenance simple with drought-tolerant picks.
By late summer, you’ll have a year-round showstopper: spring bulbs peeking through, summer blooms cascading over the fence, and fall foliage adding warm hues. The tallest plants go closest to the fence, while shorter shrubs and ground covers soften the transition to your yard.
Even in tight spaces, this design works—just adjust plant spacing to avoid overcrowding.
Common challenges? Fence materials can affect moisture—use gravel behind plastic fences to improve drainage. And if your fence is rough or peeling, add a vertical garden panel to disguise it while boosting greenery. The result? A space that feels like an extension of your home, not just an afterthought.
📚 In This Guide
- What you need
- Instructions
- Tips and common mistakes
- Wrapping up and next steps
What you need
- ● Soil: 2–3 cubic yards of high-quality garden soil or a mix of topsoil, compost, and peat moss (for drainage and nutrients).
- ● Mulch: 2–3 bags of organic mulch (e.g., shredded bark, pine straw, or cocoa hulls) to retain moisture and suppress weeds.
- ● Plants: Privacy layer (tall, dense): 3–5 evergreen shrubs (e.g., boxwood, holly, or arborvitae) or ornamental grasses (e.g., fountain grass).
- ● Mid-height fillers: 5–7 shrubs or perennials (e.g., hydrangeas, lavender, or salvia).
- ● Low-growing border: 10–15 annuals or perennials (e.g., petunias, pansies, or creeping thyme).
- ● Fertilizer: Slow-release granular fertilizer (e.g., 10-10-10 or organic options like fish emulsion).
- ● Digging: Shovel, garden fork, and landscape rake.
- ● Measuring & Marking: Tape measure, stakes, and string or spray paint for layout.
- ○ Edging: Metal or plastic edging (optional but helps define borders).
- ● Watering: Garden hose with soaker hose or sprinkler.
- ● Safety: Work gloves, knee pads, and safety glasses (if using power tools).
- ● Lighting: Solar-powered pathway lights for evening ambiance.
- ● Decor: Garden stakes, trellises, or lattice for climbing plants (e.g., clematis or jasmine).
- ● Soil Amendments: Perlite or vermiculite for improved drainage in heavy clay soil.
- ● Seasonal Swaps: Potted seasonal plants (e.g., mums in fall, amaryllis in winter) for quick updates.
How to design a privacy-focused flower bed along a fence
Here's how to create a layered, seasonal display that softens noise and blocks views while keeping maintenance manageable.
Assess the Space and Choose Plant Layers
Measure the fence length and height to determine your planting footprint. For a 6-foot-tall fence, aim for 3-4 layers of plants: tall perennials at the back, mid-height shrubs, and low ground covers or annuals at the front. I always sketch a quick cross-section to visualize how foliage will fill vertical gaps over time.
Select plants with varying bloom times to ensure color from spring through frost. For example, pair early bloomers like bleeding heart with summer performers like black-eyed Susan and late-season sedum. The back row should feature tall ornamental grasses or shrub roses that reach 5-6 feet—these will form your privacy backbone.
Prepare the Soil and Install Edging
Remove existing grass or weeds within your planting area, digging down 12 inches to loosen compacted soil. Amend with 2-3 inches of compost and 1 inch of perlite to improve drainage, especially if your yard tends to stay damp. I like to work in 5-foot sections at a time to keep the soil work manageable.
Install plastic or metal edging along the front border to contain mulch and prevent grass from creeping in. For a cleaner look, use landscape fabric under the mulch layer—this blocks weeds while allowing water to penetrate. Mark plant positions with stakes or string before digging holes to maintain even spacing.
Plant in Reverse Order for Visual Impact
Start with the back row plants, spacing them 18-24 inches apart based on their mature width. Dig holes twice as wide as the root ball but no deeper—this encourages root expansion. Gently remove plants from containers and tease apart crowded roots before placing them in the hole. Fill with native soil, pressing firmly to eliminate air pockets.
Work forward to the mid-height and front-row plants, reducing spacing to 12-18 inches for ground covers. Water each plant deeply after transplanting to settle the soil and remove any air gaps. Mulch with 2-3 inches of shredded bark, keeping it 2 inches away from stems to prevent rot. This layer will suppress weeds and retain moisture.
Add Seasonal Accents and Maintenance Plan
Fill gaps with spring bulbs like daffodils or tulips for early color, then top with annuals in summer for instant impact. I always include one or two climbing plants like clematis or honeysuckle to train along the fence top—these add vertical interest without overwhelming the design. Prune back any leggy growth in early spring to encourage bushier habits.
Water deeply twice weekly for the first month, then taper to once weekly once plants establish roots. Fertilize with a slow-release granular formula in early spring and again in midsummer. Deadhead spent blooms regularly to prolong flowering and prevent seed pods from forming. A light pruning in late winter keeps plants tidy and encourages fresh growth.
Tips & tricks for perfect privacy-boosting flower bed layers
Creating a functional yet beautiful fence-line garden takes thoughtful planning—here are the secrets to make your design both effective and effortless.
Layer Height Strategically: In Step 1, when planning your 3-4 layers, remember that the back row should reach at least 5-6 feet to block views effectively. I like to use a mix of ornamental grasses and shrub roses here—they provide both height and seasonal interest. For the middle layer, choose plants that mature between 2-4 feet tall, like black-eyed Susan, to create visual depth without overwhelming the front row.
Soil Prep Matters More Than You Think: The 12-inch deep soil amendment in Step 2 is non-negotiable for plants to thrive along fences, where roots often compete for nutrients. I've found that adding an extra inch of compost in clay-heavy soils makes a dramatic difference in root establishment. For sandy soils, increase the perlite to 1.5 inches to improve moisture retention—this helps plants survive drought periods without wilting.
Reverse Planting Creates Visual Drama: When you plant in reverse order (back to front) in Step 3, you're not just following instructions—you're creating a professional-looking display. The key is to plant taller specimens first, then fill in gaps with mid-height and ground-cover plants. I always mark plant positions with stakes before digging to maintain even spacing, especially important when working in 5-foot sections as recommended.
Maintenance Shortcuts That Work: The twice-weekly watering schedule in Step 4 can be reduced to once weekly after the first month, but only if you install a 2-3 inch layer of shredded bark mulch. This isn't just about weed control—it's about moisture conservation. I've found that mulching also reduces the frequency of deadheading by keeping plants healthier longer, which means less maintenance overall. For climbing plants like clematis, I prune back any leggy growth in early spring while the plants are still dormant—this encourages bushier growth without sacrificing blooms.
Pro Tips for Flower Bed Against Fence
- Creating a functional yet beautiful fence-line garden takes thoughtful planning—here are the secrets to make your design both effective and effortless.
- Layer Height Strategically: In Step 1, when planning your 3-4 layers, remember that the back row should reach at least 5-6 feet to block views effectively.
- Soil Prep Matters More Than You Think: The 12-inch deep soil amendment in Step 2 is non-negotiable for plants to thrive along fences, where roots often compete for nutrients.
Frequently asked questions
Got questions about creating a stunning flower bed against a fence?
You’re not alone! Here are some of the most common concerns—and their practical solutions—to help you design a lush, low-maintenance privacy screen that thrives year-round.
What’s the best spacing between plants in a fence-side flower bed?
Spacing depends on the plant type, but a general rule is 2–3 feet apart for perennials and shrubs. Check each plant’s mature width on the tag—crowding can lead to poor airflow and disease. For layered privacy, place taller plants (like hydrangeas) at the back and shorter ones (like heucheras) in front.
When is the ideal time to plant a flower bed against a fence?
Spring (after the last frost) or early fall (6–8 weeks before your first frost) are the best times. Avoid planting in extreme heat or cold. If you’re using bare-root plants (like roses or shrubs), plant them in late winter while they’re dormant. Pro tip: Amend the soil with compost before planting for better root establishment!
How can I prevent my fence from rotting or getting damaged by plants?
Use a landscape fabric barrier between the soil and fence to block roots from seeping into cracks. For wooden fences, apply a waterproof sealant before planting. If using ivy or aggressive climbers, opt for a trellis or wire mesh to direct growth away from the fence material.
Are there low-maintenance alternatives to traditional flower beds for fence privacy?
Consider evergreen shrubs (like boxwoods or holly), ornamental grasses (such as maiden grass), or climbing roses on a trellis. For instant privacy, try bamboo screens (non-invasive varieties) or lattice panels filled with trailing plants like clematis or jasmine.
What do I do if my flower bed attracts pests like aphids or deer?
Start with pest-resistant plants like lavender, marigolds, or Russian sage. For aphids, spray with a soapy water solution (1 tsp mild soap per quart of water). To deter deer, use repellent sprays (like garlic-based formulas) or plant deer-resistant varieties such as salvia, catmint, or peonies. A physical barrier (like chicken wire) can also help!
Still stumped? Drop your specific challenge in the comments—we’re happy to help tailor a solution for your space!
Wrapping up and next steps
A flower bed against a fence isn’t just a pretty addition—it’s a functional masterpiece that brings privacy, color, and life to your outdoor space year-round! 🌸 With the right plants, layers, and a little creativity, you can transform a plain fence into a thriving, seasonal sanctuary.
Whether you’re starting small or dreaming big, every step you take brings you closer to a lush, inviting retreat.
Ready to dive in? Sketch your design, gather your supplies, and start planting! Your future self—and your neighbors—will thank you for the beauty (and peace) you’ve created. 🌿