
Flowers
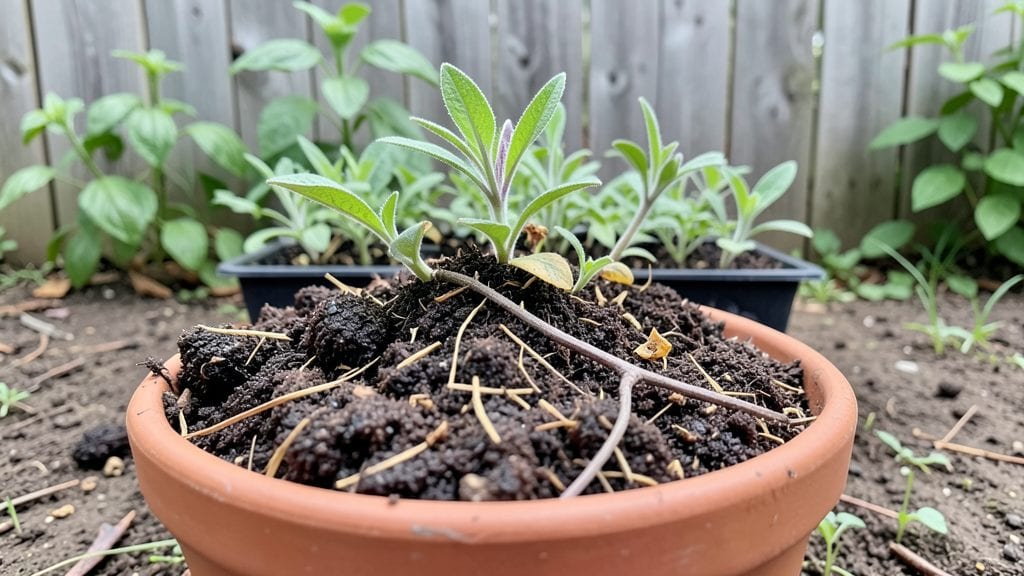
Your flowers deserve soil that's richer than what you buy in bags—compost for planting flowers is the secret weapon behind those showstopping blooms I see in neighbor's gardens every summer. 🌸 The difference isn't just in the color intensity; it's in the plant's ability to fight off pests, resist drought, and keep flowering all season long.
Here's the thing—most gardeners overthink it. You don't need expensive "black gold" from specialty stores. A simple mix of well-aged compost (I use 50% compost, 30% garden soil, 20% perlite) gives your flowers everything they need without the chemical overload.
The key is balancing nitrogen for leaf growth with phosphorus for blooms, and compost does that naturally.
By adding just 2-3 inches of compost to your planting holes or mixing it into the top 6 inches of soil, you'll see stronger stems, bigger blooms, and flowers that last weeks longer.
My hydrangeas now produce clusters so dense they look like they're wearing hats, and the roses? They've never been more disease-resistant.
Works for annuals, perennials, and even container-grown flowers—just adjust the mix for your climate. Let's get those roots into the good stuff and watch your garden transform.
📚 In This Guide
- What you need
- Instructions
- Tips and common mistakes
- Wrapping up and next steps
What you need
- ● Compost: Homemade: Equal parts browns (carbon-rich) (e.g., dry leaves, straw, shredded newspaper) and greens (nitrogen-rich) (e.g., grass clippings, fruit/veggie scraps, coffee grounds). Aim for 3-4 cubic feet per 100 sq. ft. of garden bed.
- ● Store-bought: Look for organic, well-aged compost with a dark, crumbly texture (avoid fresh manure or synthetic mixes). A 2-3 cubic foot bag covers ~10 sq. ft. when mixed into soil.
- ● Soil: Garden soil or a potting mix (for containers). Use 1 part compost to 2-3 parts soil for optimal balance.
- ● Tools: Garden fork or trowel (for mixing)
- ● Wheelbarrow or large bucket (5+ gallons) for transporting materials
- ● Gloves (to keep hands clean!)
- ● Watering can or hose (for hydration)
- ● Amendments: Add 1 cup of worm castings or 1 tbsp of bone meal per sq. ft. for extra nutrients (great for blooms!).
- ● Mulch: Straw or wood chips (1–2 inches) to retain moisture and suppress weeds.
- ● pH Test Kit: Check soil pH (ideal range: 6.0–7.0 for most flowers). Adjust with lime (to raise pH) or sulfur (to lower pH) if needed.
- ● Compost Thermometer: If making your own, monitor heat (ideal: 120–160°F for decomposition).
Step-by-Step guide for amending soil with compost for flower gardens
Transform your flower beds into nutrient powerhouses with this simple, science-backed approach.
🌱 Step 1: Test Your Existing Soil First
Before adding compost, grab a handful of your native soil and squeeze it tightly. If it crumbles easily when dry but holds shape when wet, your soil has good structure and just needs a nutrient boost. If it stays clumpy or feels gummy, you'll need to improve drainage alongside compost.
I like to do a quick pH test too—flowers like most annuals and perennials thrive in slightly acidic to neutral soil (6.0-7.0). If your soil tests higher or lower, adjust with lime or sulfur before adding compost. Never guess: a $10 soil test kit from your local garden center saves heartache later.
💧 Step 2: Choose the Right Compost and Mix Ratios
For flower gardens, I recommend finished compost (dark, crumbly, and earthy-smelling) rather than fresh manure or unfinished piles. The ideal mix is 25-30% compost by volume—enough to feed roots without smothering them. Spread a 2-3 inch layer over the planting area and lightly rake it into the top 6 inches of soil.
Here's the trick: mix compost into the topsoil rather than piling it. Flowers need aerated roots, and a thick compost layer can compact. Work it in with a garden fork or tiller until you see dark streaks throughout. This ensures nutrients reach where they're needed most—right at the root zone.
✂️ Step 3: Prepare Planting Holes with Compost Tea (Optional Boost)
For extra vigor, I make a quick compost tea by steeping 1 cup finished compost in 1 gallon warm water for 24 hours, then straining. Pour this into each planting hole before setting your flowers. The tea introduces beneficial microbes that help roots establish faster.
When planting, mix 1 part compost with 2 parts native soil in the bottom of each hole. This creates a nutrient-rich pocket where roots can immediately access food. Press the soil gently around the base of each plant to eliminate air pockets, then water deeply to settle everything.
☀️ Step 4: Water and Mulch to Lock in Moisture
After planting, water the bed until moisture reaches 6 inches deep. You'll know it's enough when water runs out of the bottom of the hole. This step is critical—compost needs moisture to break down and feed your flowers.
Top with 1-2 inches of mulch (like shredded leaves or straw) to protect the soil from drying out and prevent weeds. Keep mulch 2 inches away from plant stems to avoid rot. This layer also regulates soil temperature, which is especially helpful in hot climates where flowers can stress easily.
🌿 Step 5: Monitor and Maintain for Continuous Blooms
Flowers will show their appreciation in 4-6 weeks with deeper green leaves and more abundant blooms. Watch for signs of over-fertilization—yellow leaves or rapid but weak growth means you've overdone it. If this happens, flush the soil with extra water to dilute excess nutrients.
Every 3-4 months, add a ½ inch layer of compost to the surface and lightly scratch it in. This keeps the soil fed without overwhelming tender roots. The key is consistency: flowers thrive when their soil stays rich but never stagnant.
Tips & tricks for perfect soil amendments with compost
Between us, the difference between lackluster blooms and show-stopping flowers often comes down to how you work compost into your garden beds.
Soil Texture Matters: When testing your soil in Step 1, pay attention to how it feels when dry. If it crumbles easily but holds shape when wet, you're golden—just add compost. But if it stays clumpy, mix in coarse sand (about 10% by volume) alongside the compost to improve drainage. This prevents root rot while still feeding your flowers. The goal is that perfect balance between moisture retention and aeration.
Compost Quality Check: In Step 2, don't just grab any compost pile—look for finished compost that's dark, crumbly, and smells earthy (not putrid). If you're unsure, do the "squeeze test": a handful should hold together but break apart easily. Fresh manure or unfinished compost can burn tender flower roots. I've learned this the hard way after ruining three batches of petunias with over-fertilized soil!
Make-Ahead Strategy: You can prep your compost tea in Step 3 up to 48 hours in advance—just store it in a sealed container in the fridge. The longer it steeps (up to 72 hours), the more beneficial microbes it develops. When ready to use, strain it through a fine-mesh sieve or cheesecloth to remove any solids. This prepped tea keeps for 3-4 days in the fridge, giving you flexibility for planting days.
Mulch Layering: For Step 4, choose mulch based on your climate. In hot areas, opt for 2-3 inches of straw—it insulates roots while keeping moisture in. In cooler climates, shredded leaves work better for heat retention. Pro tip: refresh your mulch every 2-3 months to maintain its protective properties. The key is keeping that 2-inch stem clearance to prevent rot.
Pro Tips for Compost For Planting Flowers
- Between us, the difference between lackluster blooms and show-stopping flowers often comes down to how you work compost into your garden beds.
- Soil Texture Matters: When testing your soil in Step 1, pay attention to how it feels when dry.
- Compost Quality Check: In Step 2, don't just grab any compost pile—look for finished compost that's dark, crumbly, and smells earthy (not putrid).
Frequently asked questions
Got questions about using compost for your flowering plants?
You’re not alone! Here are answers to the most common queries to help you grow show-stopping blooms with ease.
Can I use fresh compost or should I age it first?
Fresh compost can work, but aged compost (3–6 months) is ideal for flowers. It’s gentler on roots, reduces ammonia spikes, and provides balanced nutrients. If you’re in a hurry, mix fresh compost with soil (1:3 ratio) or let it sit in a pile for a few weeks before planting.
When is the best time to add compost to flower beds?
Add compost before planting (spring or early fall) or as a top-dressing during the growing season. For established plants, apply a 1–2 inch layer around the base in early spring or after flowering. Avoid piling compost against stems—keep it 2–3 inches away to prevent rot.
What if my flowers wilt after adding compost?
Wilting can signal over-fertilization or poor drainage. Flush the soil with water, then reduce compost frequency. If the compost smells sour or has mold, it may be too fresh—let it cure longer. For sensitive flowers (like orchids), use a well-decomposed, fine-textured compost mixed with perlite for aeration.
Can I substitute compost with other organic matter?
Yes! If compost isn’t available, try:
- Leaf mold: Break down leaves into a spongy, nutrient-rich soil amendment.
- Worm castings: Gentle, high in micronutrients—perfect for potted flowers.
- Peat moss or coconut coir: Improves drainage but lacks nutrients; pair with a balanced fertilizer.
- Grass clippings: Use sparingly (they mat down) and mix with nitrogen-rich materials (like alfalfa pellets).
How do I know if my compost is ready for flowers?
Test for readiness with these signs:
- Temperature: Cool to the touch (below 140°F).
- Smell: Earthy, not pungent or rotten.
- Texture: Dark, crumbly, and resembles potting soil.
- Crawly friends: Earthworms or beneficial microbes indicate healthy decomposition.
Wrapping up and next steps
Transforming your garden into a burst of vibrant blooms starts with nutrient-rich soil—and compost is your secret weapon! 🌸 By enriching your planting beds with homemade or store-bought compost, you’re giving your flowers the perfect foundation to thrive.
Whether you’re a seasoned gardener or just starting, every spoonful of compost works wonders for healthier roots, brighter flowers, and longer-lasting beauty.
Ready to take the next step? Start small—amend a single flowerbed this season and watch the difference! Need inspiration? Try pairing your compost with seasonal blooms like marigolds or petunias for a show-stopping display. Happy gardening!