
Flowers
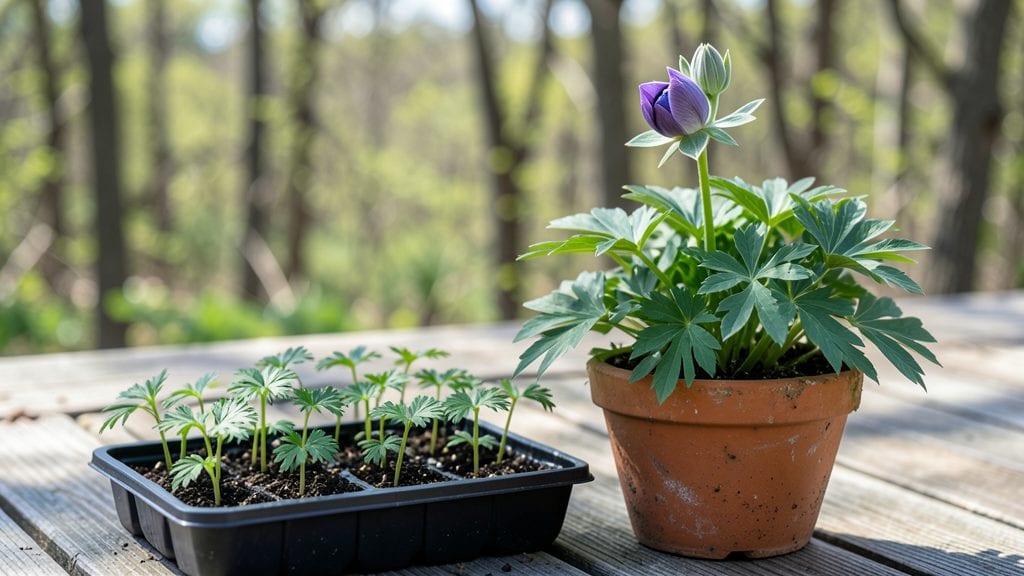
Growing columbine flower sprouts from seed delivers those iconic nodding blooms in just 60 days—and they’ll handle light frost like champions. 🌱 I’ve watched these delicate-looking plants shrug off early spring chills while other flowers wilt, and their secret starts with the right soil prep and planting technique.
The key isn’t complicated: it’s about mimicking their natural mountain habitat where they thrive.
You’ll need well-draining soil mix (equal parts potting soil and perlite), tiny seed trays or biodegradable pots, and a sunny windowsill or grow light. Plant those paper-thin seeds just ¼ inch deep—they won’t tolerate being buried—and keep the soil consistently moist but never soggy.
Most gardeners give up here, but with patience, you’ll see those first sprouts emerge in 10-14 days.
Once they’re up, give them 4-6 hours of sunlight daily and avoid overcrowding—thin seedlings to 2 inches apart to prevent disease. The payoff comes when those spiky foliage clumps transform into clusters of vibrant red, blue, or white blooms that hummingbirds adore.
By late spring, you’ll have a self-seeding perennial that multiplies effortlessly.
For best results, start seeds indoors 8-10 weeks before your last frost date—this gives them a head start before transplanting. If you rush it, weak seedlings struggle in cooler soil. The frost resistance kicks in once established, but give them a little shade on 90-degree days to prevent bolting.
With these simple steps, you’ll have columbines blooming when most flowers are still playing catch-up.
📚 In This Guide
- What you need
- Instructions
- Tips and common mistakes
- Wrapping up and next steps
What you need
- ● Columbine seeds: 1 packet (50–100 seeds, non-GMO for best results). Look for varieties like Aquilegia canadensis or Aquilegia vulgaris.
- ● Seed-starting mix: 1 bag (1–2 cubic feet) of sterile, well-draining potting soil (avoid garden soil—it’s too dense!).
- ● Containers: 2–4 small pots (3–4 inches deep) or a seed tray with individual cells (for better germination control).
- ○ Grow lights or sunny windowsill: A full-spectrum LED grow light (optional but helpful for indoor starts) or a south-facing window with 6+ hours of sunlight.
- ● Misting bottle or spray nozzle: To keep seeds moist without overwatering.
- ○ Plastic wrap or dome lid: To create a mini greenhouse effect (optional but speeds up germination).
- ● Fertilizer: A balanced, water-soluble fertilizer (5-10-5 or 10-10-10) for seedlings after sprouts appear.
- ● Small hand trowel: For gently pressing seeds into soil.
- ● Twine or labels: To mark pots and track planting dates.
- ○ Heat mat (optional): A seedling heat mat (60–70°F) can boost germination speed in cooler climates.
- ● Transplanting tray (later stage): Larger 4-inch pots for hardening off seedlings before outdoor planting.
- ● Pruning shears: For trimming leggy sprouts or deadheading spent blooms.
Step-by-Step instructions for growing columbine from seed
Here’s how to coax those delicate, frost-tolerant blooms from tiny seeds—no greenhouse needed.
🌱 Step 1: Stratify Seeds for Faster Germination
Columbine seeds need a cold period to break dormancy. Place them in a sealed plastic bag with a damp paper towel, then refrigerate for 4-6 weeks. Check weekly—if the towel dries, mist it lightly. This mimics winter’s chill, ensuring stronger sprouts later.
I like to label the bag with the date so I don’t forget. Real talk: Skipping stratification means waiting months for germination, if it happens at all. The cold trick is non-negotiable for these finicky seeds.
💧 Step 2: Sow in Well-Draining Soil
After stratification, fill 4-inch pots with a mix of 50% potting soil and 50% perlite for aeration. Press seeds ¼ inch deep—they’re tiny, so use a toothpick to avoid burying them too deep. Space them 1 inch apart to prevent overcrowding.
Water gently until the surface looks damp but not soggy. Columbine hates soggy roots, so ensure pots have drainage holes. A fine misting bottle works best—avoid heavy watering, which can displace seeds.
☀️ Step 3: Provide Cool, Bright Light
Place pots in a bright, indirect light spot (like an east-facing window) at 60-65°F. Avoid direct midday sun, which can overheat seedlings. If using a grow light, keep it 6-8 inches above the plants for 12-14 hours daily.
You’ll see first true leaves in 3-4 weeks. If seedlings stretch toward the light (leggy growth), they need more intensity. Adjust the light closer or supplement with a grow bulb.
⏰ Step 4: Harden Off Before Transplanting
Once seedlings have 3-4 sets of leaves, start hardening off by placing them outside for 1 hour daily in partial shade. Gradually increase time over 10-14 days, ending with full sun exposure. This toughens them for outdoor conditions.
Transplant after the last frost when soil reaches 50°F. Space plants 12-18 inches apart in well-draining garden beds. Water deeply at the base—columbine resents wet foliage, which causes rot.
🌿 Step 5: Maintain for Frost-Resistant Blooms
Columbine thrives in partial shade and moist but not soggy soil. Mulch with 1-2 inches of organic matter (like shredded leaves) to retain moisture and regulate temperature. Deadhead spent blooms to encourage more flowers.
These plants are tough—once established, they’ll self-seed reliably. In fact, I’ve seen them pop up in my garden for years after the original planting. Just be patient; full bloom takes 60-90 days from sowing.
Tips & tricks for perfect columbine flower sprouts
Don't let those tiny seeds fool you—these tricks will give your columbine the best start possible.
Stratification Secret: The 4-6 week cold period in Step 1 isn't just about time—it's about consistency. Place your bag of seeds on a shelf where the temperature stays steady around 40°F. I've found that refrigerator drawers with crisper settings (around 38-40°F) work perfectly. Avoid doors where temperatures fluctuate. After 4 weeks, check for moisture—damp but not wet is ideal. If you forget to label your bag, use a permanent marker on masking tape to avoid damaging the plastic.
Soil Science: In Step 2, that 50/50 soil-perlite mix isn't just for aeration—it's about balance. The perlite prevents compaction while the potting soil provides nutrients. For even better drainage, add a handful of coarse sand to the mix. When pressing seeds ¼ inch deep, use your pinky finger as a guide—it's about the width of your smallest finger joint. This depth prevents light from reaching the seeds too soon, which can cause them to sprout prematurely in the bag.
Lighting Strategy: The 60-65°F temperature in Step 3 is crucial—too warm and seedlings will stretch; too cool and they'll grow slowly. Position your grow light so it's just above the seedling tops, not the pots. I use a simple clip-on LED bulb that runs on a timer for those 12-14 hours. Watch for that first true leaf—it's your signal that germination is complete and you can start thinking about transplanting. If your seedlings look pale, they're not getting enough light intensity, not duration.
Hardening Hack: During the 10-14 day hardening process in Step 4, start with just 1 hour in partial shade, then increase by 30 minutes each day. I place mine on the north side of my porch where they get morning sun and afternoon shade. This gradual approach prevents shock. When you're ready to transplant after the last frost, do it on an overcast day or in the evening—this gives plants a full day to adjust before facing direct sunlight.
Pro Tips for Columbine Flower Sprouts
- Don't let those tiny seeds fool you—these tricks will give your columbine the best start possible.
- Stratification Secret: The 4-6 week cold period in Step 1 isn't just about time—it's about consistency.
- Soil Science: In Step 2, that 50/50 soil-perlite mix isn't just for aeration—it's about balance.
Frequently asked questions
about growing columbine flower sprouts—because every gardener deserves a little clarity!How cold can columbine sprouts handle before they die?
Columbine sprouts are tough—they tolerate light frosts down to 20°F (-7°C) once established. However, newly germinated seeds (under 2 weeks old) need protection below 32°F (0°C). Use row covers or start indoors if your spring is unpredictable!
Why aren’t my columbine seeds sprouting after 60 days?
Patience is key! Columbine seeds need cold stratification (6–8 weeks in the fridge) to break dormancy. If they’re still dry after 60 days, try soaking in warm water for 24 hours before replanting. Poor soil drainage or too much heat can also stall germination—keep soil 60–70°F (15–21°C).
Can I grow columbine from store-bought cut flowers?
Yes, but success is hit-or-miss! Snip stems at a 45° angle, remove lower leaves, and place in water. Roots may form in 2–4 weeks, but columbine isn’t as reliable as cuttings from healthy garden plants. For better odds, buy fresh seed pods from a nursery.
What pests or diseases should I watch for with columbine sprouts?
Keep an eye out for aphids (sap-sucking bugs) and slugs (they love tender sprouts!). Fungal issues like powdery mildew can appear in humid conditions—improve airflow and avoid overhead watering. Neem oil or insecticidal soap works well for early infestations.
Will columbine reseed itself if I let the spent blooms stay?
Columbine self-seeds happily—just leave the seed pods on the plant until they pop open (usually late summer/fall). Scatter the seeds lightly; they’ll sprout on their own next spring. For more control, collect pods and cold-stratify them yourself!
Wrapping up and next steps
Watching columbine flower sprouts push through the soil is a rewarding experience—especially when you know these hardy blooms will thrive even after light frost! 🌱 Whether you’re a seasoned gardener or just starting, their quick growth (just 60 days!) makes them a perfect addition to your garden. Now that you’ve got the know-how, why not plant a few this season and enjoy their vibrant colors?
Ready to take the next step? Grab your seeds, mark your calendar, and start sowing! Your future garden will thank you.