
Tools
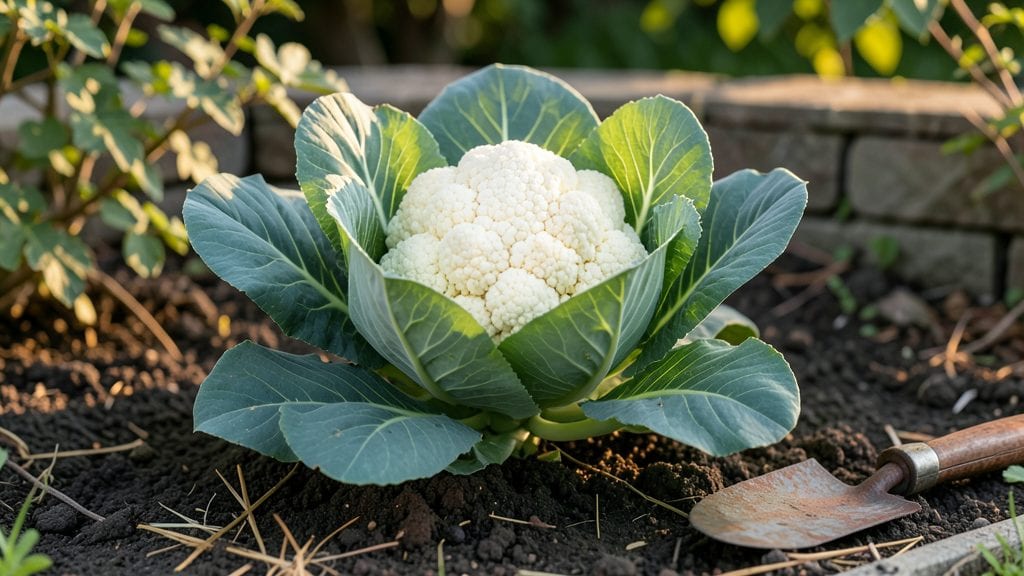
Growing cauliflower in the garden means crisp, snow-white curds that taste nothing like the grocery store version. 🌱 I learned the hard way—my first attempt bolted before forming heads, but now I’ve cracked the code for reliable harvests with minimal fuss.
The secret lies in cool-season timing, rich soil, and consistent moisture, which I’ll walk you through step by step.
You’ll need well-draining soil with plenty of organic matter, a sunny spot getting 6-8 hours of light daily, and patience—cauliflower takes 70-100 days to mature. Start seeds indoors 4-6 weeks before your last frost or buy sturdy transplants, then space them 18-24 inches apart to prevent crowding.
Water deeply 2-3 times per week, keeping the soil evenly moist but never soggy.
What you’ll get is a garden full of smooth, compact heads that stay crisp until harvest. With the right care, you can enjoy fresh cauliflower from early summer through fall, and even overwinter in mild climates.
The key is watching for yellowing leaves or loose heads—signs it’s time to harvest before pests or heat ruin your crop.
This method works in containers for small spaces or large plots for big harvests, and the same principles apply whether you’re in Zone 3 or Zone 10. Let’s get those curds growing!
📚 In This Guide
- What you need
- Instructions
- Tips and common mistakes
- Wrapping up and next steps
What you need
- ● Cauliflower Seeds: Choose disease-resistant varieties like Snowball Y Improved or Purple of Sicily. Start with 10–20 seeds for a small garden or 50+ seeds for larger yields.
- ● Seedling Trays or Biodegradable Pots: 2–4 trays (72-cell packs) for starting seeds indoors, or 50+ biodegradable pots (2–3 inches deep).
- ● Seed Starting Mix: A sterile, well-draining mix (e.g., Pro-Mix or coco coir). Use 1–2 cubic feet for seedling trays.
- ● Garden Soil: Amend with compost (aim for 2–3 inches mixed into the top 12 inches of soil). Test soil pH—cauliflower thrives in 6.0–7.0.
- ● Fertilizer: Balanced Fertilizer (10-10-10 or 5-5-5): 1–2 pounds per 100 sq ft.
- ● Calcium Supplement (e.g., crushed eggshells or lime): Prevents blossom-end rot. Use 1 cup per plant at transplanting.
- ● Mulch: Straw or shredded leaves (2–3 inches) to retain moisture and suppress weeds. Cover 10–15 sq ft per plant.
- ● Watering Can or Drip Irrigation: Cauliflower needs 1–1.5 inches of water weekly. A 5-gallon watering can or drip system works well.
- ● Garden Gloves & Hand Trowel: For transplanting seedlings and weeding.
- ● Row Covers or Frost Cloth: Protect seedlings from frost (use 4x8 ft covers for early planting).
- ● Shade Cloth (30–50% coverage): Protects heads from direct sun if temperatures exceed 80°F (27°C).
- ● Plant Support (e.g., stakes or cages): For late-season varieties prone to toppling.
- ● Organic Pest Control: Neem oil or pyrethrin spray for cabbage moths or aphids.
- ● Garden Journal: Track planting dates, soil conditions, and harvest times for future success!
How to cultivate cauliflower for consistent, low-maintenance yields
Here's the straightforward approach I've used to grow cauliflower reliably—even in less-than-ideal climates.
🌱 Step 1: Select the Right Variety and Plant at the Correct Time
Choose cold-tolerant varieties like 'Snowball' or 'Purple of Sicily' for year-round success. Cauliflower thrives in 50-75°F soil temperatures, so plant 6-8 weeks before your first frost for fall harvests or as soon as soil warms to 40°F in spring. I always check frost dates and mark my calendar—planting too early in warm soil leads to bolting (flowering prematurely), while waiting too long risks stunted growth.
Direct-sow seeds ½ inch deep, spacing them 18-24 inches apart in rows 24-36 inches apart. This gives roots room to develop without competition. If starting indoors, transplant seedlings when they have 4-6 true leaves—but handle them gently, as cauliflower roots are fragile. I use a small trowel to lift seedlings by the base rather than the stem to avoid damage.
☀️ Step 2: Provide Consistent Moisture and Light
Cauliflower demands even moisture—never let the soil dry out completely, but avoid soggy conditions. Water deeply 1-2 times per week, aiming for 1 inch of water total. I test moisture by sticking my finger 2 inches into the soil; if it feels dry, it's time to water. Inconsistent moisture causes bitter heads and poor curd formation.
Ensure full sun (6-8 hours daily)—cauliflower won’t form tight heads without sufficient light. If your garden gets afternoon shade, opt for shorter varieties like 'Early Snowball' or supplement with a reflective mulch (white plastic or aluminum foil) to boost light exposure. I’ve seen leggy, pale plants in low-light spots, and they never produced marketable heads.
💧 Step 3: Blanch Heads for Whiter Curds and Prevent Bolting
When the head reaches 3-4 inches in diameter, gently tie the outer leaves together over the curd with soft plant ties (or a strip of fabric). This "blanching" protects the head from sun exposure, keeping it white and tender. I start with the largest heads first—if left unblanched, they’ll turn yellow and tough. Leave the top leaves loose to allow airflow and prevent rot.
Watch for bolting (rapid stem elongation), which happens when days get too long or temperatures spike. If your variety is heat-sensitive, provide light shade cloth (30-50%) during hot afternoons. I’ve had success with 'Graffiti' cauliflower, which tolerates warmer conditions better than traditional varieties.
✂️ Step 4: Harvest at Peak Maturity and Maintain Soil Health
Harvest when heads are firm, compact, and before the buds in the center open. Use a sharp knife to cut the stem 1-2 inches below the head—this prevents damage to the plant’s base. I harvest in the morning when temperatures are coolest, as cauliflower heads soften in heat. Store in the fridge for up to 5 days or blanch and freeze for long-term use.
After harvest, remove the entire plant (including roots) to prevent disease buildup. Amend the soil with 2-3 inches of compost and rotate crops next season—cauliflower is heavy-feeding and depletes nutrients quickly. I also plant fast-growing radishes or lettuce in the gap to break up pest cycles.
⏰ Step 5: Extend the Season with Succession Planting
For continuous harvests, sow new seeds every 2-3 weeks during the growing season. In warm climates, use shade cloth to protect seedlings from heat stress. I’ve grown cauliflower year-round in Zone 7 by using row covers in winter and drip irrigation to maintain moisture without overwatering. Succession planting ensures you always have fresh heads—no more store-bought cauliflower!
Here’s the thing—cauliflower rewards patience. If you keep soil moist, blanch heads promptly, and harvest at the right time, you’ll get crisp, flavorful curds with minimal fuss. And once you master it, you’ll never buy cauliflower again.
Tips & tricks for perfect year-round cauliflower harvests
Real talk: Growing cauliflower isn't just about planting seeds—it's about creating the right conditions for those tight, flavorful curds to develop. Here's what nobody tells you about making this happen reliably.
Soil Temperature Secret: That 50-75°F soil temperature range in Step 1 is non-negotiable for healthy growth. I've learned the hard way that even a few degrees outside this range can trigger bolting. Use a soil thermometer to check before planting—if your soil runs cooler, consider using black plastic mulch to warm it up faster. In cooler climates, wait until soil naturally reaches 40°F before planting, even if it means delaying your spring crop slightly.
Planting Precision: Those 18-24 inch spacing requirements in Step 1 might seem generous, but they're crucial. Crowded plants compete for nutrients and light, leading to smaller, less flavorful heads. I've found that 24-inch spacing works best for larger varieties like 'Snowball', while 18-inch spacing suits smaller types like 'Graffiti'. Mark your planting lines with stakes to maintain consistency—trust me, you'll thank yourself when harvest time comes.
Blanching Technique: When you reach Step 3 and start blanching those 3-4 inch heads, use soft plant ties or even old fabric strips—just avoid plastic that can restrict growth. I've had the best results with lightweight muslin fabric that allows airflow while protecting the curd. And here's the thing about bolting: if you notice stems elongating rapidly, your plants are telling you they're stressed—either from heat or insufficient moisture. Address it immediately by providing shade and consistent watering.
Succession Planting Strategy: Those 2-3 week intervals in Step 5 are perfect for maintaining a continuous harvest, but timing is everything. In my Zone 7 garden, I start my first planting in early spring, then follow with 4 successive plantings spaced exactly 3 weeks apart. This ensures I always have young plants establishing while others are maturing. For fall crops, I adjust my last planting to be 6-8 weeks before frost—no exceptions, or you'll risk immature heads.
Pro Tips for Cauliflower In The Garden
- Real talk: Growing cauliflower isn't just about planting seeds—it's about creating the right conditions for those tight, flavorful curds to develop.
- Soil Temperature Secret: That 50-75°F soil temperature range in Step 1 is non-negotiable for healthy growth.
- Planting Precision: Those 18-24 inch spacing requirements in Step 1 might seem generous, but they're crucial.
Frequently asked questions
Got questions about growing cauliflower in your garden?
You’re not alone! Whether you’re a beginner or a seasoned green thumb, these answers will help you cultivate perfect heads every season.
How long does it take for cauliflower to grow from seed to harvest?
Most cauliflower varieties take 70–100 days to mature, depending on the type. Early varieties (like ‘Snowball Y Improved’) may be ready in as little as 60 days, while larger or late-season types (like ‘Purple of Sicily’) can take closer to 120 days. Start seeds indoors 4–6 weeks before your last frost for a head start!
Can I grow cauliflower in hot or cold climates?
Cauliflower thrives in cool weather (50–75°F) and struggles in extreme heat or frost. In hot climates, plant in early spring or fall and provide shade during peak summer. For cold regions, use frost blankets or grow under row covers. Varieties like ‘Cheddar’ tolerate heat slightly better than others.
What are the most common pests or diseases affecting cauliflower, and how do I prevent them?
Watch for cabbage worms, aphids, and flea beetles—handpick pests or use neem oil as a natural deterrent. Diseases like clubroot or black rot thrive in wet soil; improve drainage and rotate crops. Pro tip: Space plants 18–24 inches apart for airflow and remove yellowing leaves promptly.
Can I regrow cauliflower from store-bought heads?
While not reliable for large heads, you can try! Cut the stem 1–2 inches below the base, place it in water, and wait for roots to sprout. Transplant to soil, but expect smaller, less uniform regrowth. For better results, save seeds from your best garden varieties or buy fresh seeds annually.
What’s the best way to harvest and store homegrown cauliflower?
Harvest when heads are firm, compact, and before buds open (usually 1–2 weeks before full maturity). Cut with a sharp knife, leaving the outer leaves intact. Store in the fridge for 5–7 days or freeze by blanching (dip in boiling water for 3 minutes) and freezing in airtight bags for up to 12 months.
What are some low-maintenance alternatives to cauliflower for beginners?
If cauliflower seems tricky, try these easy-to-grow brassicas:
- Broccoli: Similar care, slightly faster harvest (50–70 days).
- Kale: Cold-hardy, cut-and-come-again, and packed with nutrients.
- Brussels sprouts: Longer season (90–100 days) but rewarding.
- Radishes: Ready in 3–4 weeks—great for quick wins!
Wrapping up and next steps
Growing cauliflower in your garden is a rewarding and surprisingly low-maintenance way to enjoy fresh, homegrown veggies year-round! With the right soil, spacing, and a little patience, you’ll soon be harvesting crisp, flavorful heads that rival store-bought—without the hassle.
Whether you’re a beginner or a seasoned gardener, this versatile crop proves that delicious results don’t require endless effort.
Ready to take the next step? Start by planting a few seeds or seedlings this season, and soon you’ll be experimenting with varieties, companion plants, or even winter-growing tips. Happy gardening—your future meals (and taste buds) will thank you! 🌱✨