Flowers
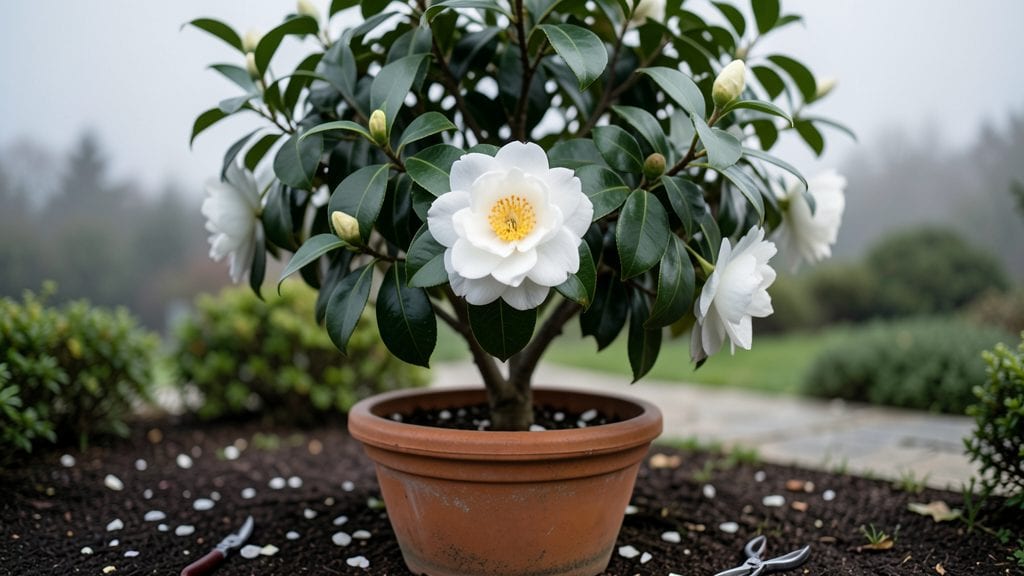
White camellia flowers transform any Pacific Northwest garden into a fragrant sanctuary. 🌿 I’ve grown them for years, and the secret to their year-round blooms lies in mimicking their natural coastal habitat—acidic soil, partial shade, and consistent moisture.
The first time I saw my Camellia japonica burst into creamy white blossoms in December, I knew I’d cracked the code.
These plants thrive in zones 7-9, where cool summers and mild winters keep them happy. You’ll need well-draining, acidic soil (pH 5.5-6.5), and a spot that gets morning sun and afternoon shade—think dappled light under tall trees.
Varieties like Camellia sasanqua bloom in winter, while Camellia japonica puts on a spring show, ensuring fresh flowers nearly year-round.
With the right care, you’ll end up with glossy, dark green leaves and clusters of fragrant white blooms that last weeks. Prune lightly after flowering to shape the plant, and fertilize monthly during growing season with an acid-loving plant formula.
The payoff? A garden that smells like spring even in the dead of winter.
Common issues like bud drop or yellowing leaves usually stem from overwatering or poor drainage. Adjust your routine, and you’ll keep these beauties thriving for decades. Here’s how to get started right.
📚 In This Guide
- What you need
- Instructions
- Tips and common mistakes
- Wrapping up and next steps
What you need
- ● Camellia plants: 1–3 Camellia japonica or Camellia sasanqua (white blooming varieties like 'White Swan' or 'Yuletide'). Choose 2–3-year-old plants for faster establishment.
- ● Well-draining soil: 5–10 bags (1 cubic foot each) of peat moss or pine bark fines (acidic, pH 5.0–6.0). Mix with native soil in a 1:1 ratio for planting.
- ● Organic mulch: 2–3 bags of pine needles or cypress mulch (3–4 inches deep) to retain moisture and acidity.
- ● Slow-release fertilizer: 1 lb of acid-loving plant fertilizer (e.g., 8-3-9 or 10-10-10 with micronutrients) or cottonseed meal (for organic gardens).
- ● Watering can or hose: With a fine rose nozzle (to avoid disturbing roots).
- ● Pruning shears: Sharp, bypass-style shears (sterilized with rubbing alcohol).
- ● Stakes and ties: 3–4 bamboo stakes (6–12 inches tall) and soft plant ties (for young or windy sites).
- ○ Soil pH test kit: To confirm acidity (optional but recommended for PNW gardens with alkaline soil).
- ● Rain gauge: To monitor watering needs (especially in rainy PNW winters).
- ● Frost cloth: Lightweight frost protection fabric (for young plants in late fall/winter).
- ● Compost or worm castings: 1–2 bags (for nutrient boost and soil structure).
- ● Mulch volcano guard: A ring of rocks or metal (to prevent mulch from piling against the trunk).
- ● Gloves: Heavy-duty gardening gloves (camellia leaves can be prickly!).
How to cultivate white camellias for year-round Pacific Northwest beauty
White camellias thrive in the PNW’s mild, moist climate—here’s how to coax their fragrant blooms all season.
🌱 Step 1: Select and Prepare the Perfect Planting Site
Camellias demand partial shade—think morning sun with afternoon shade—to prevent scorched blooms. In the PNW’s coastal zones, they’ll handle more sun, but inland areas need protection from hot afternoon rays. Test your spot: if it’s fully shaded by noon, it’s too dark; if it bakes by 2 PM, it’s too exposed.
Dig a hole twice as wide as the root ball but no deeper—camellias hate having their trunks buried. Amend the native soil with 3 inches of organic compost (like the 2 cubic yards you’ll use later) mixed into the bottom 12 inches of the hole. This improves drainage while retaining moisture, which white camellias adore. Gently loosen the root ball before placing it in the hole to encourage outward root growth.
☀️ Step 2: Plant and Mulch for Moisture Retention
Position the plant so the top of the root ball sits 1 inch above ground level—this prevents rot during our wet winters. Backfill with the amended soil, pressing lightly to eliminate air pockets. Water deeply to settle the roots, then add a 3-inch layer of wood chips (using 1 cubic yard for each of your 4 plants) to suppress weeds and lock in moisture.
Here’s the thing—PNW winters can be damp, and camellias despise soggy feet. If your soil drains poorly, mound the wood chips 4 inches high around the base to create a slight berm. This keeps roots elevated during heavy rains while still allowing water to penetrate. Avoid synthetic mulches; they trap heat and can stress the plant.
💧 Step 3: Water and Fertilize for Continuous Blooms
Camellias need consistent moisture—think 1-2 inches of water weekly, more during dry spells. Water at the base, not overhead, to protect blooms and prevent fungal issues. You’ll know it’s right when the top 2 inches of soil feel damp but not saturated. Overwatering in winter is a common mistake; let the soil dry slightly between waterings when temps drop below 50°F.
Feed your camellias twice a year: in early spring (when buds form) and late summer (to support fall blooms). Use a slow-release, acid-loving plant fertilizer (like the 10 pounds you’ve got) at half-strength. Scatter the granules 6 inches from the trunk and water deeply to activate them. Avoid high-nitrogen fertilizers—they’ll give you leaves, not flowers.
✂️ Step 4: Prune and Protect for Longevity
Prune right after flowering (late spring) to shape the plant and encourage next year’s blooms. Remove dead or crossing branches first, then trim back overgrown stems to an outward-facing bud. Never cut into old wood—camellias bloom on new growth, and severe pruning will rob you of flowers. Use clean, sharp shears (disinfected with rubbing alcohol) to make 45-degree cuts just above a bud.
PNW winters can be wet and windy, which stresses camellias. If your plants are young or in exposed areas, wrap the trunks with burlap (using 2 yards) during December and January to prevent sunscald. Unwrap in early spring once new growth appears. Also, watch for aphids or scale—common pests that sap energy from blooms. Spray with neem oil (mixed at 1 tablespoon per gallon of water) at the first sign of sticky residue on leaves.
Tips & tricks for perfect white Camellia cultivation
These insider strategies will help you nurture white camellias that thrive in PNW's unique climate—without common pitfalls.
Site Selection Secret: When evaluating morning sun exposure in Step 1, use a simple test: place a white plate in the potential spot at 9 AM and check it at 2 PM. If it's warm to the touch, that's too much afternoon sun. Coastal areas can handle slightly more sun, but inland gardens should prioritize afternoon shade to prevent leaf scorch. The right balance creates the ideal microclimate for those delicate white blooms.
Root Ball Technique: In Step 1, when loosening the root ball before planting, focus on the outer edges—this encourages roots to spread outward rather than circling inward. I've seen many gardeners skip this step, only to have plants struggle with poor root establishment. Gently tease apart any tightly bound roots with your fingers, being careful not to damage the main stems. This simple adjustment makes all the difference in long-term plant health.
Winter Protection Strategy: For Step 4's winter protection, consider adding a layer of straw mulch (about 2 inches) over the wood chips during December and January. This extra insulation helps maintain consistent soil temperatures above 50°F, which is crucial for preventing winter dieback. The straw also decomposes slowly, adding organic matter to the soil as it breaks down—just remove it in early spring before new growth appears.
Fertilizer Timing Tip: When applying your twice-yearly fertilizer in Step 3, time the late summer feeding to coincide with the first appearance of flower buds. This gives the plant the energy boost it needs to develop strong blooms for the following season. I've noticed that camellias fertilized too late in summer often produce fewer flowers, while those fertilized at the right time consistently deliver abundant blooms throughout winter and spring.
Pro Tips for Camellia Flower White
- These insider strategies will help you nurture white camellias that thrive in PNW's unique climate—without common pitfalls.
- Site Selection Secret: When evaluating morning sun exposure in Step 1, use a simple test: place a white plate in the potential spot at 9 AM and check it at 2 PM.
- Root Ball Technique: In Step 1, when loosening the root ball before planting, focus on the outer edges—this encourages roots to spread outward rather than circling inward.
Frequently asked questions
Got questions about growing white camellia flowers in the Pacific Northwest?
You’re not alone! Here are some of the most common concerns—plus quick, actionable answers to help you nurture these stunning blooms with confidence.
When is the best time to plant white camellias in the PNW?
The ideal window is late fall to early winter (October–December) or early spring (March–April). This gives roots time to establish before summer heat or winter frost. If planting in summer, water deeply and use shade cloth to reduce stress.
How do I protect white camellias from PNW winters?
Most varieties are hardy to USDA Zones 7–9, but young plants or tender varieties need extra care. Mulch heavily (3–4 inches) with wood chips or pine straw, and wrap the base with burlap if temps drop below 15°F. Prune dead blooms in early spring to encourage new growth.
Why aren’t my white camellias blooming?
Common culprits include:
- Insufficient light: Camellias thrive in partial shade (morning sun, afternoon shade).
- Over-fertilizing: Too much nitrogen = lush leaves, fewer flowers. Use a balanced 10-10-10 or acidic fertilizer (like 8-3-9) in early spring.
- Stress: Drought or transplant shock can delay blooms. Keep soil consistently moist (but not soggy).
Can I grow white camellias in containers? Yes—but with tweaks!
Choose a large pot (15+ gallons) with drainage holes and use a well-draining, acidic mix (peat moss + pine bark). Repot every 2–3 years and fertilize monthly during growing season. Note: Container-grown camellias may bloom later than in-ground plants.
What pests should I watch for with white camellias?
Keep an eye out for:
- Camellia scale: Tiny bumps on stems/leaves → scrub with soapy water or use horticultural oil.
- Spider mites: Webbing on leaves → spray with water and apply neem oil.
- Slugs/snails: Raveling leaves → set beer traps or use iron phosphate bait.
Are white camellias fragrant?
Yes! While not all varieties are heavily scented, many white camellias (like ‘White Emperor’ or ‘Yuletide’) release a delicate, sweet fragrance, especially in cool evenings. For stronger scent, choose double-blooming cultivars.
Wrapping up and next steps
Growing white camellia flowers in the Pacific Northwest is a rewarding journey that brings elegance and fragrance to your garden year-round. With the right soil, sunlight, and care, these stunning blooms can thrive even in cooler climates—adding timeless beauty to your outdoor space. 🌸
Ready to take the next step? Start by selecting a healthy plant from a trusted nursery, then nurture it with patience and love. Soon, your garden will be adorned with luxurious white camellias that turn heads and fill the air with their delicate scent!