Flowers
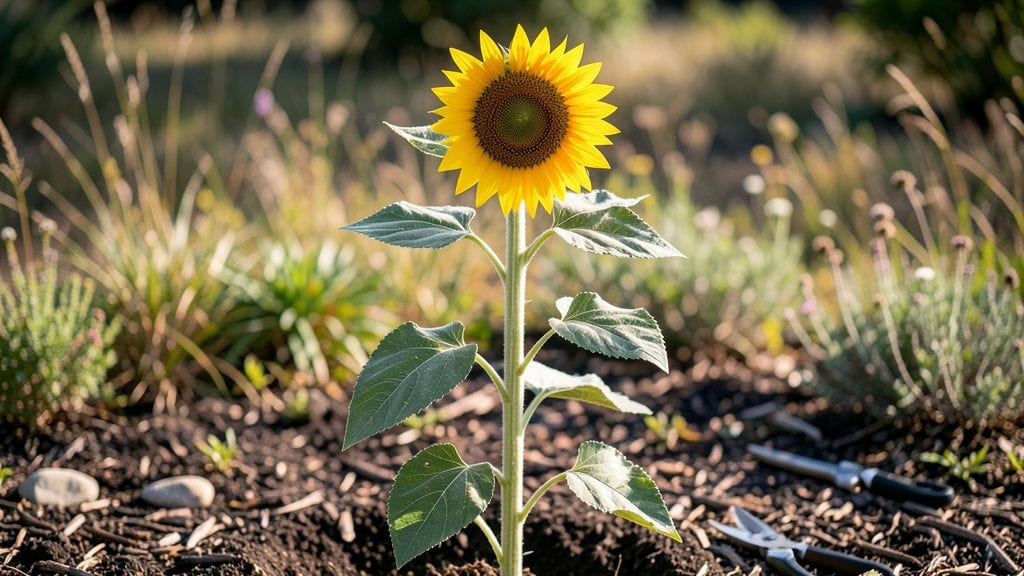
Those beautiful sunflower photos I’ve taken over the years turn my garden into a golden masterpiece—and the secret isn’t just the flowers themselves. It’s the way light dances through their petals at golden hour, or how their rough stems create natural texture against smooth garden walls.
The best shots come down to three things: timing, framing, and a little creative staging. You don’t need fancy equipment—just a phone, a sunny afternoon, and an eye for angles.
My favorite compositions play with height (short flowers in the foreground, sunflowers reaching skyward) and color contrasts (deep purple salvias beside golden blooms). Even a simple row of sunflowers looks dramatic when shot from low, looking up at their faces.
By the end, you’ll see your garden through a photographer’s lens—sunflowers as bold backdrops, their petals catching light like liquid gold. The results? Images that make your neighbors double-take and your Instagram feed pop with effortless beauty. Ready to turn your sunflowers into showstoppers?
This works for any garden size—containers on a patio, a full sunflower field, or even a single dramatic bloom in a vase. The techniques scale, and the inspiration is endless. Let’s get clicking!
📚 In This Guide
- What you need
- Instructions
- Tips and common mistakes
- Wrapping up and next steps
What you need
- ● Camera: DSLR, mirrorless, or high-end smartphone (with manual controls if possible).
- ● Lens: Wide-angle (16-35mm) or standard zoom (24-70mm) for versatility.
- ● Tripod: Sturdy, adjustable-height (minimum 50" tall) for stability.
- ● Remote shutter: Wireless or 10-second timer to avoid camera shake.
- ● Sunflowers: 5–10 mature plants (6+ feet tall) for depth and texture.
- ● Backdrop: Lush greenery (ivy, shrubs, or grass) or a neutral fabric (if indoors).
- ● Natural light: Golden-hour sunlight (early morning or late afternoon).
- ● Reflector: 20"x20" gold/silver panel to enhance lighting.
- ● Pruners: For trimming stray stems or leaves.
- ● Polarizing filter: To reduce glare and deepen colors.
- ● Props: Rustic wood, vintage frames, or colorful fabrics for thematic shots.
How to style sunflowers for stunning garden backdrop photos
Here’s how I turn sunflowers into a breathtaking photo backdrop—simple tricks that make any garden scene pop.
🌿 Step 1: Choose the Right Varieties and Heights
Tall sunflowers like ‘Mammoth’ or ‘Russian Giant’ create dramatic vertical lines, while shorter varieties like ‘Teddy Bear’ add texture and contrast. I plant 4-6 sunflowers in a staggered formation—tallest in the center, shorter ones flanking—to create depth in photos. This arrangement naturally draws the eye toward the focal point.
Space them 2-3 feet apart so stems don’t compete for light. If you’re working with limited space, mix 2-3 tall varieties with 1-2 shorter ones for a balanced look. Sunflowers grow fast, so plant seeds 6-8 weeks before your first frost to ensure they reach their full height by peak bloom season.
☀️ Step 2: Position for Optimal Lighting
Sunflowers thrive in full sun (6+ hours daily), but for photography, I place them where the morning or late afternoon light hits them directly. This soft, golden light enhances their natural colors without harsh shadows. Avoid placing them in deep shade—sunflowers will grow leggy and pale, ruining their photo appeal.
If your garden gets intense midday sun, position the taller sunflowers slightly behind shorter ones to create a layered effect. This way, the sunflowers cast gentle shadows on the backdrop, adding dimension to your photos. I also avoid placing them against walls or fences—leave 3-4 feet of open space behind them to prevent flat, uninteresting compositions.
🪴 Step 3: Add Complementary Backdrop Elements
Sunflowers alone can be striking, but adding textured foliage or contrasting colors elevates the scene. I often pair them with lavender, ornamental grasses, or deep green shrubs to create visual contrast. These plants soften the boldness of sunflowers while adding warmth and movement to the backdrop.
For a pop of color, I scatter marigolds or zinnias at the base of the sunflowers. Their bright blooms draw the eye upward, guiding viewers to the towering sunflowers. Avoid overcrowding—keep the backdrop open and airy, with enough negative space to let the sunflowers shine. A simple wooden fence, stone path, or rustic bench can also frame the scene beautifully.
✂️ Step 4: Maintain for Peak Bloom and Health
Deadhead spent blooms regularly to encourage continuous flowering and keep the garden looking fresh. I also remove any yellowing or damaged leaves to maintain a clean, vibrant appearance. Sunflowers are low-maintenance, but water deeply 1-2 times per week during dry spells to prevent wilting, which can make them look dull in photos.
Fertilize lightly with a balanced 10-10-10 formula when planting and again after 4-6 weeks to support strong stem growth. Avoid over-fertilizing—too much nitrogen leads to excessive foliage and fewer blooms. If stems lean or bend, gently stake them with bamboo canes to keep them upright and photogenic.
💧 Step 5: Time Your Shoot for Best Results
Sunflowers are at their most vibrant 2-3 hours after sunrise or before sunset when the light is soft and warm. I avoid midday shoots—harsh shadows and bright light can wash out their colors. On cloudy days, sunflowers still look stunning, but the diffused light creates a dreamy, ethereal effect perfect for moody photos.
Wait until at least 50% of the sunflowers are fully open before photographing. Closed buds can look awkward in compositions, while open blooms create a sense of abundance. If you’re shooting in a windy area, choose a calm day—sunflowers sway beautifully, but strong gusts can make them look messy in photos.
Tips & tricks for perfect sunflower backdrop photography
Transforming sunflowers into a showstopping photo backdrop takes more than just planting them—here's how to elevate your garden compositions with these pro techniques.
Variety Selection Matters: While the instructions focus on 'Mammoth' and 'Russian Giant' for height, consider adding a few 'Autumn Beauty' sunflowers for their striking bicolor blooms. These create visual interest when placed strategically among the taller varieties. I like to position them at the front of my arrangements—their unique petals add depth and prevent a monotonous look. The key is balancing height with color variation to create a dynamic focal point that draws the eye naturally.
Lighting Angle Secrets: The instructions mention morning and late afternoon light, but here's what nobody tells you—position your sunflowers so their faces catch the light directly, not their backs. This creates that signature glow that makes photos pop. I also recommend shooting during the "golden hour" (the hour after sunrise or before sunset) when the light is warmest. If you must shoot at midday, use a reflector to bounce light onto your sunflowers and minimize harsh shadows.
Composition Rule of Thirds: When framing your shot, imagine your viewfinder divided into nine equal parts by two horizontal and two vertical lines. Place your sunflowers where these lines intersect for maximum visual impact. I often position the tallest sunflower at one intersection while letting the shorter varieties spill across the other lines. This creates natural balance and prevents a static, centered composition that feels less dynamic.
Seasonal Timing Tip: The 6-8 week planting window mentioned is crucial, but here's an extra tip: if you're in a warmer climate, you can get two sunflower seasons by planting early varieties in spring and late varieties in summer. This gives you continuous photo opportunities throughout the growing season. Just make sure to deadhead regularly to encourage more blooms—sunflowers are prolific once they get going!
Pro Tips for Beautiful Sunflower Photos
- Transforming sunflowers into a showstopping photo backdrop takes more than just planting them—here's how to elevate your garden compositions with these pro techniques.
- Variety Selection Matters: While the instructions focus on 'Mammoth' and 'Russian Giant' for height, consider adding a few 'Autumn Beauty' sunflowers for their striking bicolor blooms.
- Lighting Angle Secrets: The instructions mention morning and late afternoon light, but here's what nobody tells you—position your sunflowers so their faces catch the light directly, not their backs.
Frequently asked questions
Got questions about capturing stunning sunflower photos? You’re in the right place! Here are answers to the most common queries—from timing tips to troubleshooting tricks—to help you nail the perfect shot every time.
When is the best time of day to photograph sunflowers?
The golden hours—just after sunrise or before sunset—are ideal for soft, warm lighting that enhances sunflower colors. Avoid midday when harsh shadows create unflattering contrasts. Overcast days can also work well for diffused light, but watch for flat shadows.
Do I need professional equipment to take beautiful sunflower photos?
Not at all! A smartphone with manual settings (adjusting exposure and focus) can yield gorgeous shots. For pros, a DSLR with a macro lens (100mm+) captures intricate details like petal textures. A tripod helps stabilize long exposures, especially in windy conditions.
How can I make my sunflower photos stand out in a crowded garden?
Focus on composition: Use the rule of thirds to place sunflowers off-center, or frame them with foliage for depth. Shoot from low angles to emphasize height, or include contrasting elements like wildflowers or rustic barns. Edit lightly—boost saturation and clarity without overdoing it!
What should I do if my sunflower photos look dull or washed out?
Check your white balance—sunflowers often appear dull under cool lighting. Adjust to "shade" or "cloudy" mode. In post-processing, increase vibrance (not saturation) to preserve natural tones. Underexpose slightly in-camera to retain detail when editing.
Can I photograph sunflowers in pots or containers instead of a garden?
Potted sunflowers add versatility—try macro shots of petals or flat lays with complementary objects (e.g., terracotta pots, vintage books). For depth, place containers at varying heights. Just ensure good lighting and minimal clutter in the background.
Pro Tip: Shoot in RAW for more editing flexibility, especially when balancing sunflower colors against green foliage or blue skies!
Wrapping up and next steps
Capturing beautiful sunflower photos is all about embracing nature’s bold beauty and a little creative patience! Whether you’re framing a single bloom or a golden field, these tips will help you craft images that pop—literally. 🌻✨
Now that you’re armed with the right tools and techniques, grab your camera and step outside. Try experimenting with different angles, lighting, and editing styles to make each shot uniquely yours. The perfect sunflower photo is just one click away—go make it happen!