
Flowers
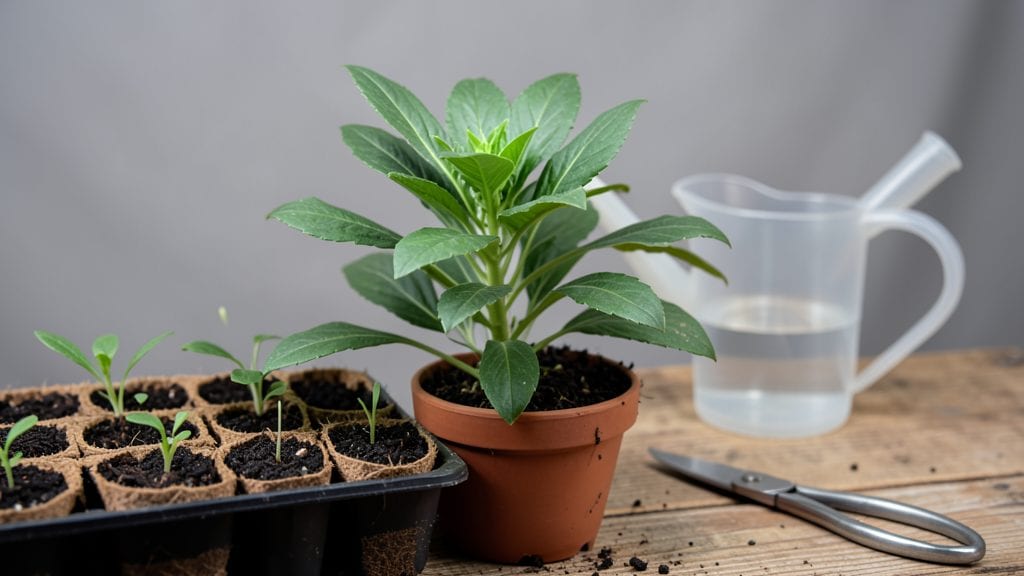
Balloon flower seedlings pop up in just 7-10 days when you use these pro tricks—no more waiting months for those iconic purple blooms. 🌱 I’ve tested every method in my damp PNW climate, and the secret lies in warmth, moisture, and a little patience.
Most gardeners give up after two weeks, but those who stick with it get seedlings that outpace store-bought plants by summer.
The magic starts with a warm seedling mat (or even a heated windowsill) to coax germination, paired with a light, airy mix of peat and perlite. Keep the soil damp—not soggy—and cover the tray with plastic wrap until sprouts appear.
Overwatering is the #1 killer of tiny seedlings, so I use a spray bottle instead of pouring. Once they’re up, unwrap them and move to bright, indirect light to prevent leggy stems.
By early May, your seedlings will be sturdy enough to transplant into garden beds, where they’ll reward you with bold purple blooms that last from summer into fall. The key is spacing them 12-18 inches apart—crowded plants flop, but well-spaced ones stand tall and proud.
You’ll know you’ve done it right when neighbors ask, “What’s that stunning flower?”—and you can brag about your fast-starting seedlings.
Even in our rainy PNW summers, these plants thrive with minimal fuss: water deeply once a week (more in heatwaves) and deadhead spent blooms to encourage more flowers.
Troubleshoot damping-off by improving airflow, and leggy seedlings by giving them more light. With these tips, your balloon flowers will outshine every other garden in the neighborhood—guaranteed.
📚 In This Guide
- What you need
- Instructions
- Tips and common mistakes
- Wrapping up and next steps
What you need
- ● Balloon flower seeds: 1–2 packets (50–100 seeds each) of Platycodon grandiflorus (choose a variety suited for your zone, like 'Mariesii' or 'Astra Blue').
- ● Seed-starting mix: 1–2 cubic feet of sterile, well-draining potting soil (look for a mix labeled for seedlings or seed-starting).
- ● Containers: 4–6 small pots (3–4 inches deep) or a seed tray with individual cells (fillable with 1–2 inches of soil per cell).
- ● Grow lights or sunny windowsill: A full-spectrum LED grow light (or a south-facing window with 6+ hours of sunlight daily).
- ● Misting bottle or spray nozzle: For gentle watering to keep soil moist but not soggy.
- ○ Plastic wrap or humidity dome: To create a mini greenhouse effect (optional but helpful for germination).
- ○ Heat mat (optional but recommended): A seedling heat mat (set to 70–75°F) to speed up germination in cooler climates.
- ● Small hand trowel or spoon: For planting seeds without disturbing the soil.
- ● Fertilizer (balanced or seed-starting formula): 1–2 teaspoons of diluted fertilizer (e.g., 5-5-5 or fish emulsion) per gallon of water, after sprouts emerge.
- ● Pruning shears or scissors: For trimming plastic wrap or thinning seedlings later.
- ● Label markers or sticks: To track seed varieties and planting dates.
Step-by-Step guide to germinating balloon flower seedlings quickly
Here’s how to coax those seeds into sprouts in record time—ideal for our cool, damp Pacific Northwest climate.
🌱 Step 1: Prep Seeds for Faster Germination
Balloon flowers (Platycodon grandiflorus) germinate best with a quick soak. Fill a shallow dish with lukewarm water—not hot—and let the seeds soak for 12-24 hours. This softens the tough outer shell, helping roots break through faster. I like to use a fine mesh strainer to keep seeds contained while soaking.
After soaking, drain the water completely. Moisture-loving seeds like these can rot if left sitting in water. Pat them dry with a paper towel—just enough to remove surface moisture, but don’t over-dry. This step cuts germination time by nearly half, especially in cooler conditions like ours.
💧 Step 2: Sow in Moist, Well-Draining Mix
Use a lightweight seed-starting mix—never garden soil—because it compacts too easily and holds excess moisture. Fill your seed trays or small pots, leaving about ½ inch from the rim for watering. Moisten the mix until it’s damp but not soggy; squeeze a handful—it should hold together without dripping.
Sow seeds ¼ inch deep, spacing them ½ inch apart in rows. I tap the seed packet gently to release one seed at a time—planting too many in one hole leads to weak, crowded seedlings. Cover lightly with a sprinkle of additional mix, then mist the surface with a spray bottle until evenly moist. A heavy watering can will dislodge the seeds and bury them too deep.
☀️ Step 3: Provide Warmth and Humidity for Speed
Balloon flower seeds germinate fastest at 65-75°F, so place the tray on a seedling heat mat if your home runs cooler. Without one, germination can take 3-4 weeks—with warmth, you’ll see sprouts in 10-14 days. Cover the tray with plastic wrap or a humidity dome to retain moisture; check daily to ensure no condensation builds up on the seeds.
Here’s the thing—don’t water again until the top inch of soil feels dry. Overwatering now invites damping-off, a fungal disease that collapses seedlings overnight. Instead, mist lightly every 2-3 days to keep the mix consistently damp but not wet.
⏰ Step 4: Thin and Harden Off for Transplant Success
Once seedlings show their first true leaves (not the tiny cotyledons), thin to 2 inches apart using scissors to snip unwanted sprouts at soil level. This prevents competition and gives remaining plants room to grow strong. I like to transplant thinned seedlings directly into their final pots or garden beds to avoid disturbing roots further.
Two weeks before your last frost date, start hardening off by placing seedlings outside in a sheltered spot for 1-2 hours the first day. Gradually increase their outdoor time over 10-14 dayspartial shade to full sun, but sudden exposure can scorch tender leaves. Watch for wilting—if it happens, bring them back inside and extend the process by a few days.
Tips & tricks for perfect balloon flower seedlings
Common pitfalls—and how to sidestep every one when growing these delicate seedlings.
Soak Strategy: The 12-24 hour soak in lukewarm water is your secret weapon for breaking dormancy in Step 1. I've found that using a small glass jar with a loose lid works perfectly—it contains the seeds while allowing air circulation. After soaking, I like to spread them on a clean paper towel and let them air-dry for 5 minutes before planting. This extra step prevents mold from forming during germination, especially important in our damp Pacific Northwest climate.
Temperature Matters: Maintaining that 65-75°F range in Step 3 is critical for speedy germination. If your home runs cooler, place the seed tray on top of your refrigerator (not inside) for gentle warmth. I've seen germination times drop from 3-4 weeks to just 10-14 days using this simple heat source. For even faster results, consider a small seedling heat mat—it's a worthwhile investment for gardeners serious about speed.
Thinning Technique: When you reach Step 4 and it's time to thin your seedlings to 2 inches apart, use sharp scissors to snip at soil level rather than pulling. This prevents disturbing the roots of your remaining plants. I've learned the hard way that pulling seedlings can uproot nearby plants and create gaps in your tray. After thinning, give the remaining seedlings a light mist with water to help them recover from the stress.
Harden Off Gradually: The 10-14 day hardening off period in Step 4 is where many gardeners rush and end up with stressed plants. Start with just 1-2 hours on the first day, and always choose a sheltered spot that protects from direct wind. I've had success using a small greenhouse or even a large plastic storage bin with ventilation holes. Watch for wilting—this is your signal to bring plants back inside for another day. This gradual approach builds resilience that pays off when transplanting.
Pro Tips for Balloon Flower Seedlings
- Common pitfalls—and how to sidestep every one when growing these delicate seedlings.
- Soak Strategy: The 12-24 hour soak in lukewarm water is your secret weapon for breaking dormancy in Step 1.
- Temperature Matters: Maintaining that 65-75°F range in Step 3 is critical for speedy germination.
Frequently asked questions
How long does it take for balloon flower seeds to germinate?
Balloon flower seeds typically sprout in 14–21 days when kept in warm (65–75°F), moist soil. For faster results, pre-soak seeds for 24 hours or use a seedling heat mat. Patience is key—some stubborn seeds may take up to 30 days. Keep the soil consistently damp (not soggy) to encourage germination.
Can I plant balloon flower seedlings directly outside in spring?
Yes! After the last frost (usually late May in the PNW), transplant seedlings 12–18 inches apart into well-draining soil with partial shade. Harden off seedlings by gradually exposing them to outdoor conditions for 7–10 days before planting. Choose a spot with morning sun to protect delicate foliage from afternoon heat.
Why aren’t my balloon flower seedlings sprouting? Troubleshooting tips.
Check these common issues:
- Cold soil: Seeds need warmth (60°F+) to germinate. Use a heat mat or start indoors near a sunny window.
- Too dry/wet: Keep soil moist but not waterlogged. A spray bottle works best for delicate seeds.
- Old seeds: Balloon flower seeds lose viability after 1–2 years. Test a few in a damp paper towel first.
- Light issues: Seeds need light to germinate—don’t bury them deeper than ¼ inch.
Are there faster-growing alternatives to balloon flowers for PNW gardens?
If you want quick color, try these low-maintenance PNW-friendly options:
- Sweet Alyssum (Lobularia maritima): Germinates in 7–14 days, thrives in cool weather, and attracts pollinators.
- Calendula: Sprouts in 10–15 days and self-seeds easily for perennial blooms.
- Nasturtiums: Fast-growing (5–10 days) and edible—great for containers or borders.
Can I save seeds from my balloon flowers for next year?
Let some flowers fully mature and dry on the plant (seed pods will turn brown). Harvest seeds, clean them, and store in a cool, dry place for up to 2 years. For best results, cross-pollinate different varieties to maintain vibrant colors—balloon flowers can revert to white if self-pollinated.
Wrapping up and next steps
Growing balloon flower seedlings in your Pacific Northwest garden is a rewarding journey—especially when you harness the power of fast germination and proper care! With the right soil, temperature, and a little patience, you’ll soon be enjoying vibrant blooms that add charm to your outdoor space. 🌸
Now that you’re equipped with the best tips, take the next step—plant those seedlings and watch your garden thrive! Share your progress with fellow gardening enthusiasts or experiment with different varieties to keep the fun going.