
Planting
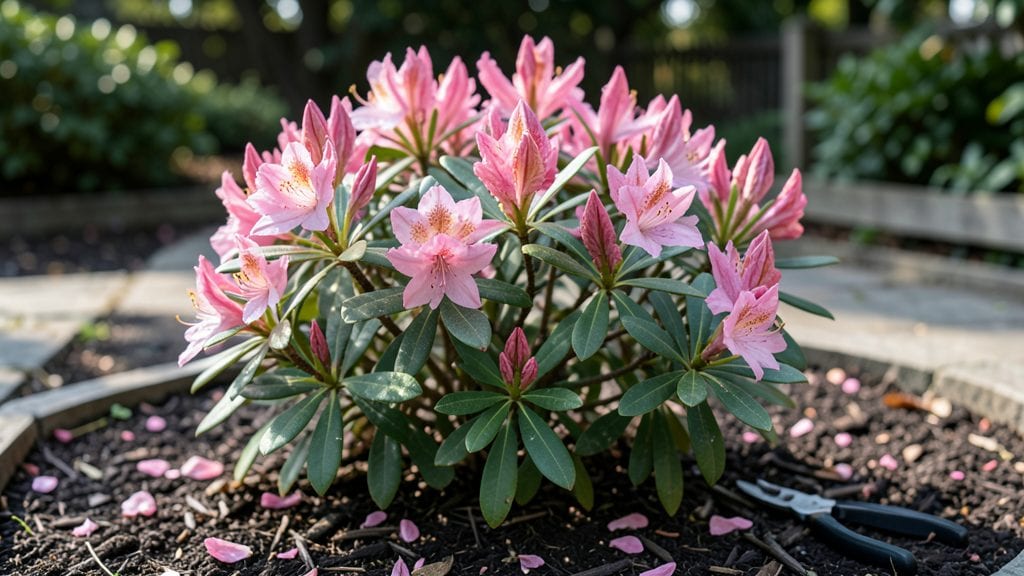
This azalea flowering plant thrives in the Pacific Northwest’s damp winters, bursting into vibrant bloom just when other garden stars falter—proof these evergreens are made for our climate’s toughest challenges. 🌸 The secret lies in mimicking their natural habitat: acidic soil, partial shade, and consistent moisture without waterlogging.
Azaleas need well-draining, acidic soil (pH 4.5–6.0) mixed with organic matter like peat moss or compost. They prefer morning sun and afternoon shade, especially in hotter inland areas.
Water deeply once or twice a week—more in summer, less in winter—but avoid soggy roots. Mulch helps retain moisture and protect roots from freeze-thaw cycles.
Prune right after flowering to shape the plant and remove dead wood. Skip heavy pruning in fall, as it can stress the plant before winter. With the right care, your azaleas will reward you with vibrant blooms for decades, becoming a year-round focal point in your garden.
Let’s get yours thriving!
Bonus: Evergreen azaleas also make stunning container plants for patios or balconies. Just ensure the pot has drainage and use a balanced, acidic fertilizer in early spring. Winter protection like burlap wraps can extend their lifespan even further in colder zones.
📚 In This Guide
- What you need
- Instructions
- Tips and common mistakes
- Wrapping up and next steps
What you need
- ● Azalea plants: 1–5 plants (depending on desired coverage; evergreen azaleas like Rhododendron varieties work best for PNW climates).
- ● Size: 1-gallon containers or bare-root (for spring planting).
- ● Soil: 1–2 cubic yards of acidic, well-draining soil mix (pH 4.5–6.0).
- ○ Optional: Pre-mixed azalea/rhododendron soil (e.g., FoxFarm Ocean Forest or Miracle-Gro Azalea Mix).
- ● Organic mulch: 2–3 inches of pine bark fines or cedar chips (avoid wood chips; they raise pH over time).
- ● Gardening tools: Trowel or hand shovel
- ● Garden fork (for amending heavy clay soil)
- ● Pruners (sterilized with rubbing alcohol)
- ● Measuring tools: pH test kit (e.g., Luster Leaf Rapid Test)
- ● Measuring tape (for spacing plants 3–5 feet apart)
- ○ Optional but helpful: Wheelbarrow (for mixing soil amendments)
- ● Knee pads or garden stool (for comfort)
- ● Watering can or hose with a rain shower nozzle
- ● Location: Partially shaded spot (3–6 hours of morning sun; avoid hot afternoon sun).
- ● Climate readiness: Plant in early spring (March–April) or fall (September–October) to avoid frost.
- ● Soil prep: Amend native soil with peat moss or sulfur if pH is too alkaline (common in PNW).
Step-by-step guide to establishing cold-hardy azaleas in the Pacific Northwest
Here's the method that ensures vibrant blooms year after year in our damp, cool climate.
🌱 Step 1: Select and Prepare the Planting Site
Choose a location with morning sun and afternoon shade—azaleas thrive in dappled light conditions that prevent leaf scorch. The Pacific Northwest's acid rain naturally keeps soil pH favorable, but test your site first to confirm it's between 4.5 and 6.0. If your soil tests higher, amend with 2-3 inches of peat moss or sulfur mixed into the top 12 inches of soil.
Dig a hole twice as wide as the root ball but only as deep as the container's base. This prevents burying the plant too deeply, which can suffocate roots. Loosen the sides of the hole with a fork to help roots spread into surrounding soil. I always tap the hole gently after digging to settle the soil without compacting it—this creates a stable base for the plant.
☀️ Step 2: Plant and Mulch for Moisture Retention
Remove the azalea from its container and gently tease apart any circling roots with your fingers. Place the plant in the hole so the top of the root ball sits 1 inch above ground level—this prevents water from pooling around the stem. Backfill with the native soil you removed, pressing lightly to eliminate air pockets but not compacting tightly.
Water deeply immediately after planting to settle the soil around roots. Then apply 3-4 inches of organic mulch (like pine bark or cedar chips) over the root zone, keeping it 2 inches away from the stem. This mimics the forest floor conditions azaleas prefer and helps retain moisture during our rainy winters. Mulch also insulates roots from temperature swings, which is crucial for cold-hardy varieties.
💧 Step 3: Establish a Consistent Watering Routine
Water newly planted azaleas twice weekly for the first month to encourage root establishment. You'll know you're watering correctly when the soil feels moist 2 inches below the surface—stick your finger in to check. During our dry summer months, increase to three times weekly, but never let the plant sit in soggy soil. Azaleas are drought-tolerant once established, but young plants need consistent moisture.
I always water in the early morning to reduce evaporation and fungal risks. Avoid overhead sprinkling once blooms appear—water droplets can cause brown spots on petals. Instead, use a soaker hose or drip irrigation system placed at the base of the plant. This targeted approach keeps foliage dry while delivering water exactly where roots need it.
✂️ Step 4: Prune for Shape and Encourage Future Blooms
Prune azaleas immediately after flowering (late spring to early summer) to shape the plant and remove any dead or crossing branches. Use clean, sharp pruners to make cuts just above a leaf bud or lateral branch. Never prune more than one-third of the plant's height in a single season—this prevents stress and maintains the bushy growth habit azaleas are known for.
Here's the thing—azaleas bloom on old wood, so avoid heavy pruning in fall or winter. Instead, focus on removing any suckers or water sprouts that appear at the base of the plant. These compete with the main structure for nutrients and weaken the plant's ability to produce vibrant blooms next season. After pruning, apply a balanced, slow-release fertilizer (10-10-10) to support new growth.
Tips & tricks for perfect azalea planting in the Pacific Northwest
These tried-and-true strategies will help you establish azaleas that thrive in our unique climate.
Soil Preparation: The Pacific Northwest's naturally acidic soil is perfect for azaleas, but if your soil tests above pH 6.0, don't just add peat moss—mix that 2-3 inches with sulfur into the top 12 inches of soil. I've seen gardeners skip this step and end up with stunted growth. The sulfur helps lower pH gradually, giving roots time to adjust. Test your soil again after a month to confirm the pH is within the ideal 4.5-6.0 range.
Planting Depth: When placing your azalea in the hole, use a small stake to mark the original soil line on the root ball. This ensures you position it with the top 1 inch above ground level—any deeper and you risk suffocating the stem. I learned this the hard way after seeing several plants develop stem rot from being planted too deeply. The 1-inch elevation also prevents water from pooling around the stem during our frequent rains.
Mulching Technique: That 3-4 inches of organic mulch isn't just for looks—it's a critical insulator. Use pine bark or cedar chips specifically, as these break down slowly and maintain moisture while preventing soil compaction. Keep the mulch 2 inches away from the stem to avoid creating a moist environment that encourages fungal growth. I've noticed azaleas with mulch piled against stems develop more leaf spot diseases in our damp climate.
Watering Wisdom: The twice-weekly watering schedule is perfect for our rainy winters, but during summer droughts, increase to three times weekly while checking soil moisture at 2 inches deep. I've found that morning watering is non-negotiable—it reduces evaporation and gives foliage time to dry before evening humidity sets in. For established plants, consider installing a soaker hose on a timer to automate this process while keeping petals dry.
Pro Tips for Azalea Flowering Plant
- These tried-and-true strategies will help you establish azaleas that thrive in our unique climate.
- Soil Preparation: The Pacific Northwest's naturally acidic soil is perfect for azaleas, but if your soil tests above pH 6.0, don't just add peat moss—mix that 2-3 inches with sulfur into the top 12 inches of soil.
- Planting Depth: When placing your azalea in the hole, use a small stake to mark the original soil line on the root ball.
Frequently asked questions
about azaleas in the Pacific Northwest—because even the toughest gardeners need a little clarity!When is the best time to plant azaleas in the PNW?
Plant azaleas in early spring or fall (September–October) to avoid extreme heat or frost. This gives roots time to establish before winter. Spring planting (March–April) works too, but keep soil moist until roots settle in. Pro tip: Avoid planting in summer—heat stress can stunt growth!
Are azaleas truly cold-hardy in the Pacific Northwest?
Yes! Most PNW azaleas (like Rhododendron species) thrive in USDA Zones 6–8 and tolerate temps down to 10°F (-12°C). Just protect young plants with mulch and avoid late-season fertilizing, which can make them vulnerable to frost. Bonus: Native varieties (e.g., Rhododendron macrophyllum) are extra resilient!
Why aren’t my azaleas blooming—what am I doing wrong?
Common culprits:
- Over-fertilizing (too much nitrogen = fewer flowers, more foliage).
- Poor drainage (azaleas hate soggy roots—amend soil with peat or pine bark).
- Wrong sunlight (they need partial shade, not full sun).
- Pruning at the wrong time (never trim after blooms appear—wait until after flowering).
Can I grow azaleas in containers? What’s the best setup?
Use a large container (15+ gallons) with well-draining, acidic soil mix (50% peat/pine bark, 50% potting soil). Add perlite or sand for aeration. Key tips:
- Water daily in summer (containers dry out fast!).
- Move pots to partial shade in hot afternoons.
- Fertilize monthly with acid fertilizer (April–September).
Are azaleas prone to pests or diseases in the PNW?
Yes, but most are preventable! Watch for:
- Lace bugs (silver spots on leaves? Spray with neem oil).
- Root rot (from overwatering—ensure good drainage).
- Powdery mildew (space plants for airflow; fungicide if needed).
Wrapping up and next steps
Azaleas bring vibrant color and resilience to the Pacific Northwest’s gardens, thriving in cooler climates while demanding minimal fuss. Whether you’re a seasoned gardener or just starting, these cold-hardy beauties offer year-round interest—from stunning blooms to glossy foliage.
The key? Patience and proper care—pick the right variety, prep the soil, and watch your garden transform into a lush, fragrant paradise.
Ready to start your azalea journey? 🌸 Grab some cuttings or a young plant, follow the steps above, and soon, you’ll be the envy of the neighborhood with your showstopping blooms. Happy planting!