Flowers
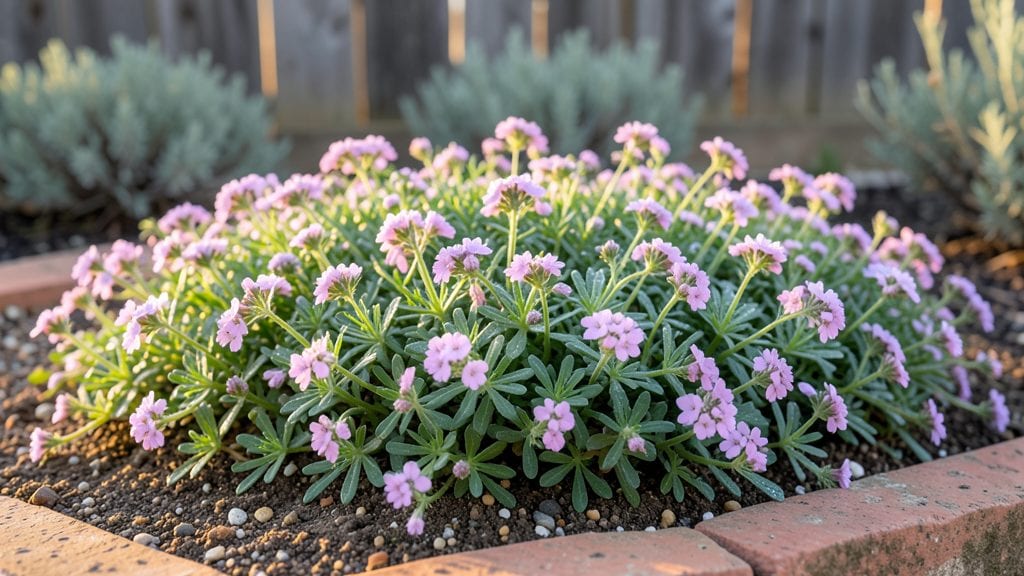
Alyssum flower leaves turning yellow or brown isn’t just a problem—it’s a signal your plants are crying out for help. 🌿 I’ve seen everything from powdery mildew to aphid infestations ruin what should be lush, peppery greens, but there’s always a fix.
The key is spotting the issue early: check for sticky residue (aphids), white powder (fungus), or crispy edges (underwatering).
Most problems boil down to three fixes: better airflow (space plants 6–8 inches apart), targeted treatments (neem oil for pests, baking soda spray for fungus), or soil checks (too much nitrogen causes weak leaves).
My alyssum thrives after I adjust watering—just keep soil lightly moist, never soggy. A quick inspection every few days keeps issues from spiraling.
📚 In This Guide
- What you need
- Instructions
- Tips and common mistakes
- Wrapping up and next steps
What you need
- ● Seeds or seedlings: Alyssum seeds (e.g., Lobularia maritima or Alyssum montanum) or young plants from a nursery. Quantity: 10–20 seeds or 3–5 seedlings for a small harvest.
- ● Well-draining potting mix: Light, sandy, or loamy soil with a pH of 6.0–7.5. Quantity: 1–2 gallons per plant.
- ● Containers or garden bed: Containers: 6–8 inch pots with drainage holes (for indoor/balcony growing). Quantity: 1 pot per plant.
- ● Garden bed: Full sun to partial shade (4–6 hours of sunlight daily). Space plants 6–12 inches apart.
- ● Watering can or spray bottle: For gentle hydration (avoid overwatering!).
- ○ Fertilizer (optional but helpful): Balanced liquid fertilizer (e.g., 10-10-10) or compost tea. Apply: Every 4–6 weeks.
- ● Pruning shears or sharp scissors: For harvesting leaves and stems cleanly.
- ○ Gloves (optional): To protect hands from soil or prickly stems.
- ● Sunlight access: A sunny windowsill, balcony, or garden plot.
- ● Patience (but who’s counting?): Alyssum grows best in cool weather (spring/fall) and may take 4–6 weeks to mature.
- ● Companion plants: Pair with radishes, lettuce, or herbs like thyme to deter pests.
- ● Slow-release fertilizer pellets: Mix into soil for steady nutrient supply.
- ● Grow lights: If indoor growing lacks natural sunlight (LED or fluorescent bulbs work well).
- ● Food-safe spray bottle: For rinsing leaves before culinary use.
Step-by-step guide to growing and harvesting alyssum for edible greens
This fragrant, peppery annual isn't just for borders—its tender leaves pack a bold flavor perfect for salads and garnishes.
🌱 Step 1: Choose the Right Variety and Planting Conditions
Alyssum thrives in cool to moderate climates, making it ideal for early spring or fall harvests. Select sweet alyssum (Lobularia maritima)—the common edible variety—over its ornamental cousins, which often contain bitter compounds. Plant in well-draining soil with a pH between 6.0 and 7.0, as alkaline conditions dull its peppery kick.
Sow seeds ¼ inch deep in rows spaced 12 inches apart after the last frost date when soil reaches 50°F. Alyssum germinates best in 60-70°F soil, so avoid planting in hot summer months unless you're in a high-altitude region. Thin seedlings to 6 inches apart once they develop their first true leaves—crowding reduces airflow and invites fungal diseases.
☀️ Step 2: Provide Optimal Light and Watering
Alyssum flourishes in full sun to partial shade, but its leaves retain the most robust flavor when grown in 4-6 hours of morning sun followed by afternoon shade. In hot climates, afternoon shade prevents bolting (premature flowering), which makes leaves bitter. Watch for yellowing between veins—a sign of too much direct sun.
Water consistently to keep the soil evenly moist but not soggy. Alyssum has shallow roots, so 1 inch of water per week is ideal. Let the top ½ inch of soil dry between waterings to prevent root rot. Mulch with 1 inch of straw to retain moisture and suppress weeds, but keep mulch 2 inches away from stems to avoid fungal issues.
✂️ Step 3: Harvest Leaves at Peak Flavor
Harvest leaves when plants are 4-6 inches tall and before they flower—this ensures the strongest peppery flavor. Use clean, sharp scissors to snip individual leaves or small clusters from the outer edges, leaving the center growth intact. Avoid cutting more than ⅓ of the plant at once, as heavy harvesting stresses the plant and reduces future yields.
For continuous harvests, pinch back flowering stems immediately—they sap energy from leaf production. Alyssum regrows quickly after harvesting, so you can expect 2-3 harvests per season if managed properly. Store harvested leaves in the fridge for up to 5 days or dry them for later use by spreading them on a screen in a dark, well-ventilated area.
🌿 Step 4: Extend the Season with Succession Planting
To enjoy fresh alyssum greens all season, plant new seeds every 3-4 weeks starting in early spring. Alyssum self-seeds readily, so allow some plants to bolt and drop seed naturally for next year’s crop. In cooler climates, a fall planting can produce tender leaves well into winter if protected by a lightweight row cover during hard freezes.
Here’s the thing—alyssum’s peppery flavor mellows as temperatures rise. For summer harvests, grow it in partial shade and harvest early in the morning when flavors are most intense. If your plants start flowering prematurely, trim the buds immediately to redirect energy back into leaf production. With proper care, you’ll have enough leaves for 4 servings per planting, perfect for garnishing dishes or blending into peppery pesto.
Tips & tricks for perfect alyssum flower leaves
Here’s what nobody tells you about growing these peppery greens—details that make all the difference between good and exceptional harvests.
Soil pH Precision: Test your soil before planting—alyssum’s peppery punch fades dramatically in alkaline conditions. Aim for that 6.0-7.0 pH range by amending with sulfur if needed. I’ve seen firsthand how soil outside this range turns those vibrant leaves into bland, watery disappointment.
Morning Sun Strategy: Those critical 4-6 hours of morning sun are non-negotiable for peak flavor. Position your plants to catch the cool morning rays first, then shift them to afternoon shade as temperatures rise. I’ve found that even 30 minutes of midday sun in summer can trigger bolting—watch for that yellowing between veins as your early warning system.
Harvesting Technique: When snipping those 4-6 inch plants, always cut just above a leaf node—this encourages bushier growth. I learned this the hard way after harvesting too aggressively and watching my plants become leggy. Remember: you’re aiming for 2-3 harvests per season, so be gentle with each cutting.
Season Extension Hack: For winter harvests in cooler climates, use a lightweight row cover during hard freezes—it protects without smothering. I’ve grown alyssum through 20°F nights this way, and the leaves stay tender. Just remember to remove the cover during the day for any sun exposure.
Pro Tips for Alyssum Flower Leaves
- Here’s what nobody tells you about growing these peppery greens—details that make all the difference between good and exceptional harvests.
- Soil pH Precision: Test your soil before planting—alyssum’s peppery punch fades dramatically in alkaline conditions.
- Morning Sun Strategy: Those critical 4-6 hours of morning sun are non-negotiable for peak flavor.
Frequently asked questions
Can you eat alyssum leaves raw, or do they need cooking?
Alyssum leaves are 100% edible raw and pack a mild, peppery kick—perfect for salads, garnishes, or sandwiches! Cooking them (like sautéing) mellows the flavor, but raw is where their crisp texture shines. Pro tip: Try them in pesto or blended into dressings for a unique twist!
When is the best time to harvest alyssum leaves for peak flavor?
Harvest leaves in the morning after dew dries (around 8–10 AM) for the freshest taste. Aim for young, tender growth—older leaves can taste bitter. Pinch off stems just above a leaf pair to encourage bushier regrowth. Spring and fall yields the sweetest harvest!
What do I do if my alyssum leaves turn yellow or wilt?
Yellowing leaves often signal overwatering or poor drainage. Let soil dry slightly between waterings, and ensure pots/containers have drainage holes. Wilting? Check for pests (like aphids) or heat stress—move plants to partial shade if temps exceed 85°F. Fix fast: Trim affected leaves and adjust care!
Are there non-edible alyssum varieties I should avoid?
Most Lobularia maritima (sweet alyssum) and Alyssum montanum (golden alyssum) are safe, but always confirm the species. Avoid Alyssum saxatile (golden alyssum)—its leaves can be toxic to pets. Stick to culinary varieties like ‘Taste of Honey’ or ‘Sweet Alyssum’ for worry-free snacking!
Can I grow alyssum indoors, or is it strictly an outdoor plant?
Alyssum thrives indoors with 6+ hours of sunlight daily (a sunny windowsill or grow light works). Use well-draining pots and fertilize lightly every 4–6 weeks. Just avoid overcrowding—prune regularly to keep plants compact. Bonus: It repels pests naturally!
Wrapping up and next steps
From their peppery punch to their versatile uses—alyssum flower leaves are a hidden gem for adventurous eaters! Whether you’re foraging, gardening, or just curious about edible blooms, these tiny greens add a bold, spicy kick to dishes without the fuss. 🌿✨
Ready to dive in? Start by growing your own patch or foraging responsibly in your area—just double-check identification first! With a little experimentation, you’ll unlock a world of flavor and creativity right in your kitchen.